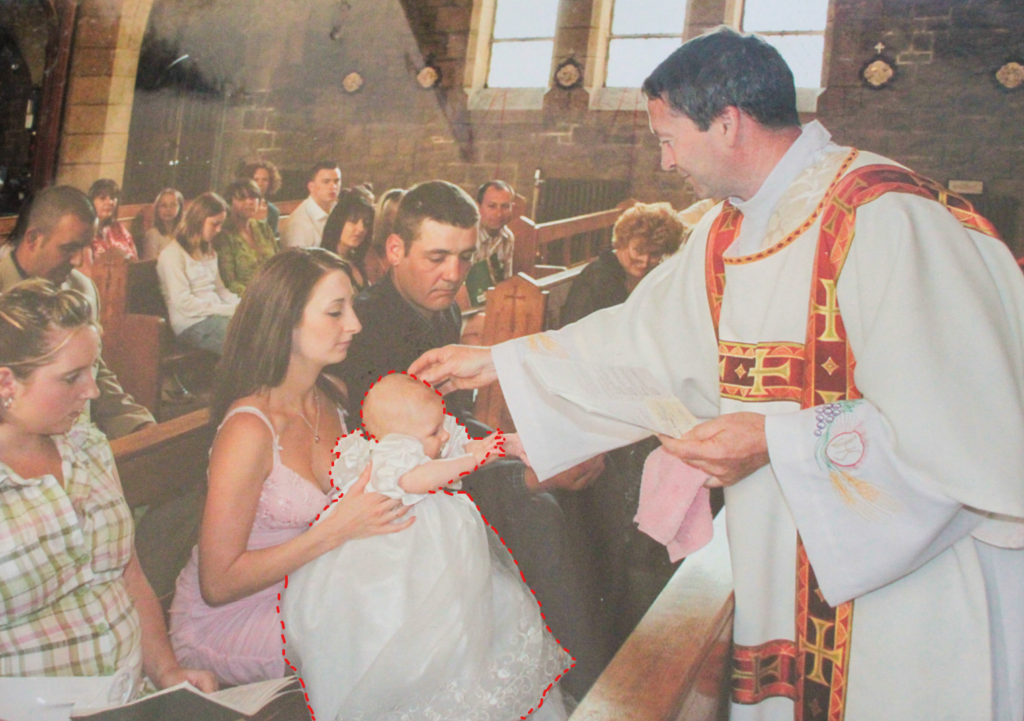
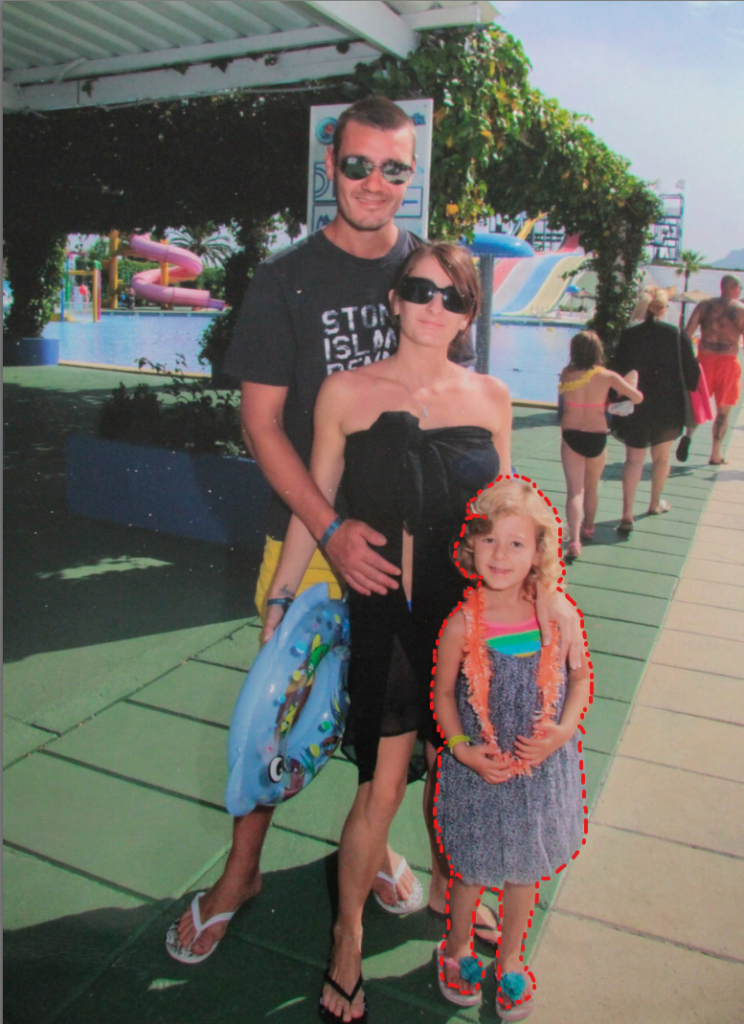
To experiment with stitching I am going to be using archive images and stitching them with red string/ thread. I have chosen this colour for the stitching, because it represents love and the blood that unifies us all together. I am going to be stitching myself when I was a baby, so that I could present that I am the result of my mum and dad’s union together and how I am surrounded by their love and share their blood. I will also be stitching photographs that I have taken of my mum, dad and sister together, so that I am able to stitch around my sister in the same coloured thread to present the same thing.
Photos Used?
Archive Images:
Photoshop
First, I screen shot the image I wanted to use.
Then, I used the red ballpoint pen to draw the stitches.
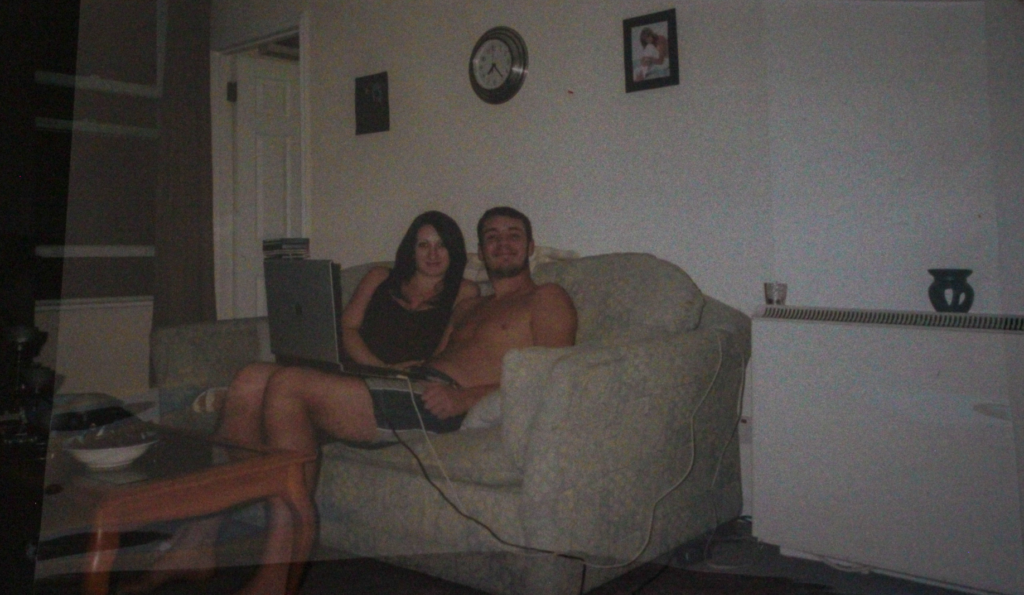
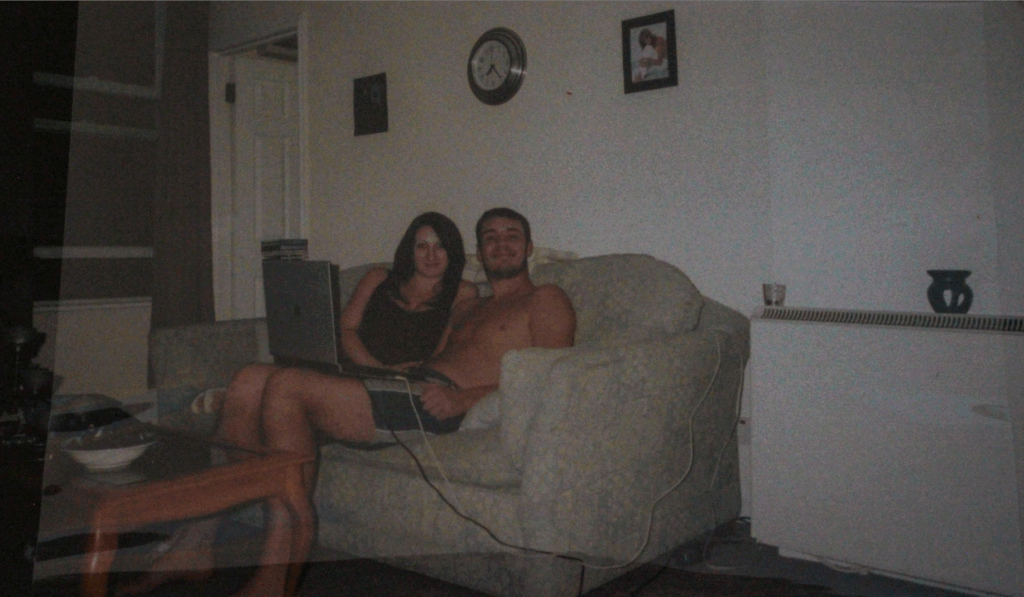
For this photoshoot I want to recreate the archive image below:
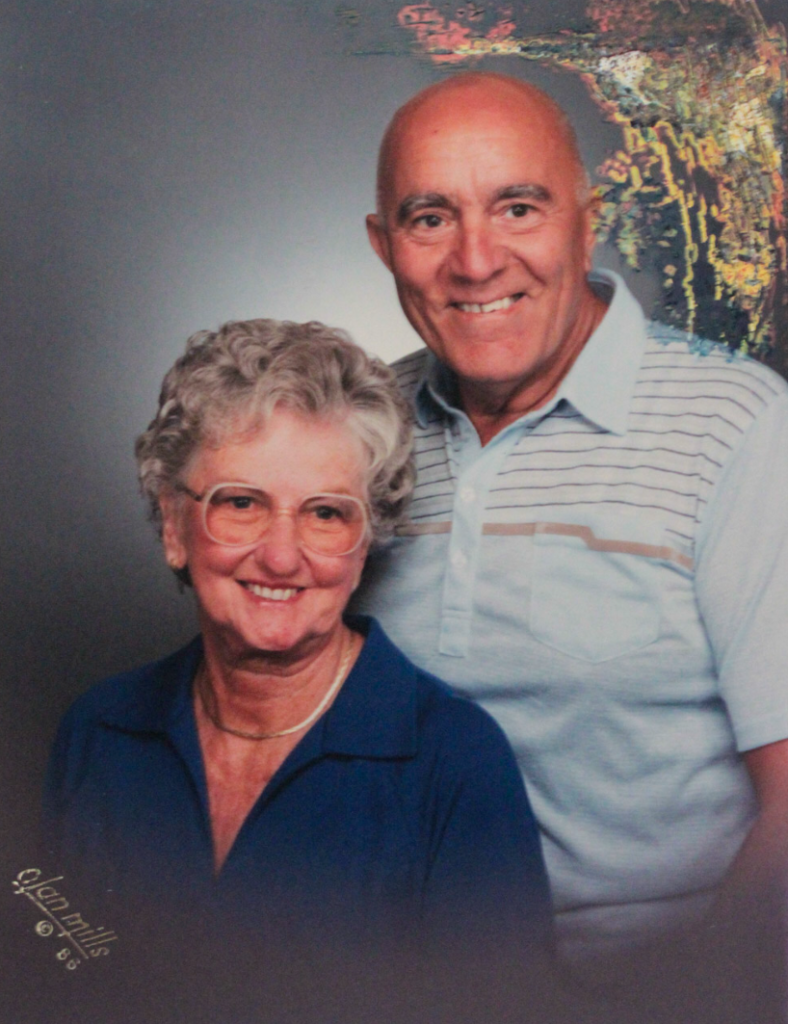
This archive is an image of my mum and dad in 2006.
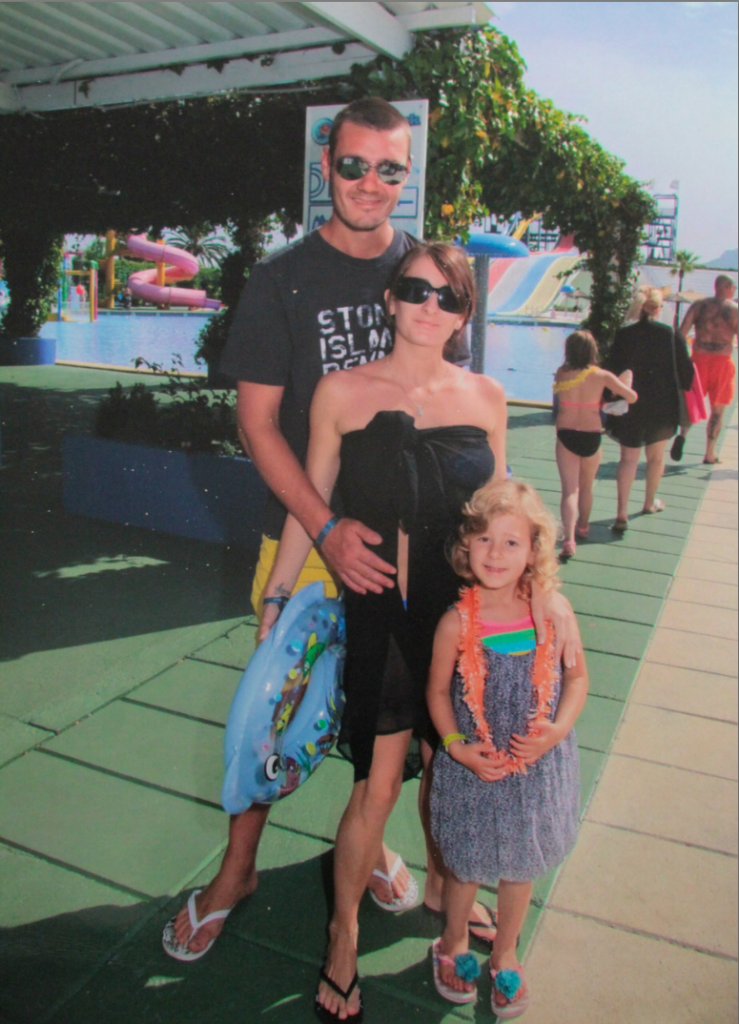
I would also like to take photographs not inspired by an archive of my mum, dad and sister all sat together.
Aim
My aim for this photoshoot is to create joiners, which are inspired by my artist research on David Hockney. In order to do this, I am going to need to recreate this image multiple times from different angles/ perspectives. In order to achieve this, I am going to take this image every day for a week from a slightly different angle each day. After doing that I will either have to print of all these images and piece them together to create a unique image, or use photoshop to do so.
Examples of a Joiner:
This experimentation also links well with the Art Movement I researched, which is cubism.
Why?
I want to experiment with joiners, because it is a type of cubism and I think multiple different images being unified into one image symbolises how there are multiple different members of a family, but they are all unified together through love, blood, DNA, heritage etc. I also think the process of taking the images at different times and then having to print them off and arrange them together, or using photoshop to do so takes a lot of time, which symbolises how a family is unified until the end of time and how even though time passes the family union never breaks, it just grows.
I also want to recreate the archive above for this, so that I can create a joiner that includes my own photographs as well as an archive.
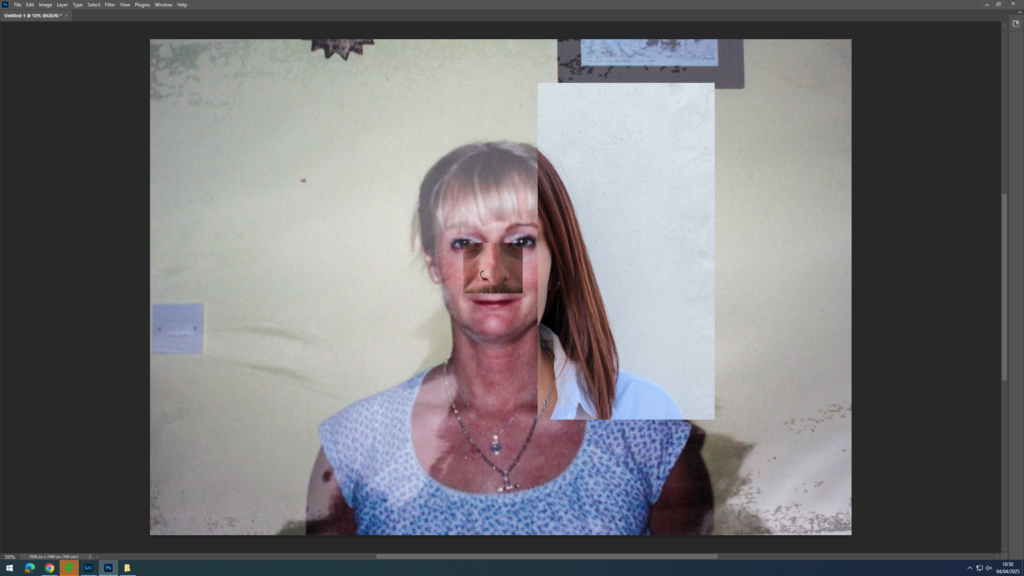
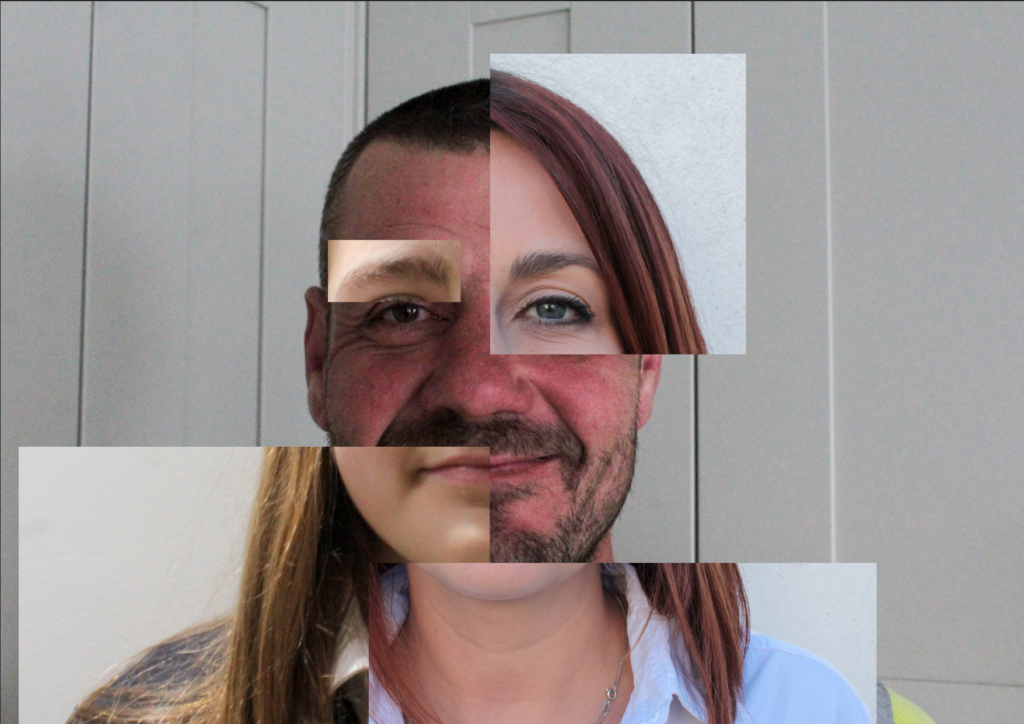
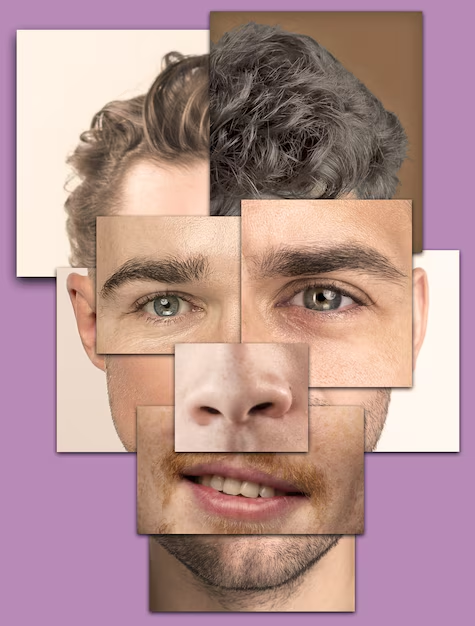
My aim is to create a collage of images of different parts of my mums sides family faces and combine them together, so that their similar characteristics would be present. I did this, because I want to explore how family can not only unify you by love, but that you are also unified by DNA and blood and therefore have the same, or similar characteristics and how this union can never be broken even if you wish it could.
Photos Used?
Archive reference:
Photographs:
How?
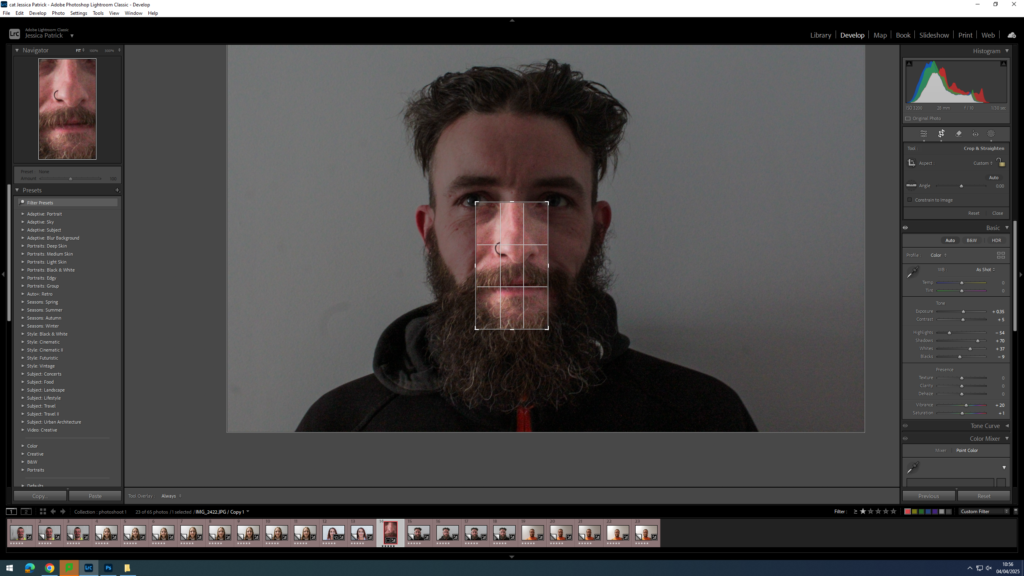
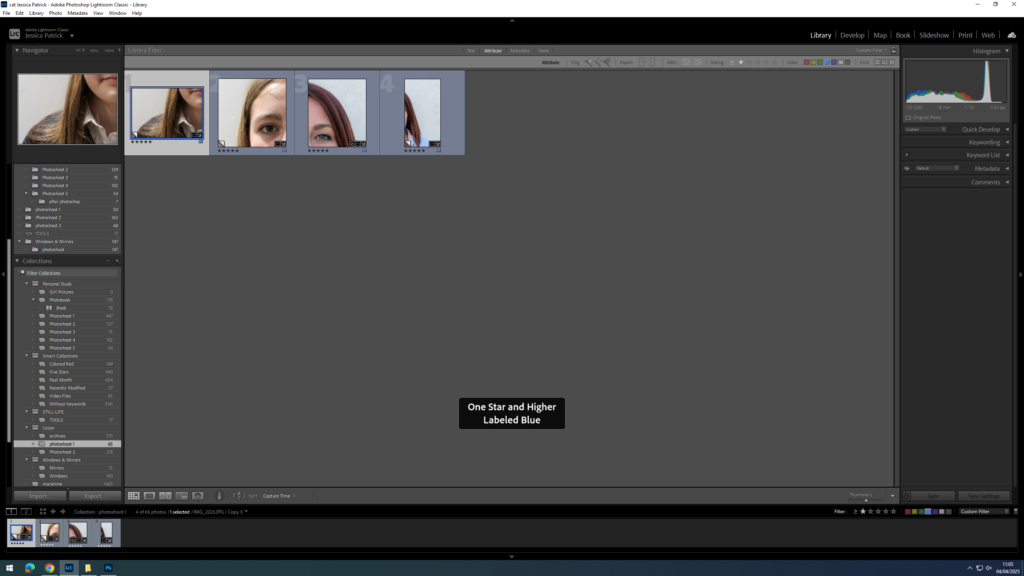
Firstly, I had to use Lightroom to crop my edited images.
I cropped out the facial features I wanted to use from each person.
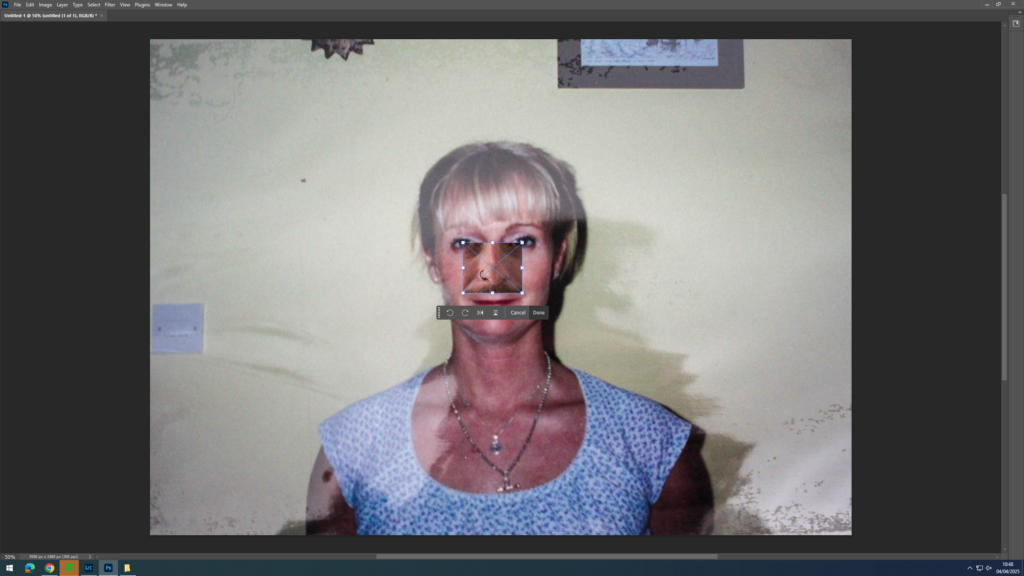
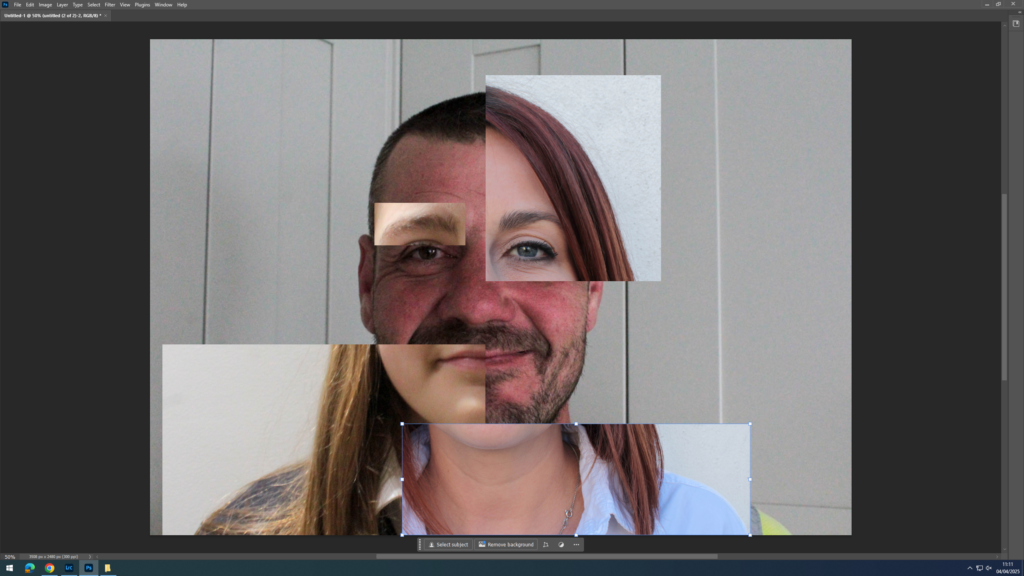
The, I went onto photoshop and created a new A4 landscape print and dragged my archive image onto it and resized it until it fit the A4 page.
Then, I dragged my exported images from Lightroom onto the print and moved and resized them until they fit and were in line.
I tried to line everything up the best I can, including having the pupils line up, the shoulder and even the necklaces.
I then continued to do this with all the images until I came out with my end result below.
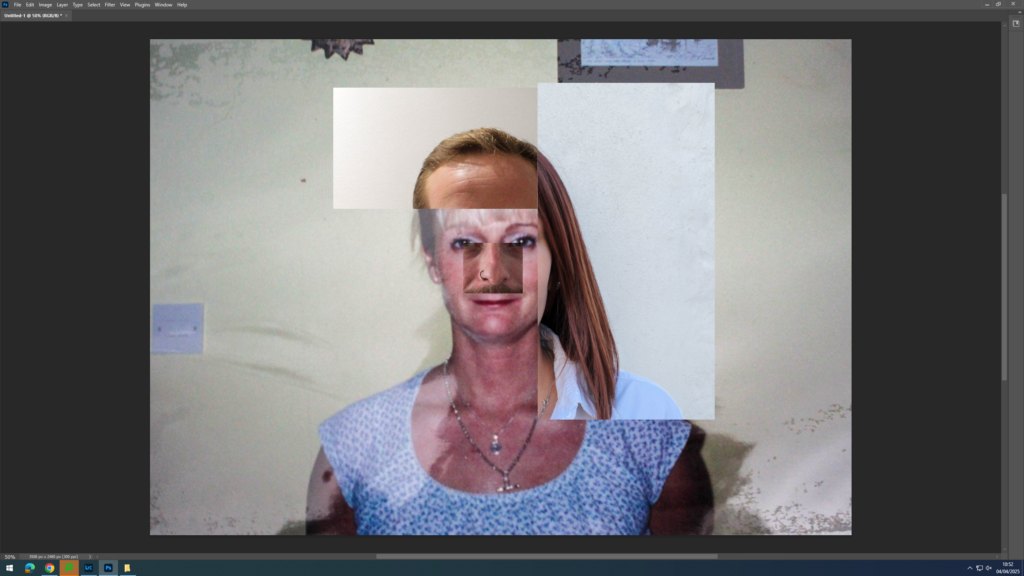
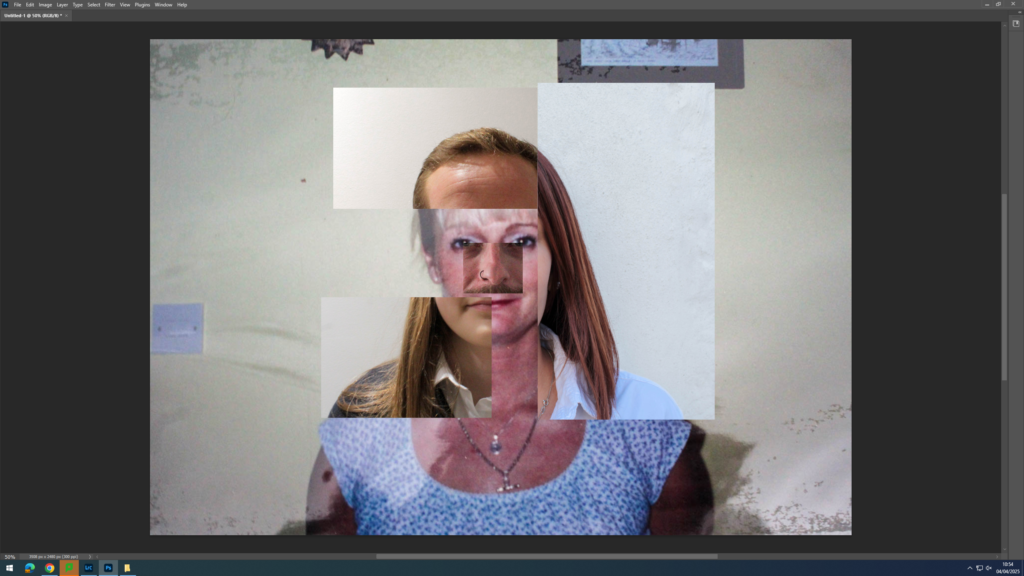
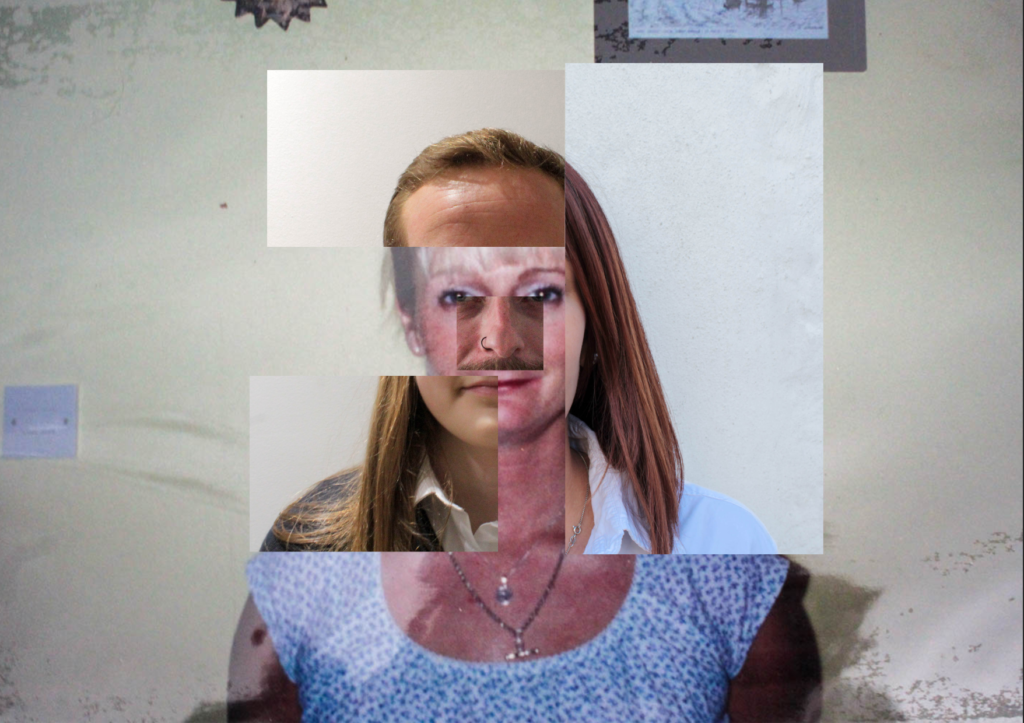
Next, I decided to experiment with the other images I have of my mum, my dad and my sister in order to do the same thing.
First, I dragged the image of my dad into a new A4 print in landscape.
Next, I had to crop more features of my mum and my sister.
Then, I exported them into photoshop the same way and adjusted the size and positioning of them until they were where I wanted.
I attempted to keep everything in line in this version as well.
Final Photoshop:
Evaluation
I think this experimentation went well as I was able to experiment with collages like I had planned on doing at the start of this project. I also want to include some collages in my book, including joiners, so this is a good start and I will maybe be able to add these into my book.
I also feel like the technicalities of making these images went just as planned as I was able to line everything up perfectly, including the finer details, such as the necklaces. I was also able to take very similar images of all my family members, edit them in a way that looked the best and then crop them to only present one facial feature, so that I was able to join them all together.
The aim of this experimentation was to present how family are unified together by more than love, but they are unified together through their DNA and blood, which cannot be broken. I wanted to present this by presenting the members of my families physical features, because DNA and blood etc. is what makes you who you are and the way you look. Presenting these physical features and how similar they are all to each other in one image presents how all the family members are unified together and how that union can never be broken, even if you wanted it to.
These collages also experimented with the Cubism movement that I researched as I have taken lots of different images and combined them together in a collage, presenting different perspectives at the same time. I think this also symbolizes and is a metaphor for family and how each part is a separate person, but we are all joined together, just like how each separate image is joined together now in one.
My mum (her daughter)My mum (her daughter) My sister (her granddaughter) My sister (her Granddaughter) My uncle Dan (her son)My uncle Dan (her son)My uncle Josh (her son)My uncle Josh (her son) My dad
Analysis of 2 Images
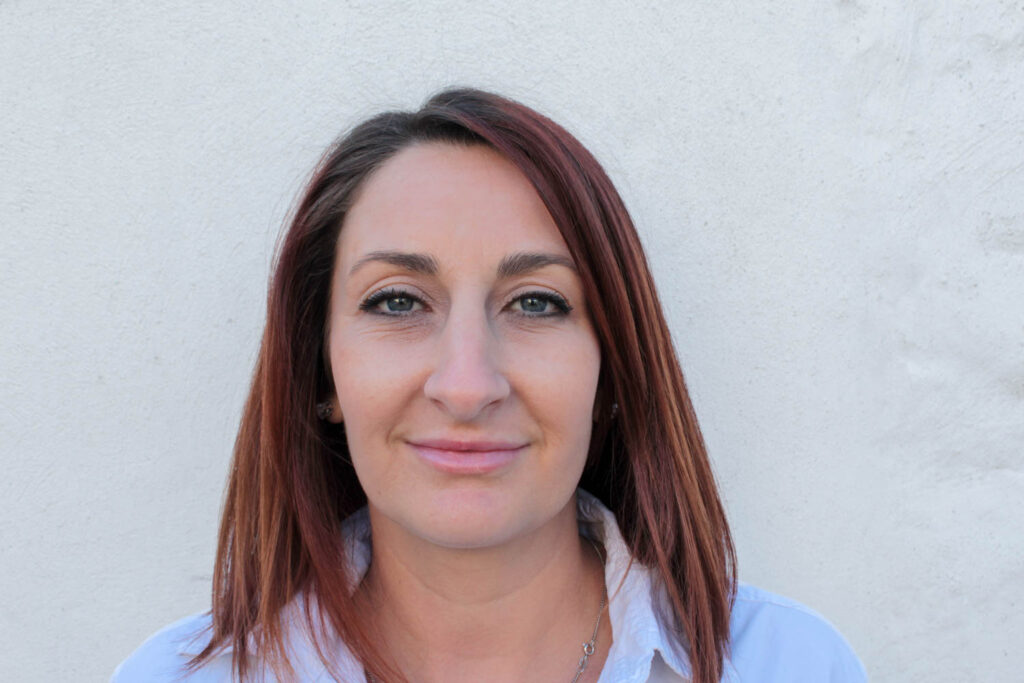
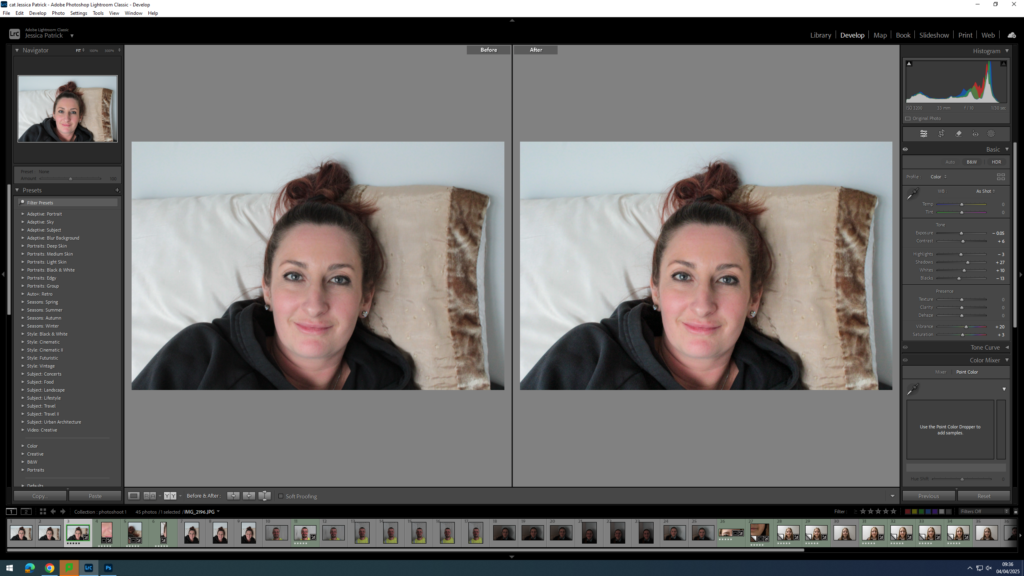
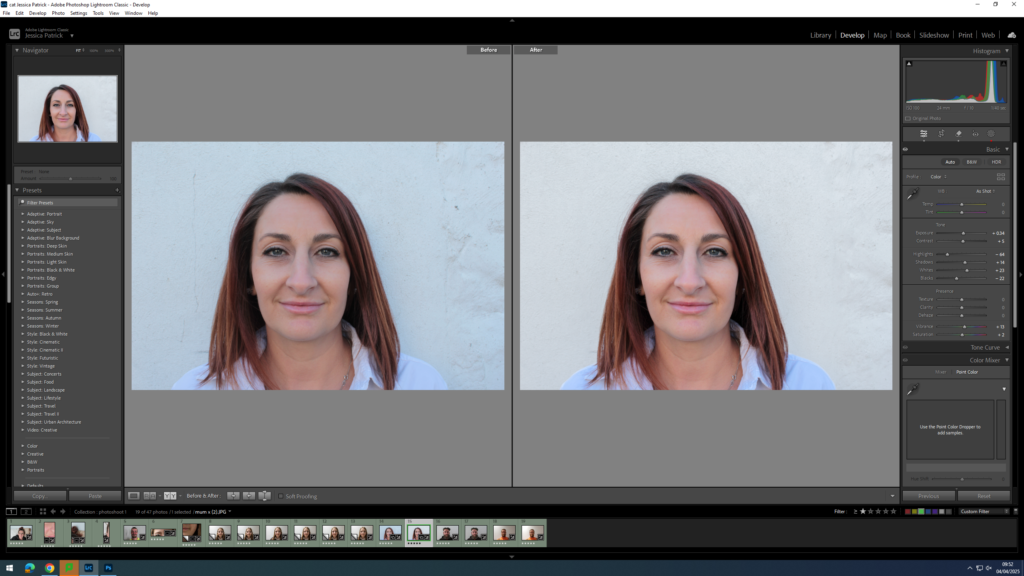
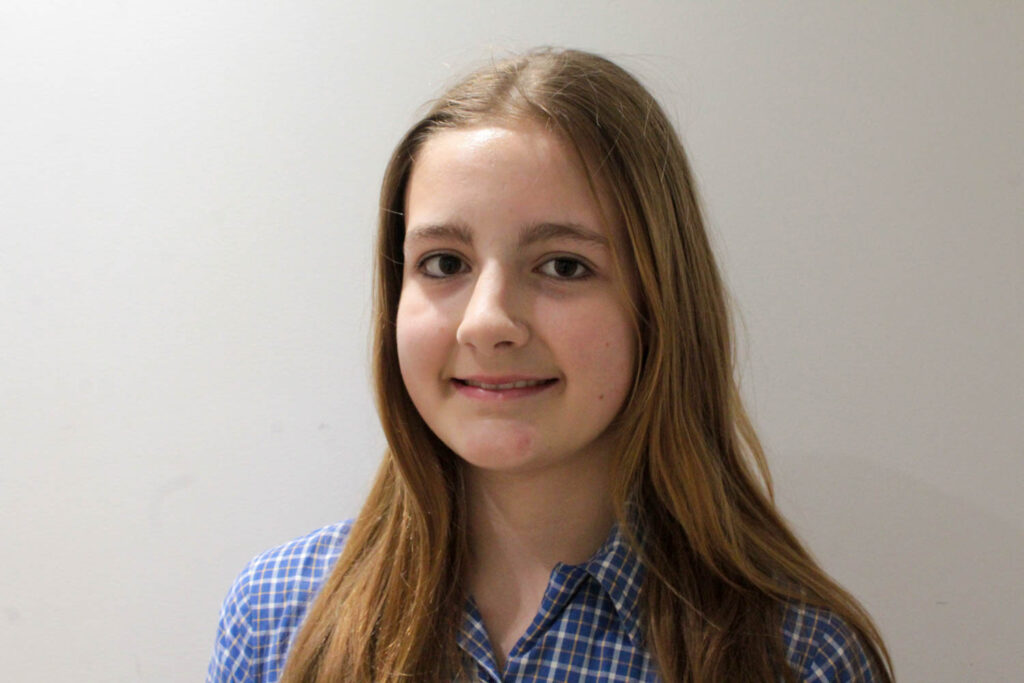
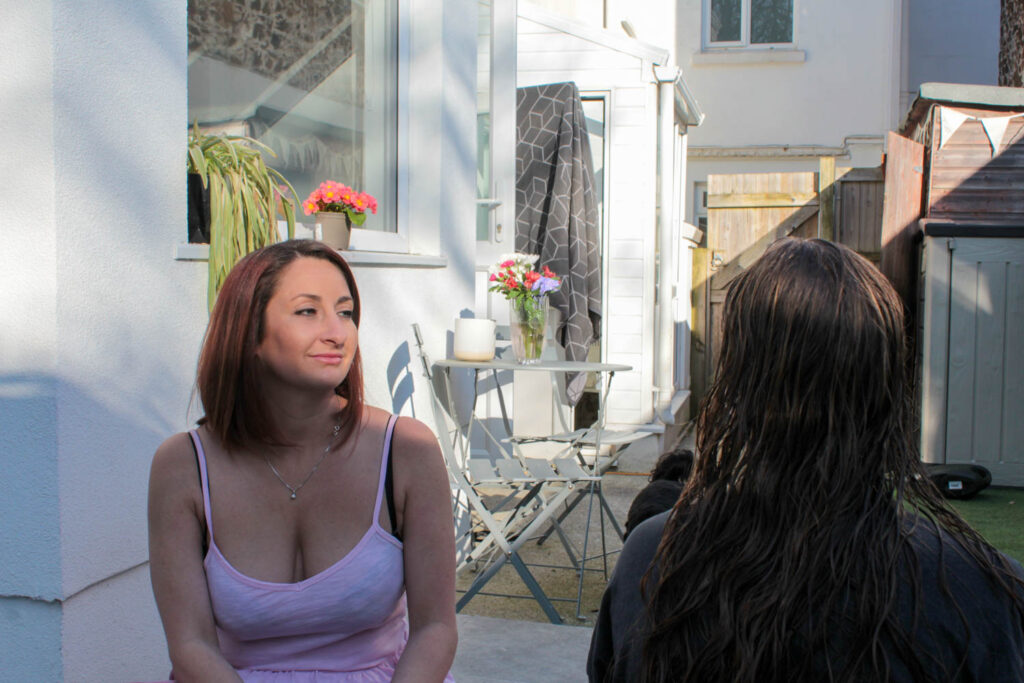
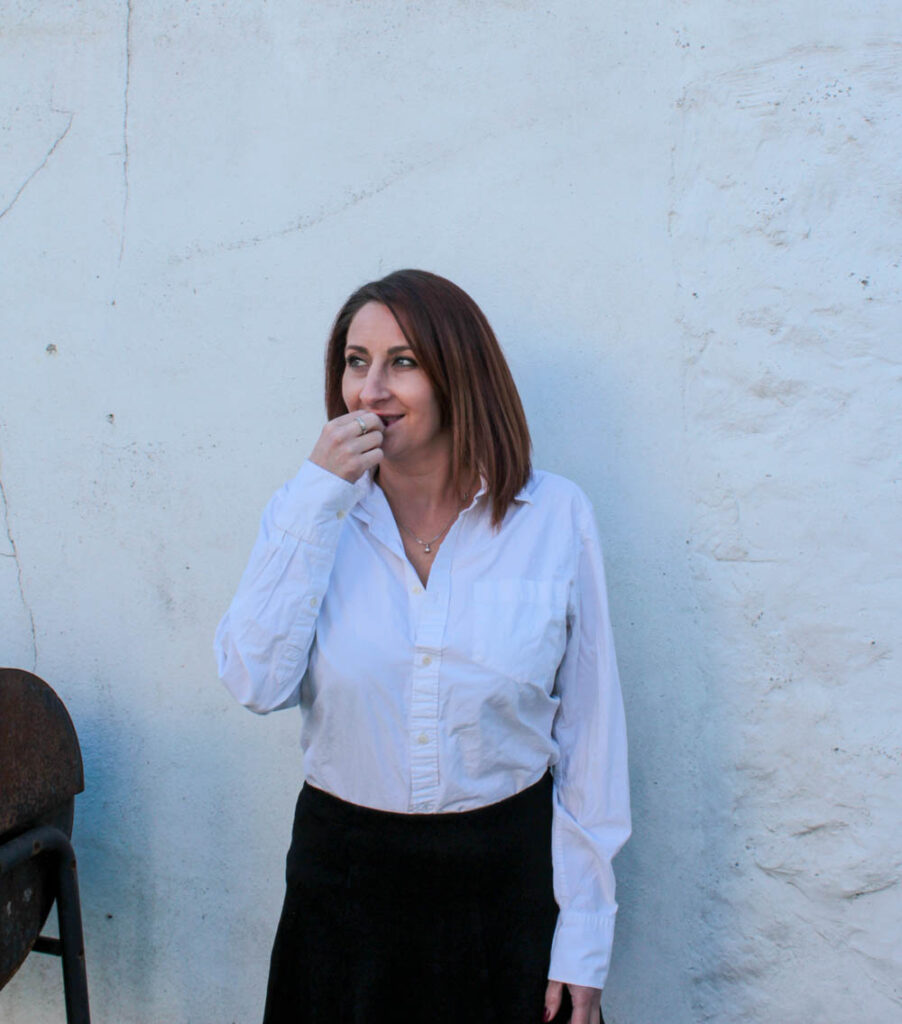
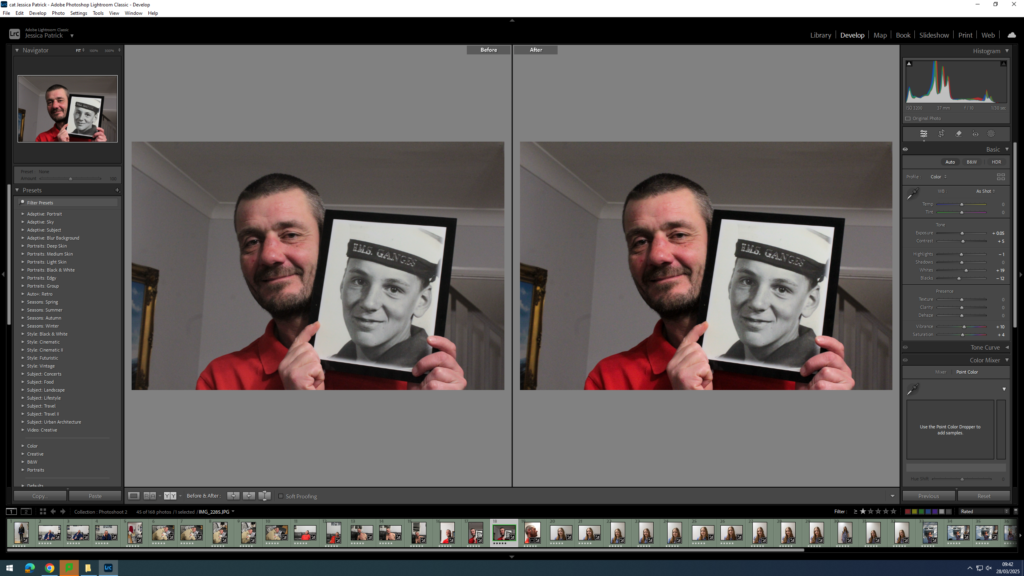
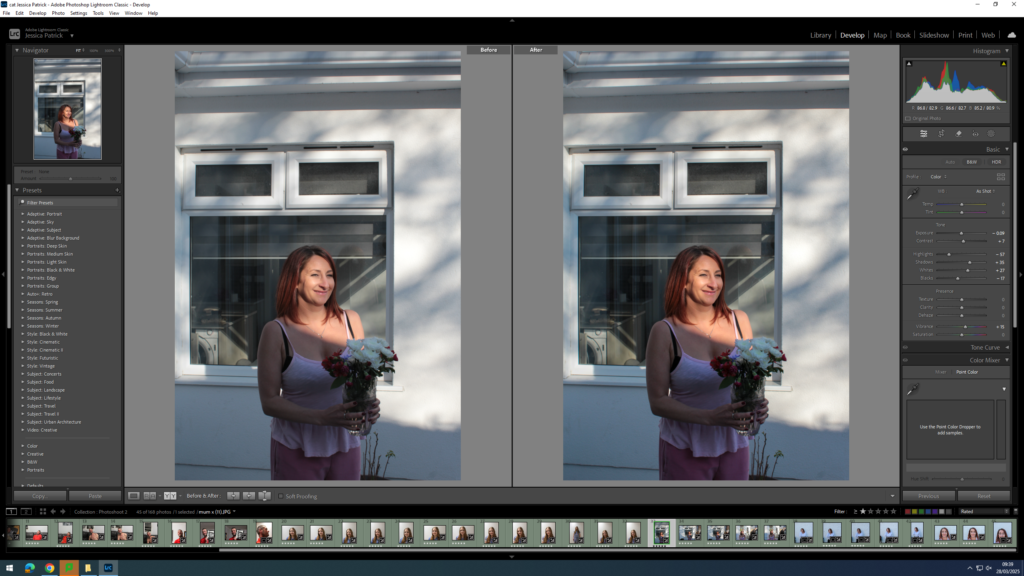
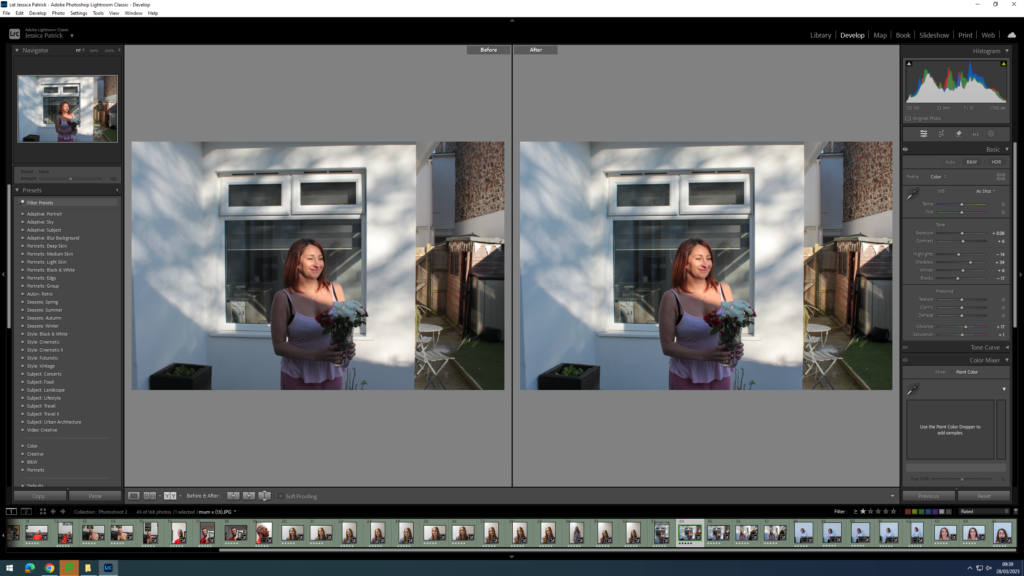
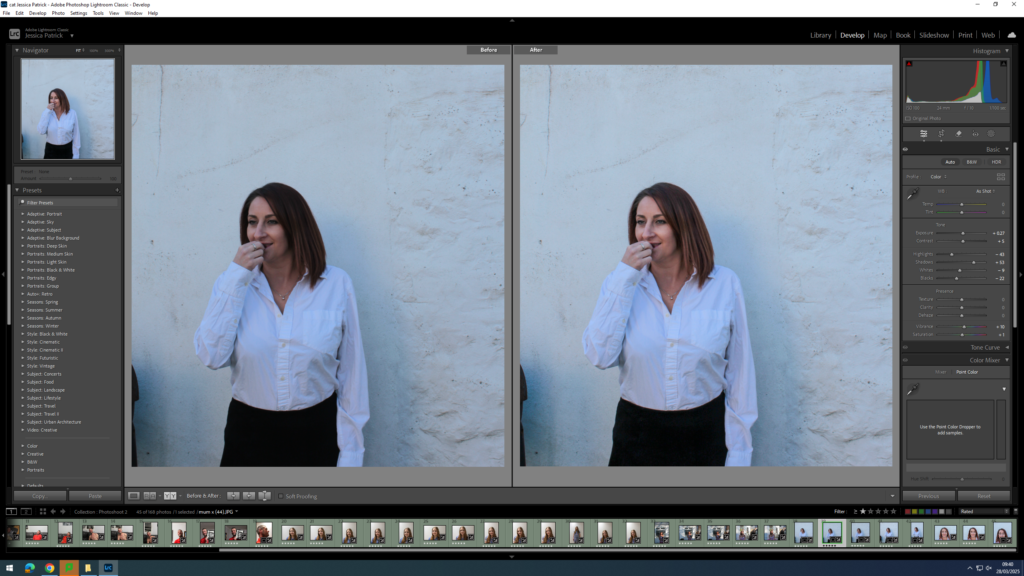
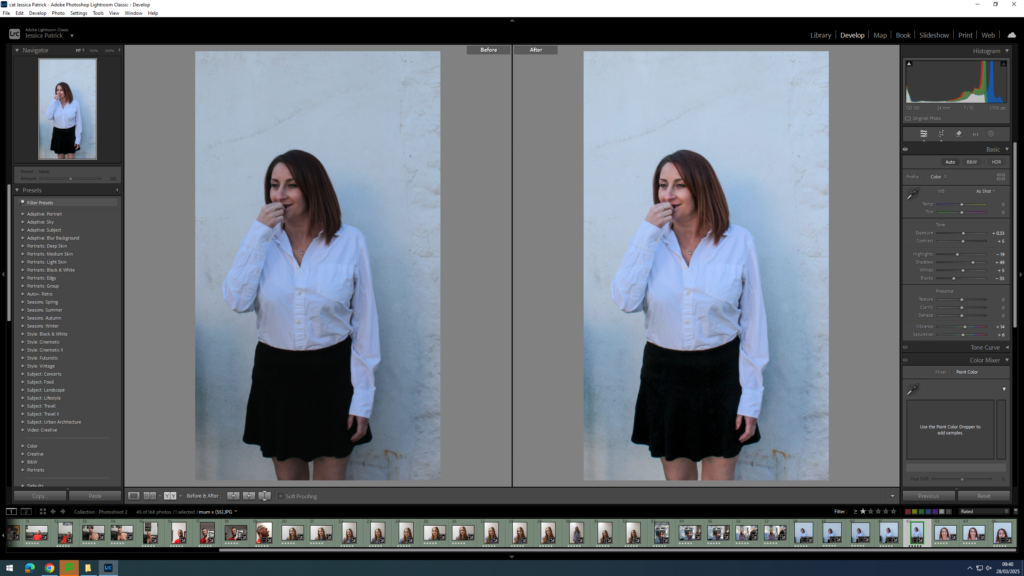
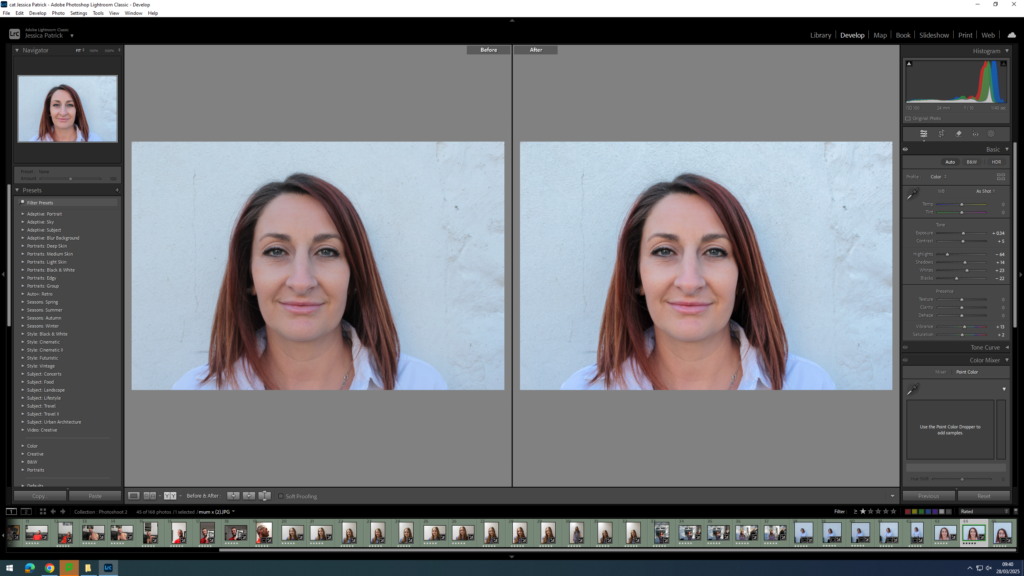
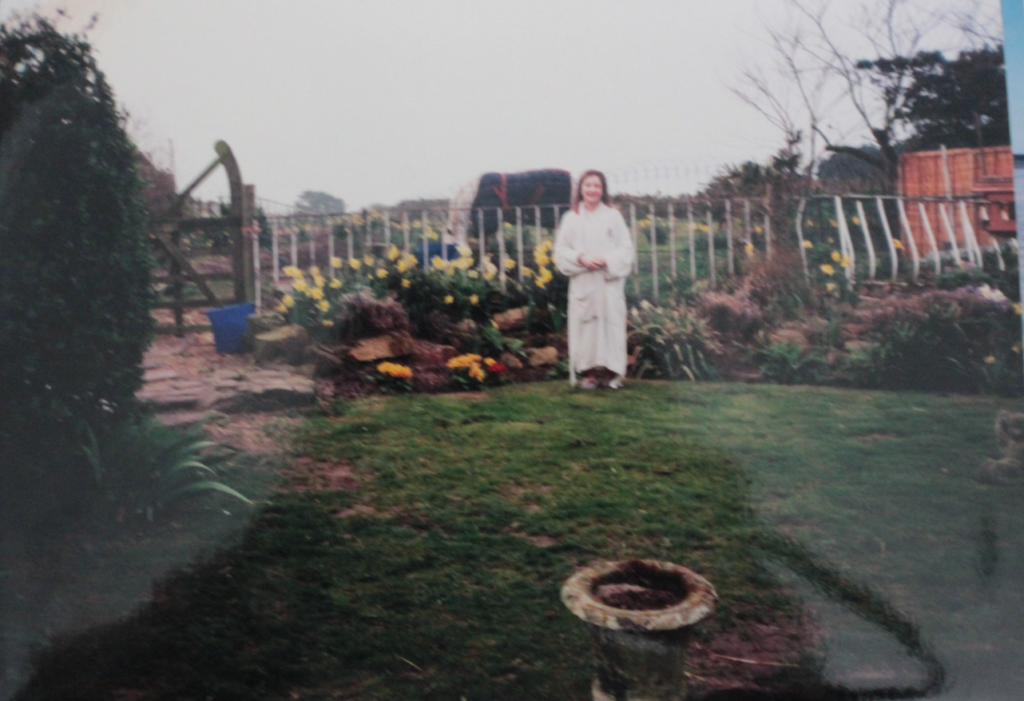
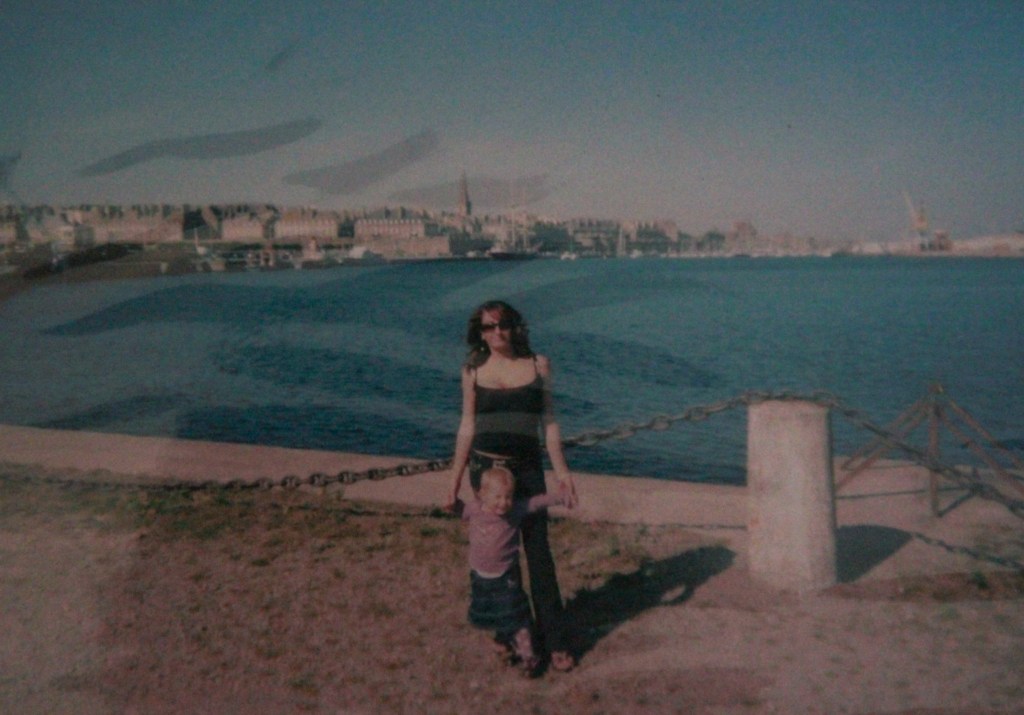
The lighting used in this image was natural daylight, as this photograph was taken in my garden. Therefore, there were low levels of control for the lighting. However, there were high levels of control with the composition of this image, as it is a staged image, where I directed my mum. I also had control over the distance and positioning of myself with the camera.
F-stop: f/10
Exposure time: 1/40 sec
ISO speed: ISO-100
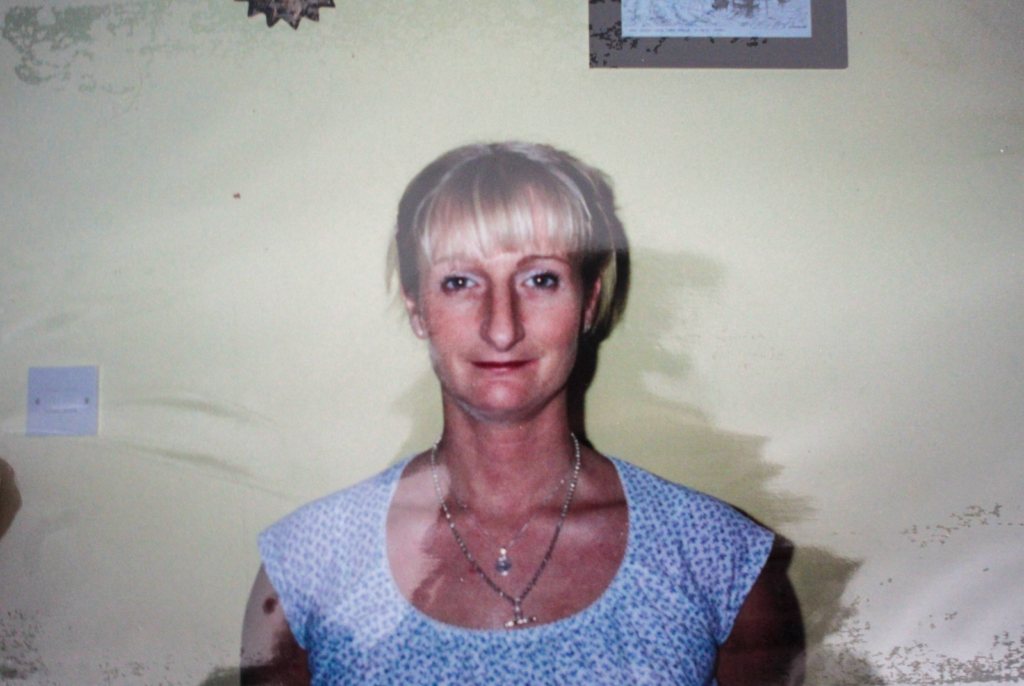
This image contains mainly white, due to the background and the colour of my mums shirt. However some other colours that can be seen are red, pink, brown, blue, black and skin tone due to my mum features. Therefore, there is quite a lot of contrast between my mum and the white background. There are also lots of light tones in this image due to the amount of white. There isn’t a lot of texture in this image.
The composition of this image is simple as it is a portrait of my mum where she is in the centre of the frame looking directly forward. She is the main viewpoint of the image.
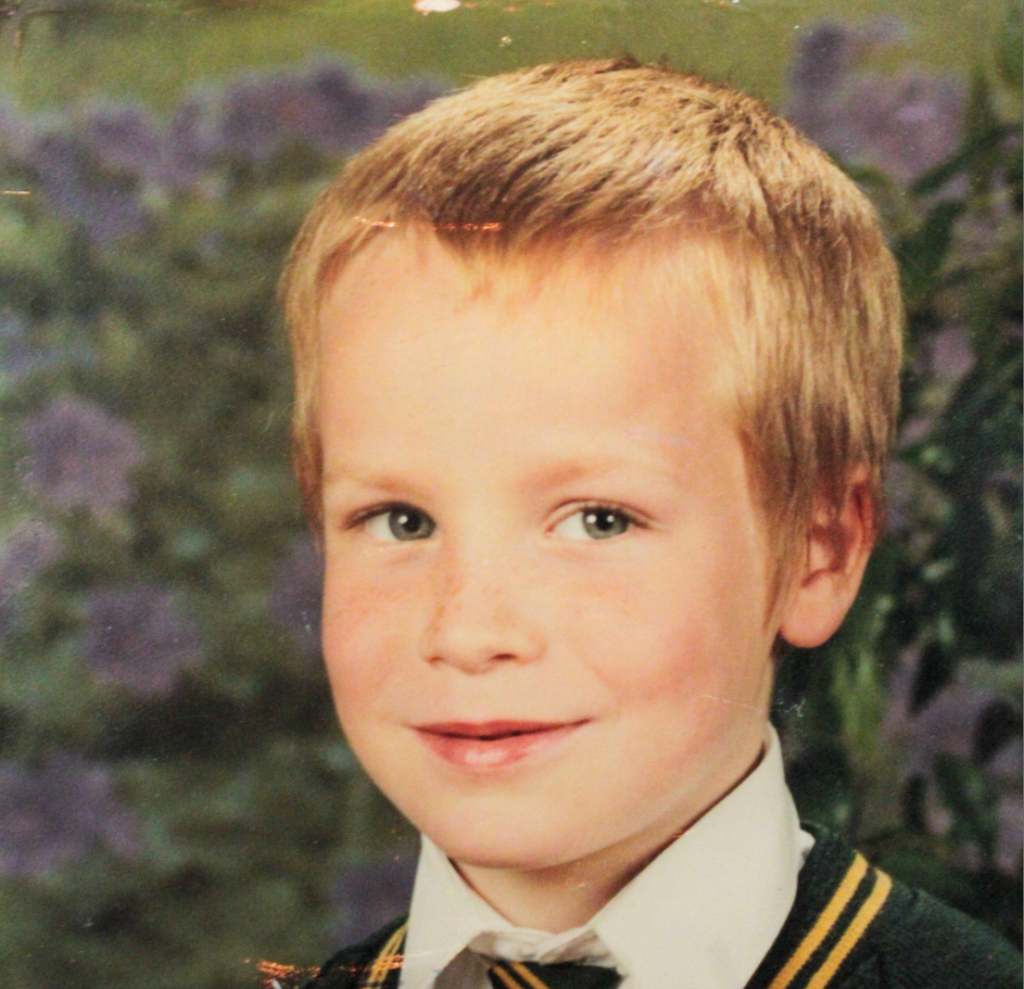
This image is a remake of an archive image of her mum when they were at very similar ages. The meaning for this is to present the similar characteristics that they share, so that I can present how family are unified through DNA, blood and other characteristics and that union can never be broken even if you wanted it to.
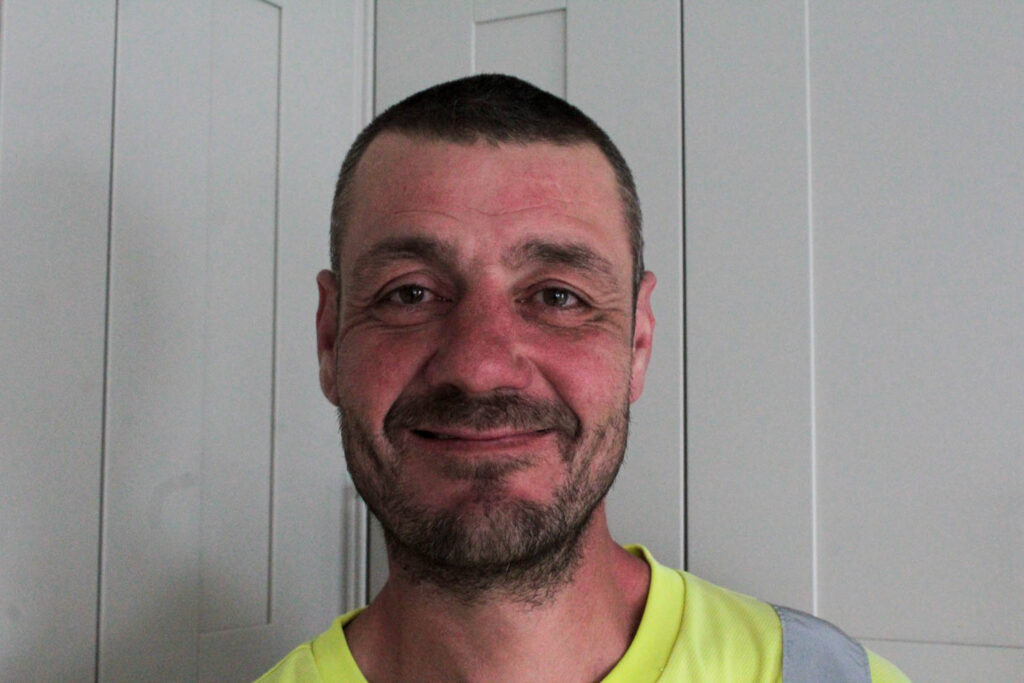
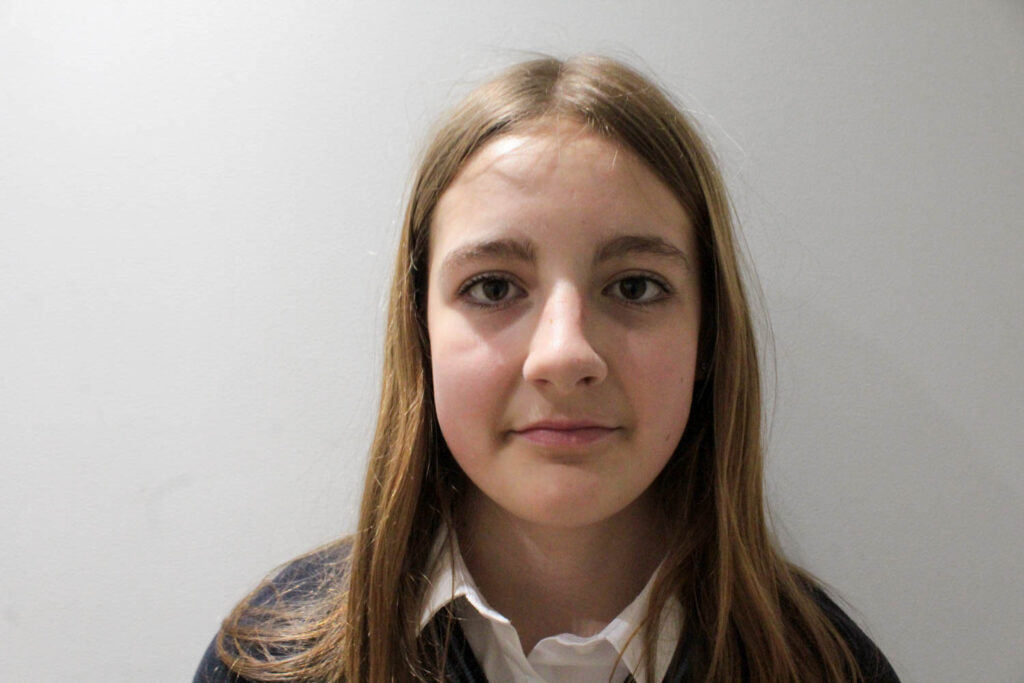
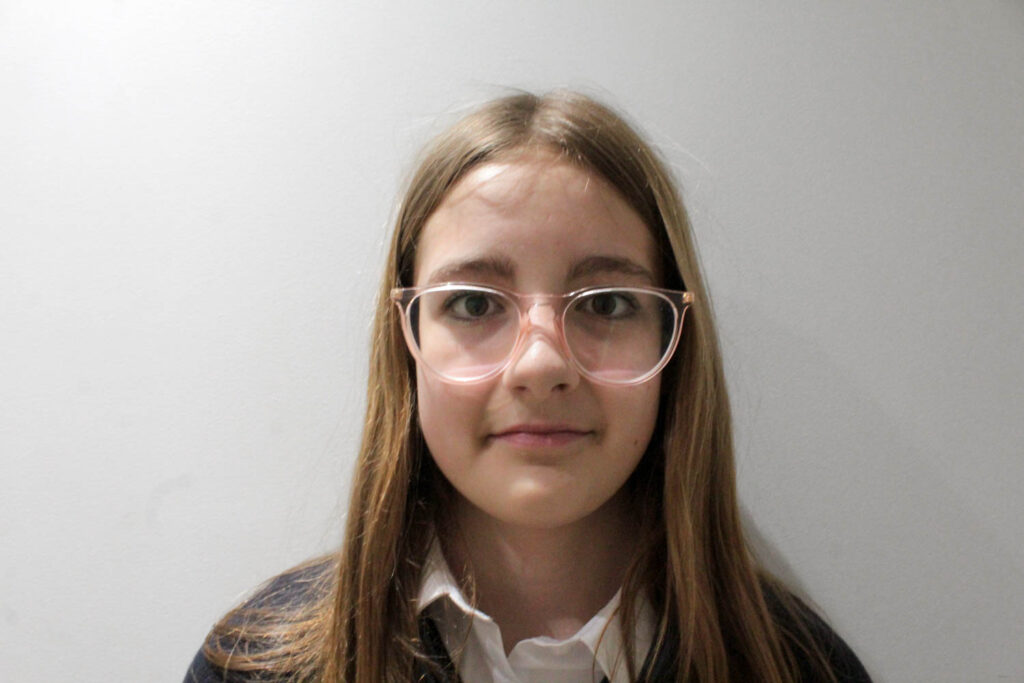
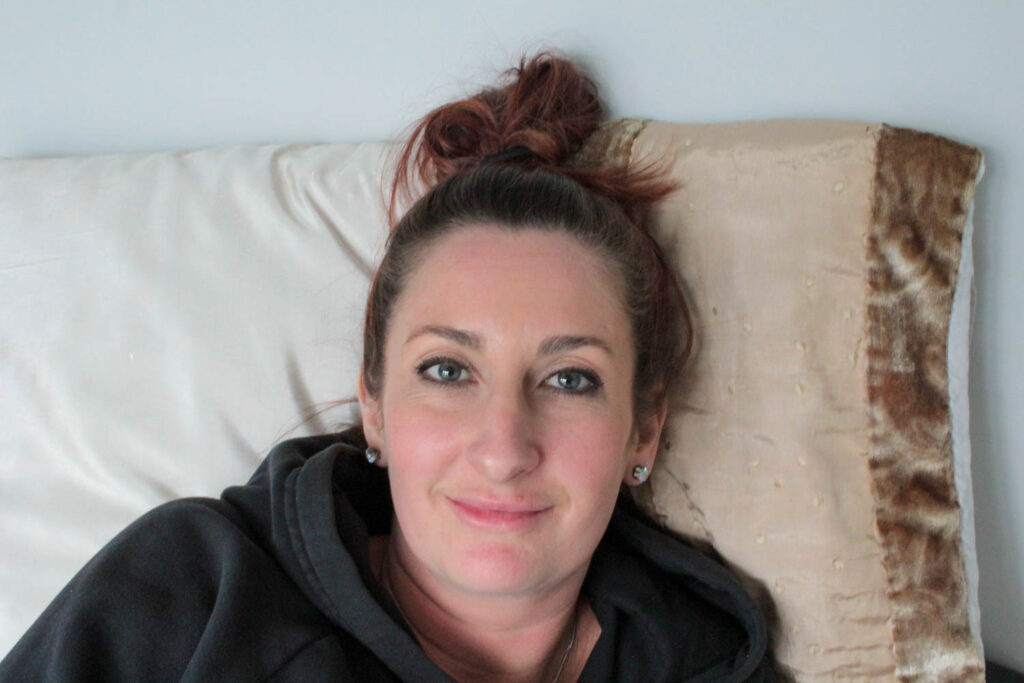
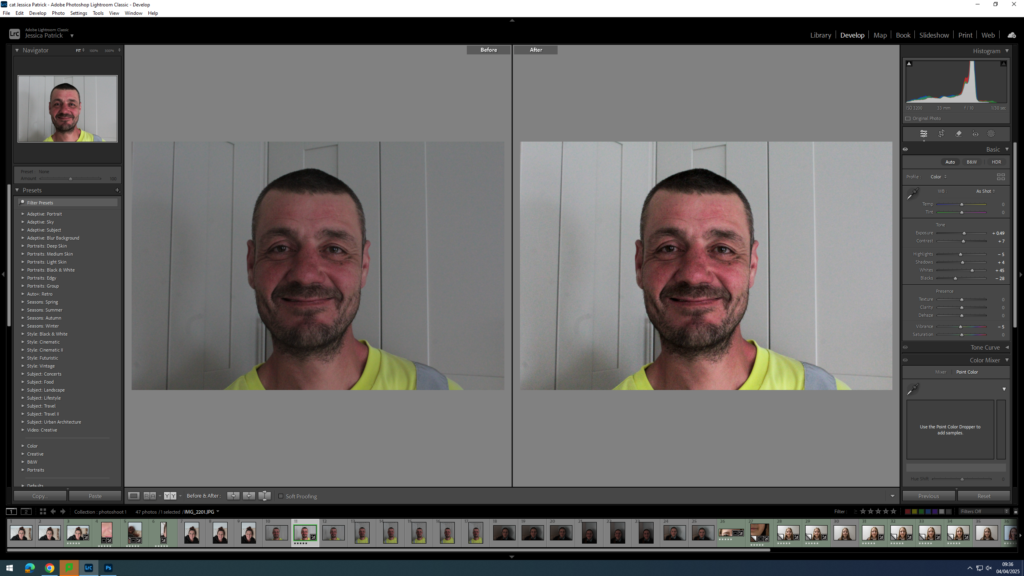
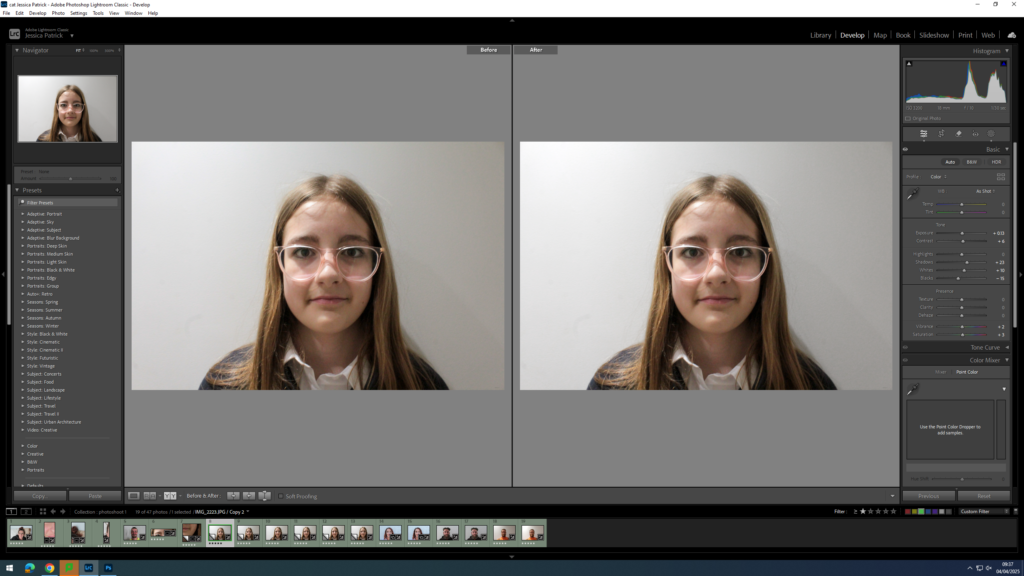
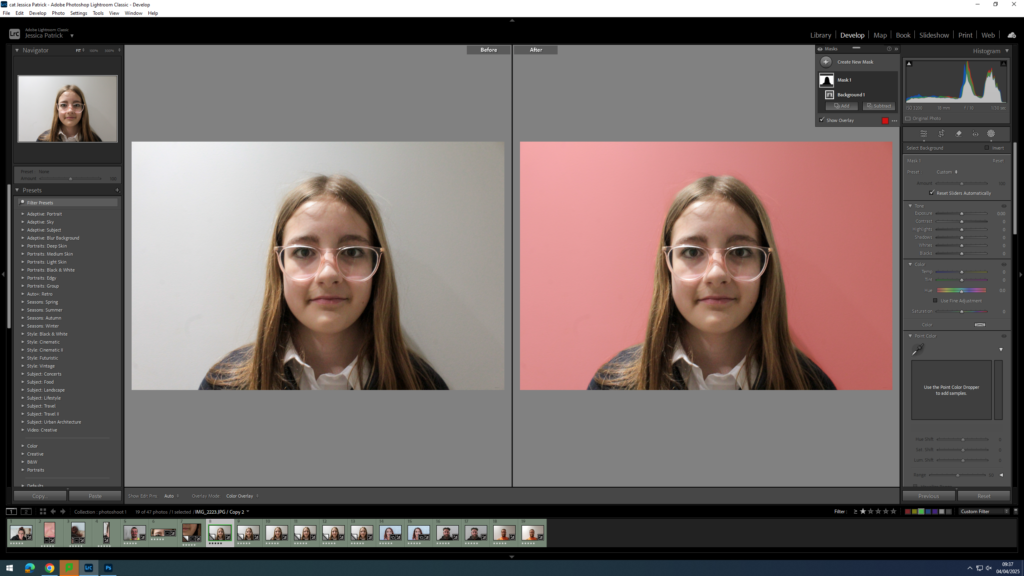
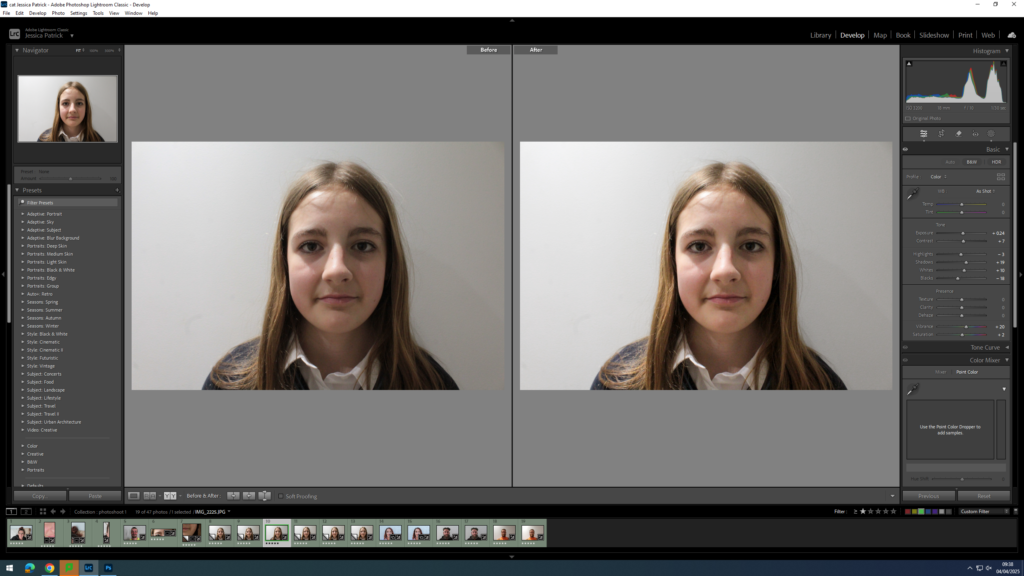
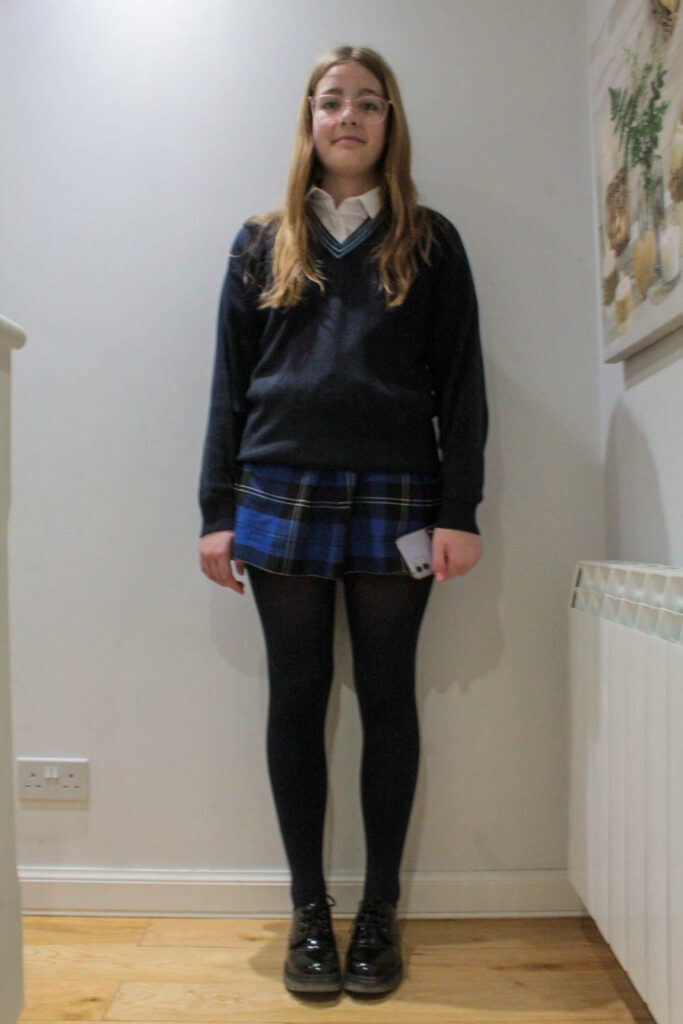
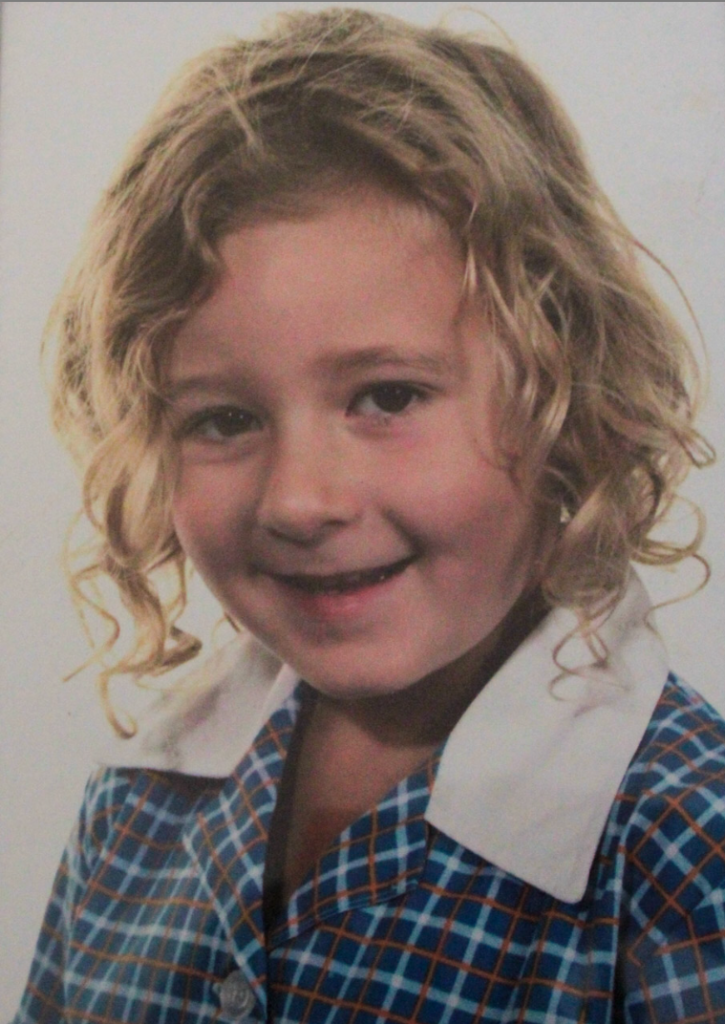
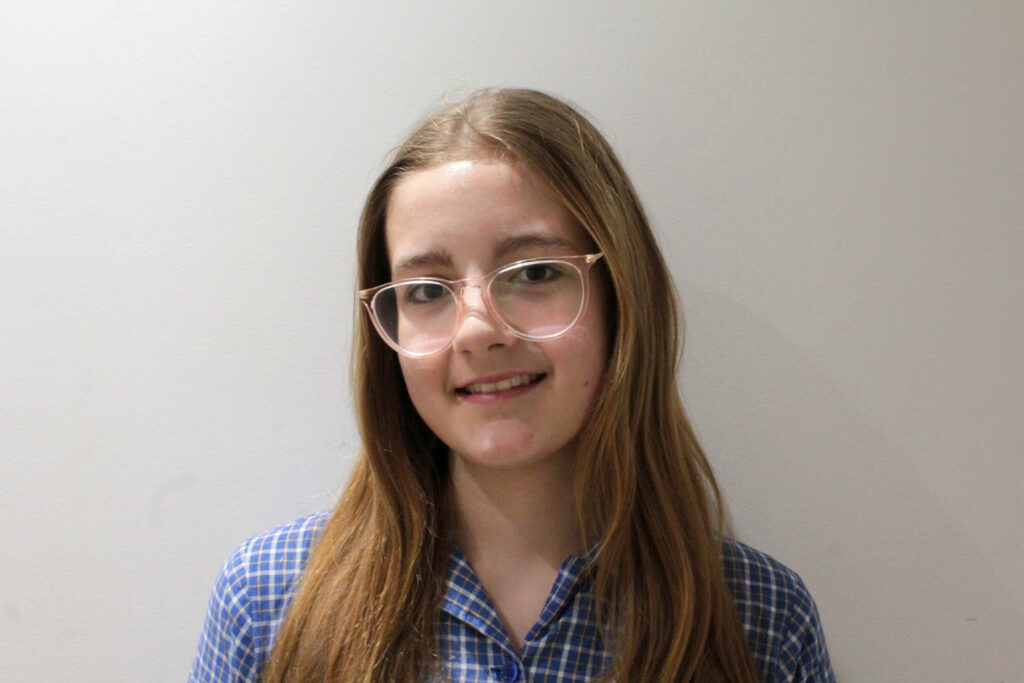
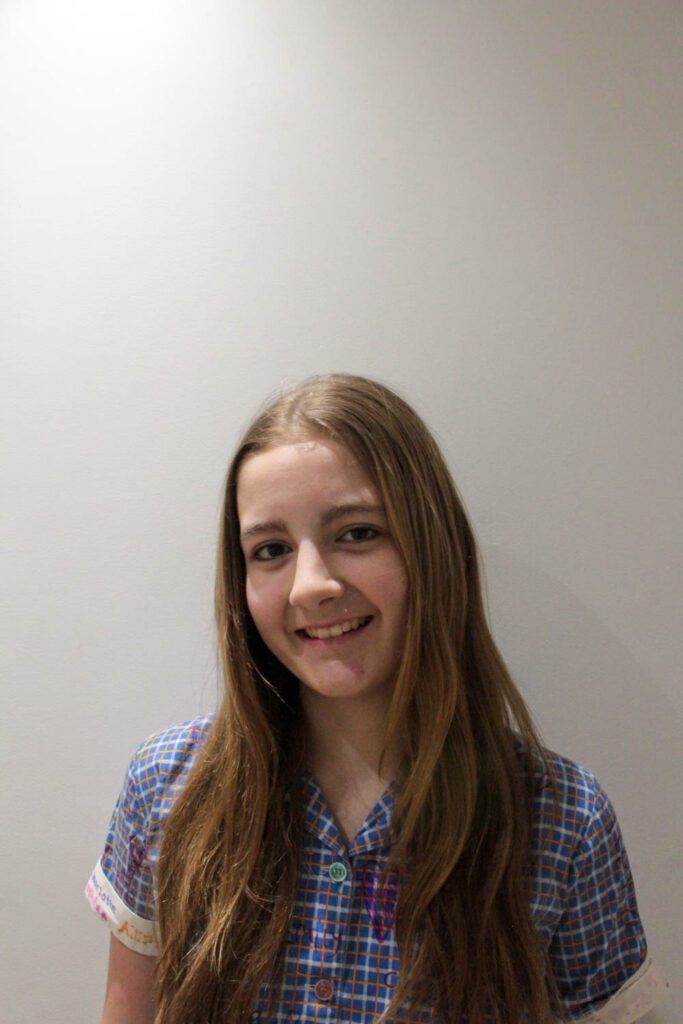
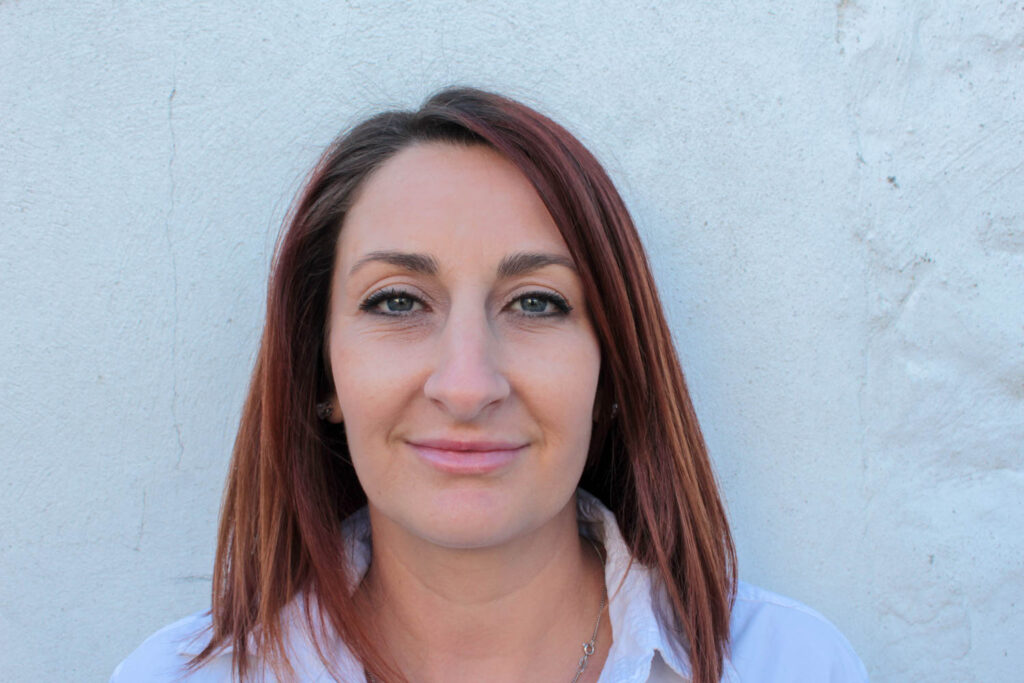
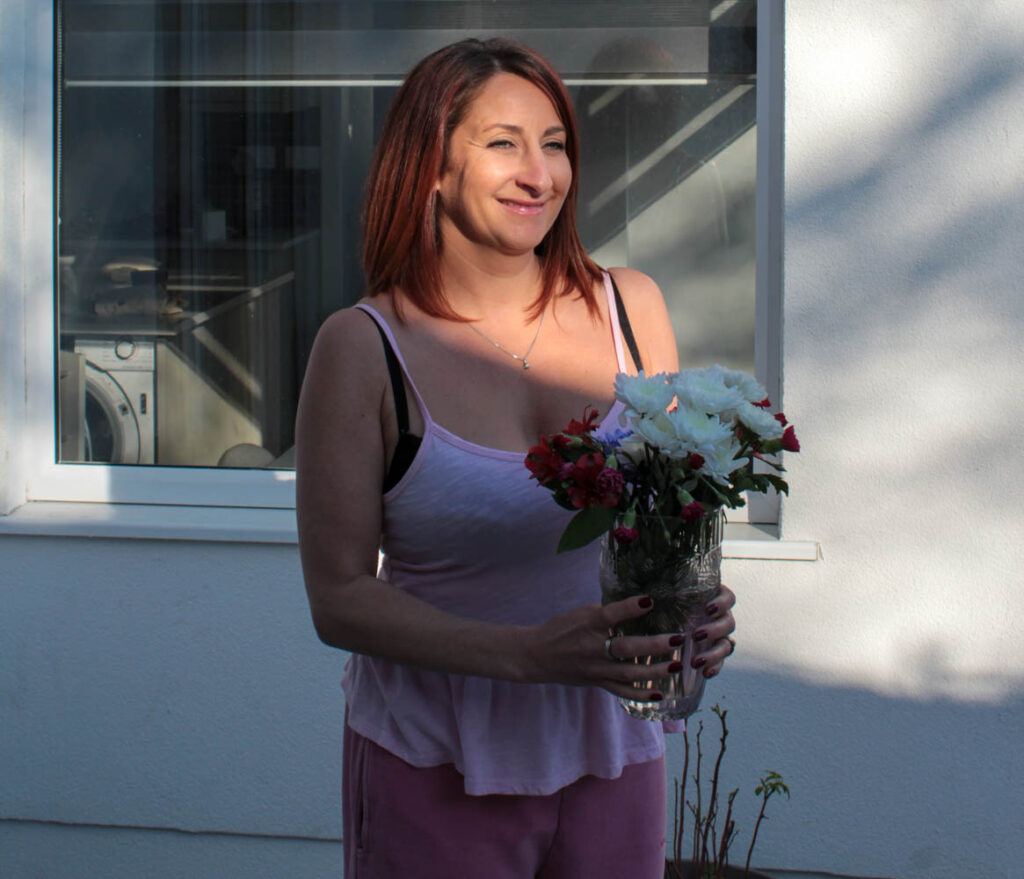
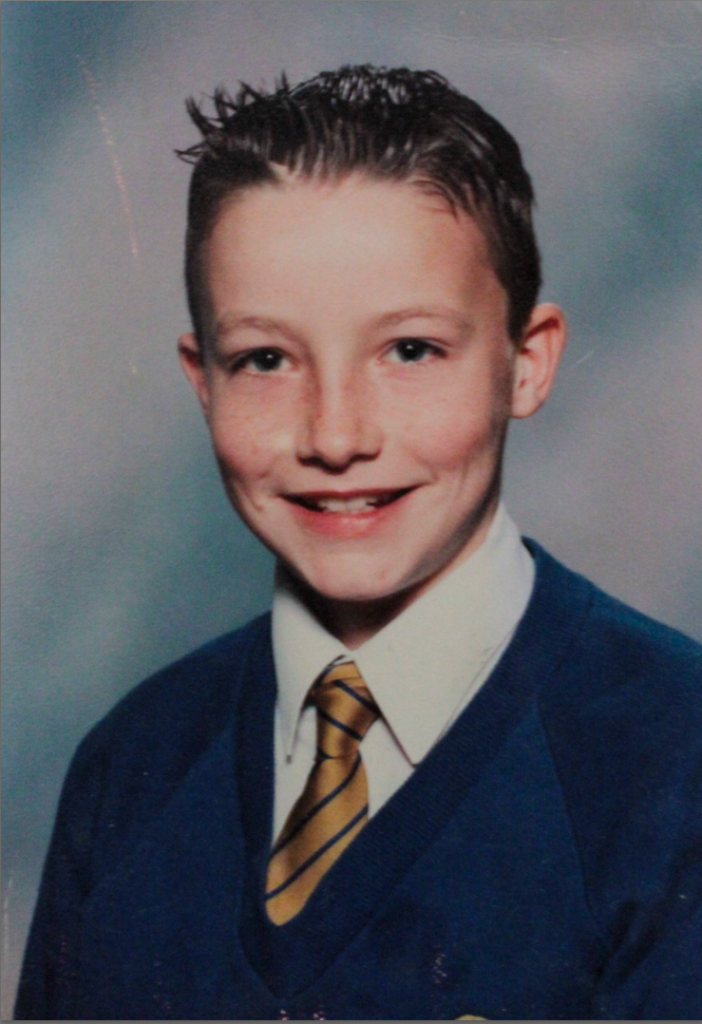
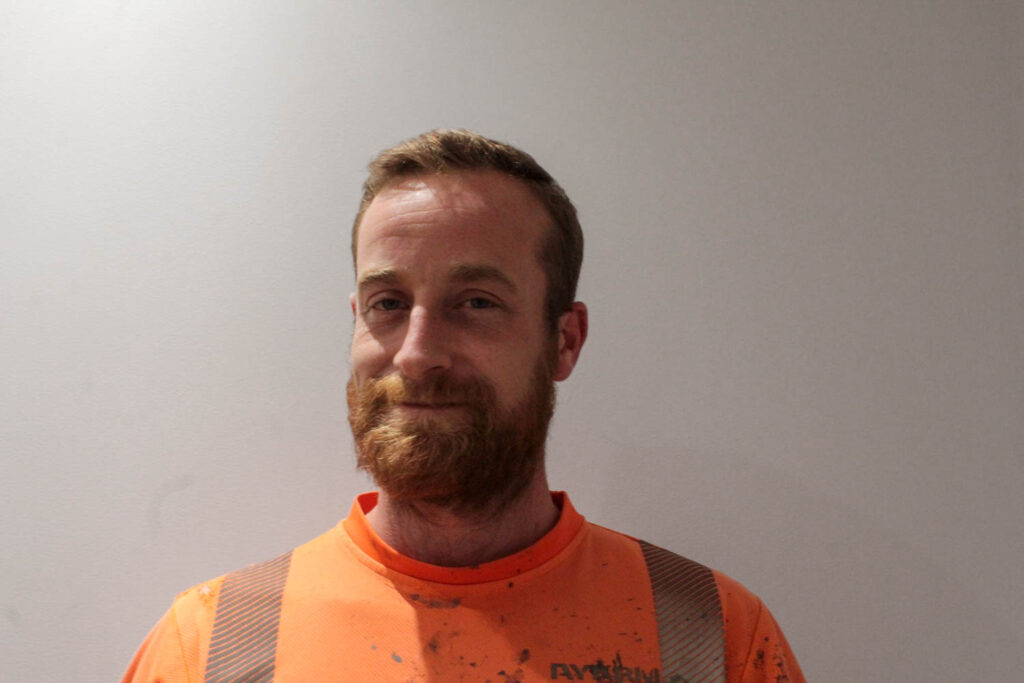
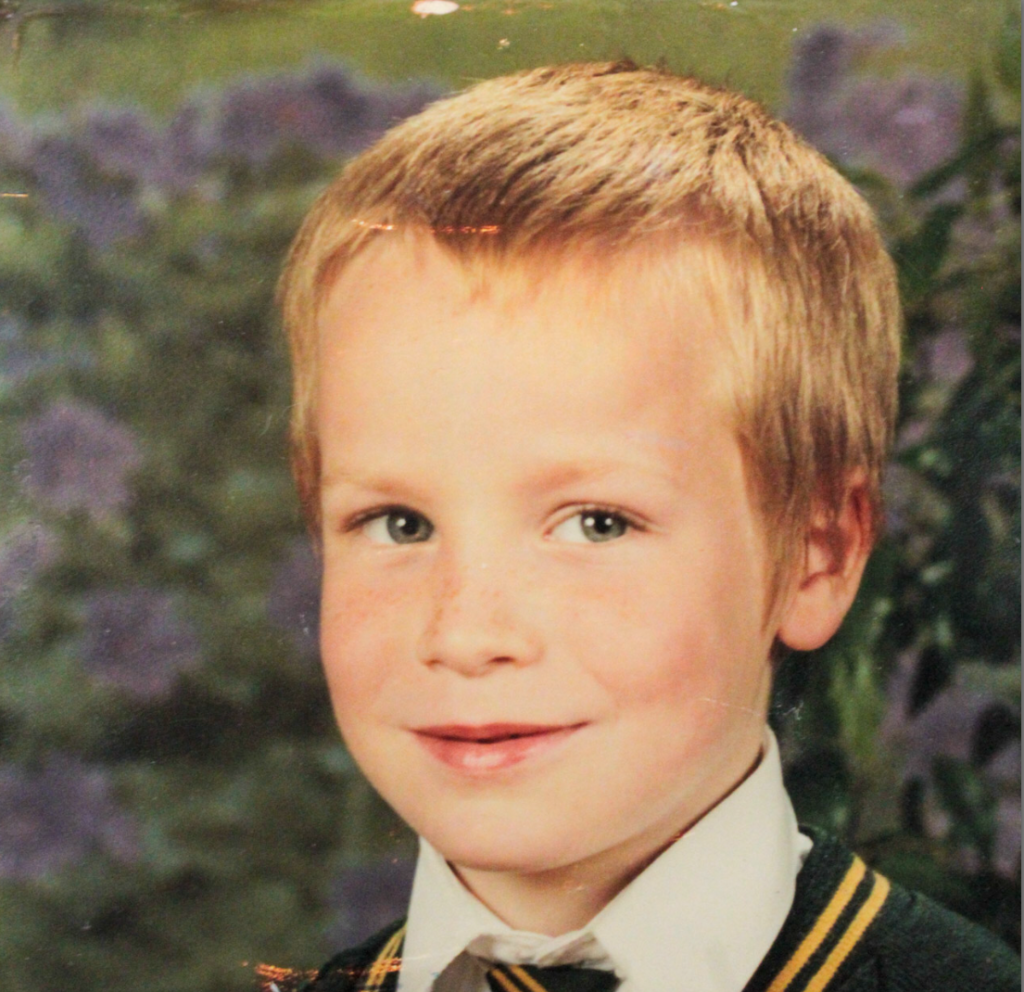
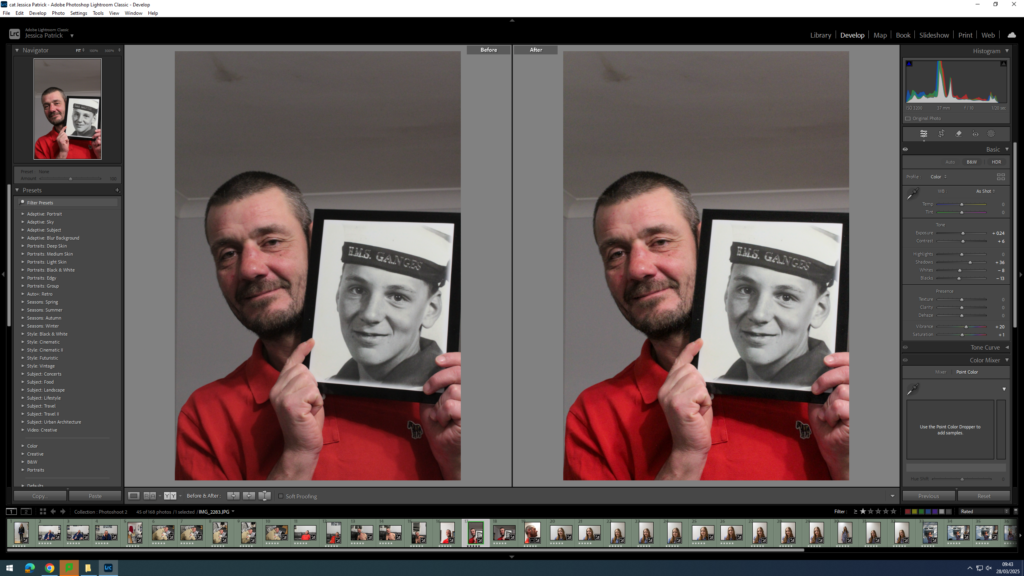
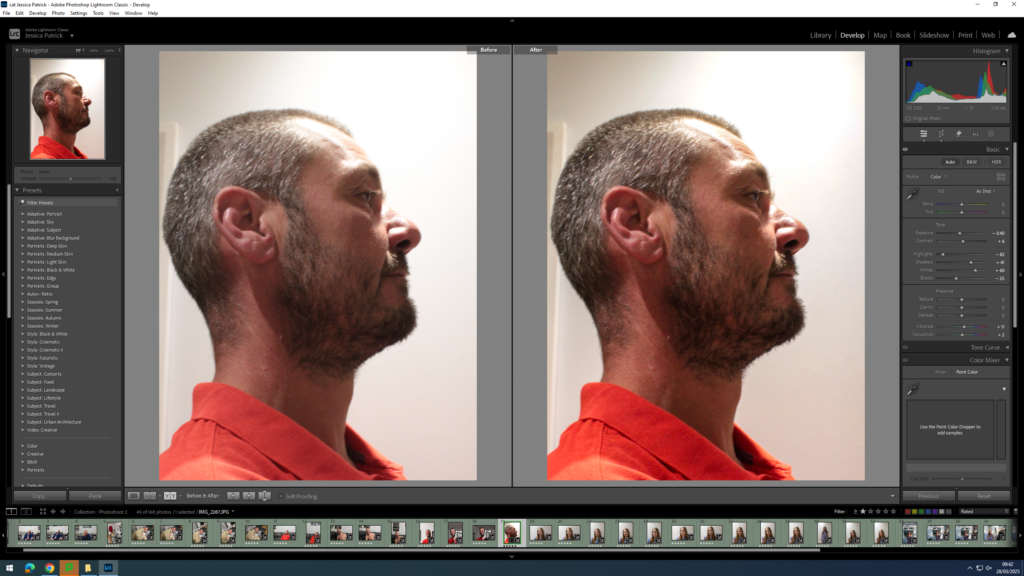
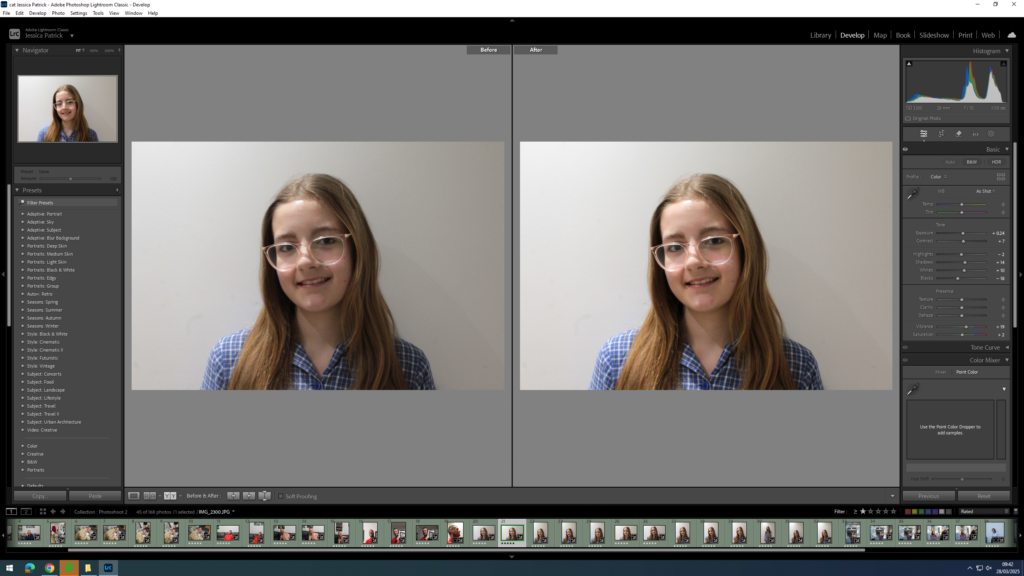
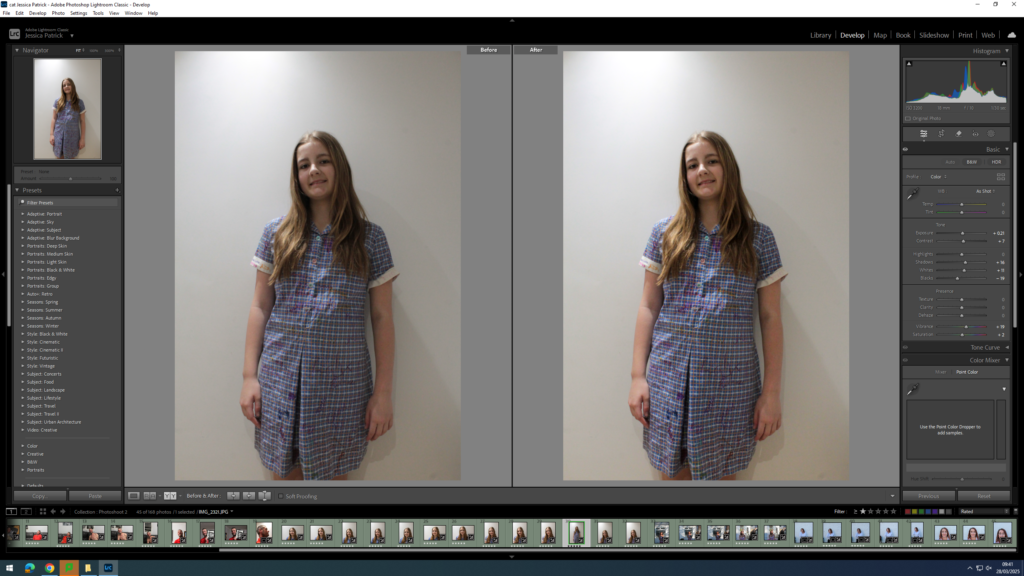
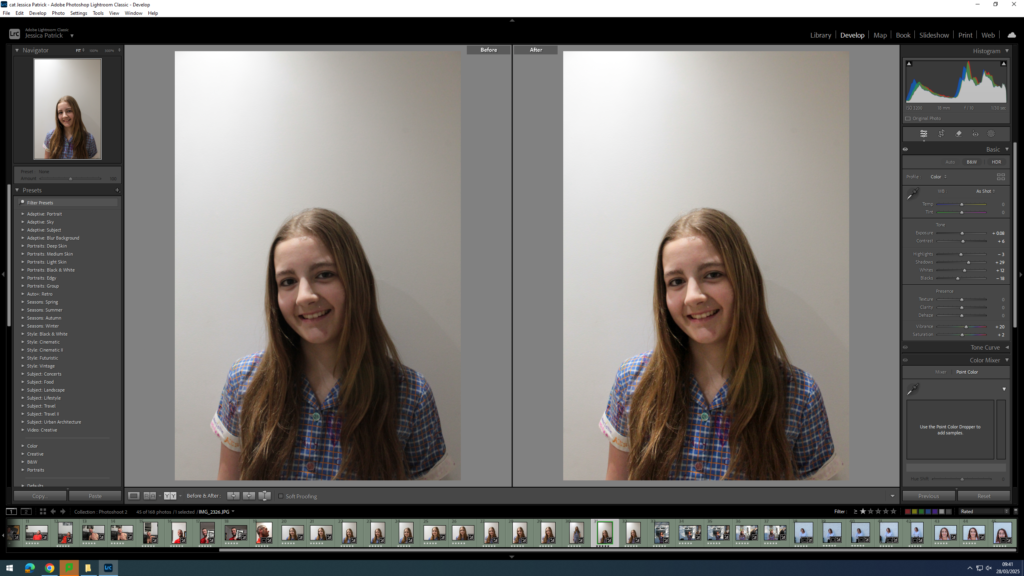
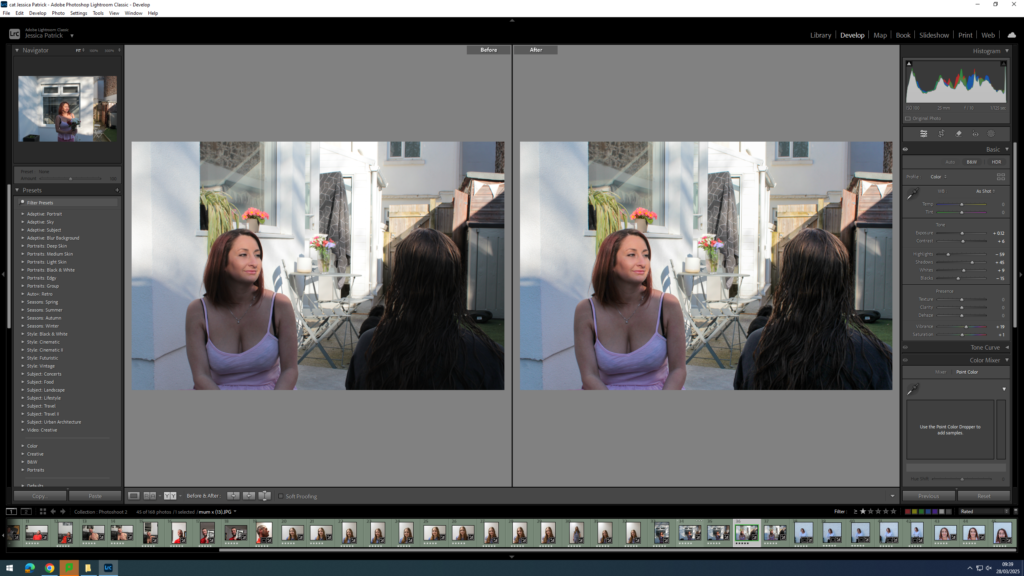
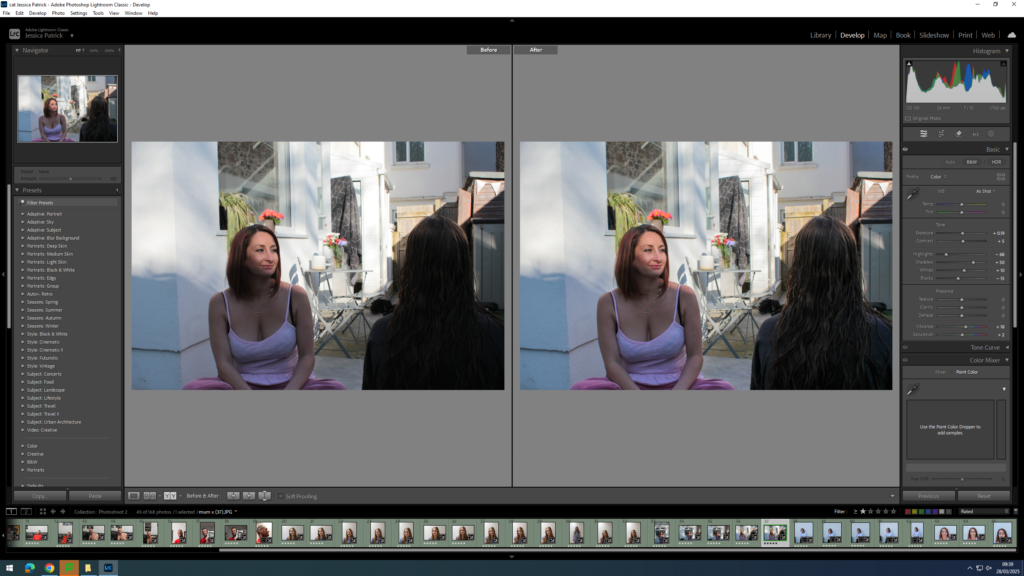
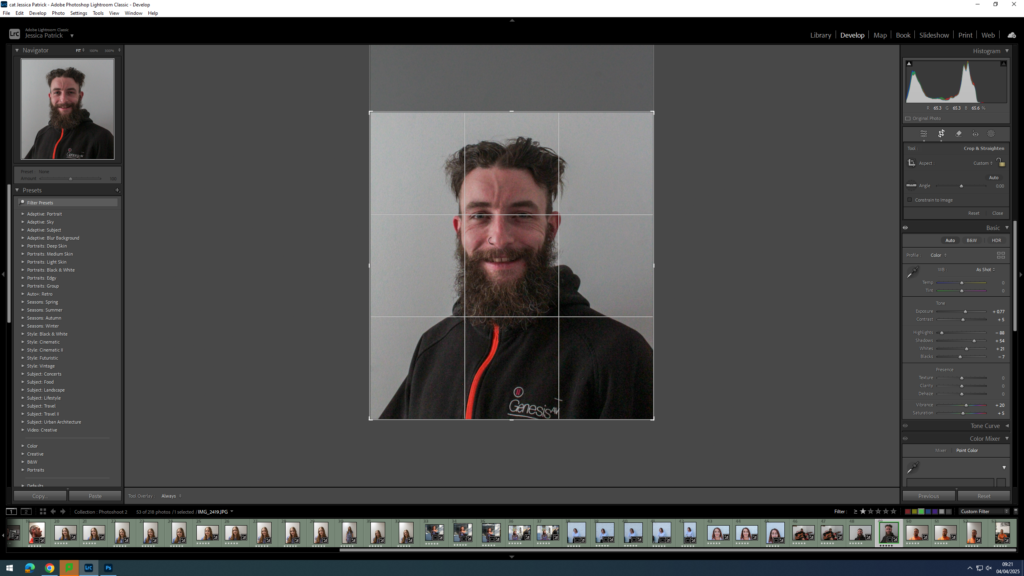
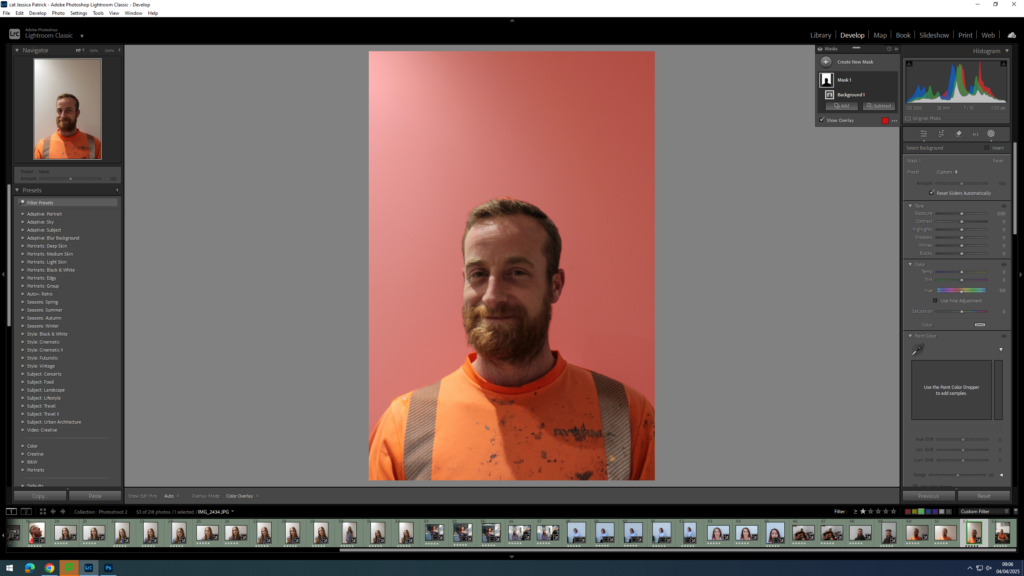
The lighting used in this image is artificial lighting due to the image being taken inside. However, there was still little control with the lighting as I had to use what I had at home, but there was high levels of control to the composition of the image, because it was a staged image, where I could manipulate the positioning of my model and the distance and positioning of myself with the camera.
F-stop: f/10
Exposure time: 1/40 sec
ISO speed: ISO-100
There are very few colours in this image as well, but they include the white background and shirt, the golden hair, black jumper and pink glasses. There are light and dark tones due to the lighting coming from one side of the image, rather than directly forward. There is also a lot of contrast between the white background and my subject in the black jumper. There is not a lot of texture in the photograph.
The composition of this image is a simple composition with the main viewpoint of the image being my subject in the centre of the frame.
This image is a remake of an archive image of my subjects grandma. The meaning for this is to present the similar characteristics that they share, so that I can present how family are unified through DNA, blood and other characteristics and that union can never be broken even if you wanted it to.
Evaluation
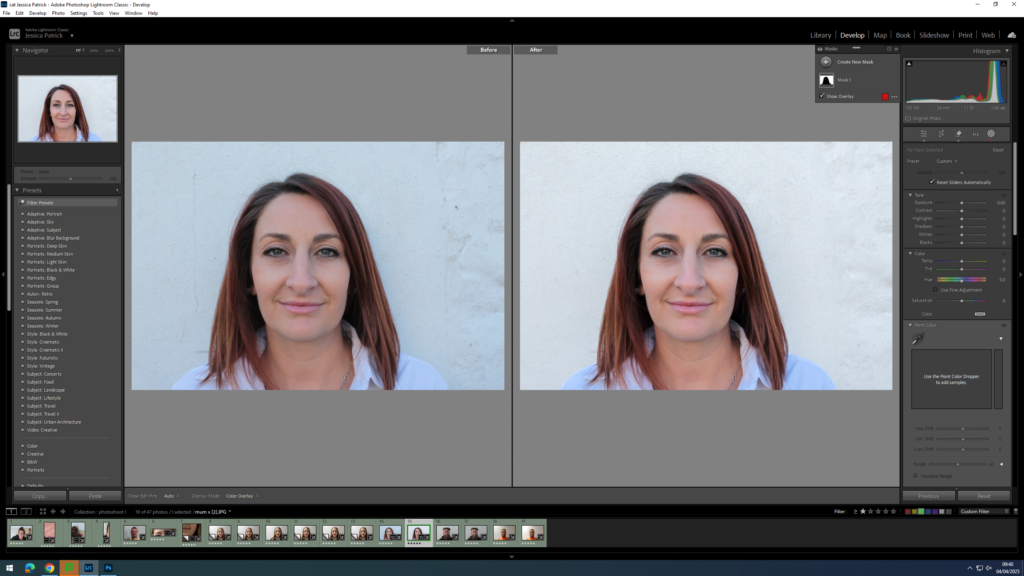
I think this photoshoot went well, because I was able to recreate the archive image chosen well with multiple family members. I was also able to experiment with my editing slightly, by selecting the background, as well as using the removing tool to remove any blemishes in my photographs. However, next time I would use the same background/ take the photographs in the same place, so that they would all have a plain white background and be more similar to each other, which would make it slightly easier for me when using photoshop.
These photographs link to the topic of union, because they present how similar all my family look, due to sharing DNA, blood and other characteristics. I am going to explore this theory more, by using photoshop to combine these characteristics together, by creating a collage of my families faces.
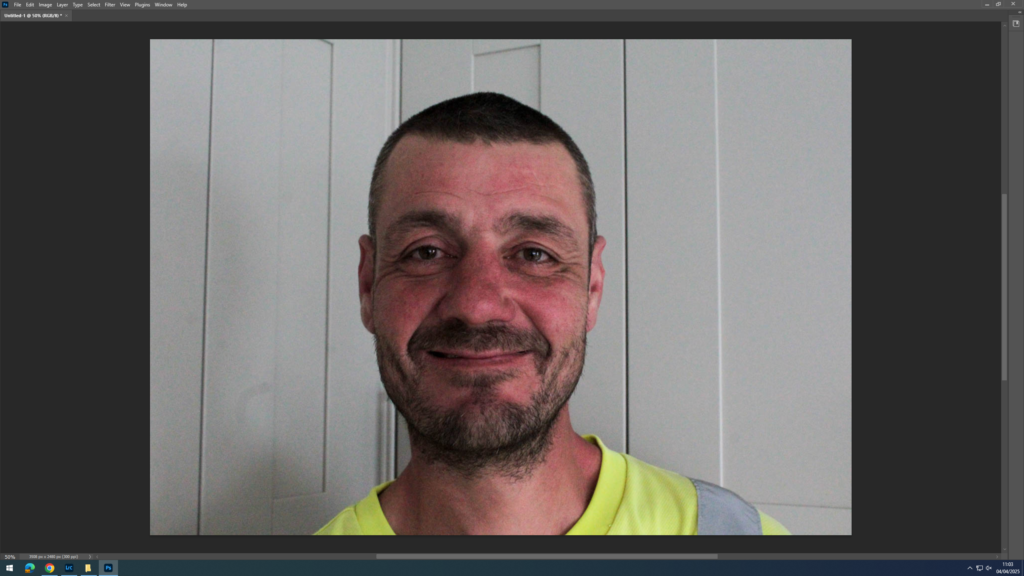
I have also taken an image of my dad that is not related to the archive image, because I want to create another collage using my mums image, my sisters image and his image to show the same concept.
For this photoshoot I have recreated the archive image below:
I have recreated this image using my mum (her daughter), my uncle Josh (her son), and my other uncle Daniel (her son).
Edits
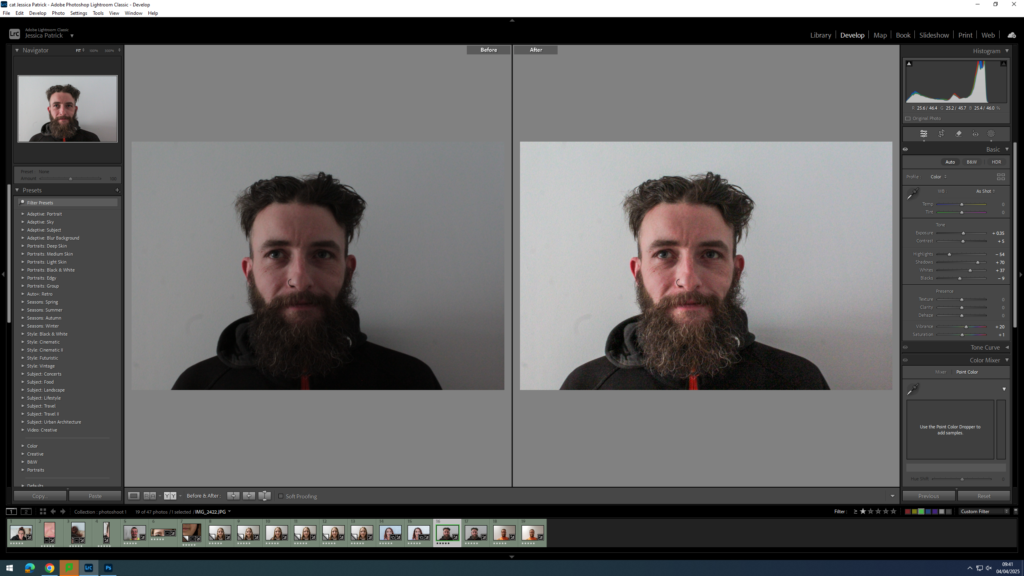
I edited this image by increasing the exposure, contrast, shadows and whites, while decreasing the highlights, blacks and vibrancy. I did this, so that the image would be slightly more exposed with better lighting.
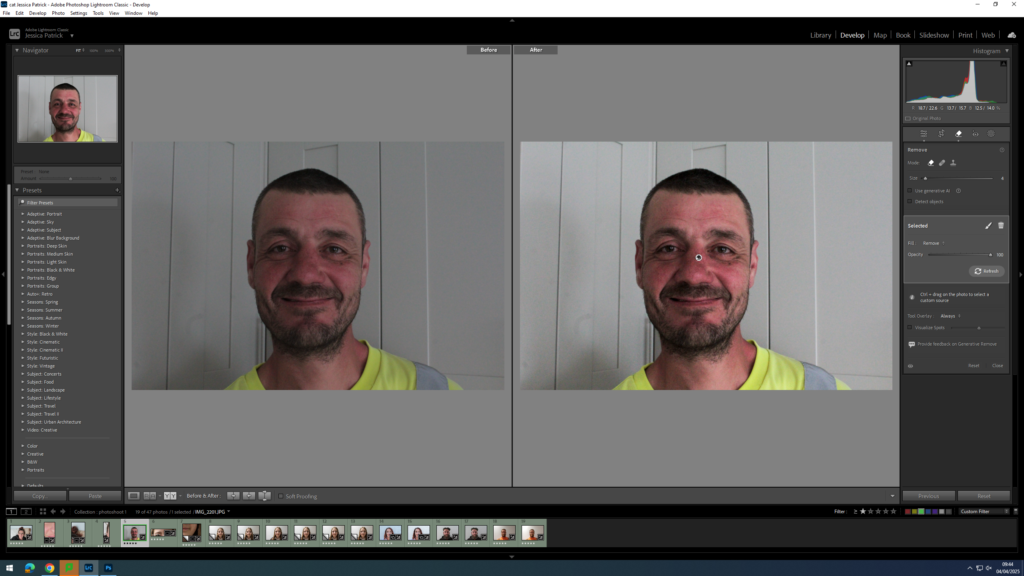
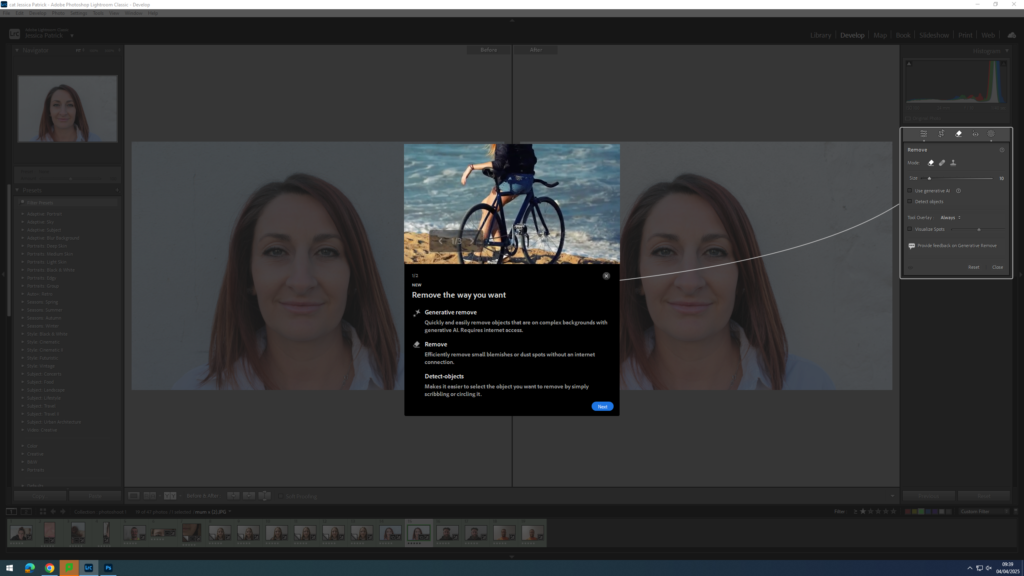
I then attempted to even out my dad’s skin tone slightly, so I used the remove tool to remove any blemishes.
I edited this image by increasing the contrast, shadows, whites, vibrancy and saturation, while decreasing the exposure, highlights and blacks. I did this, so that my mum face would have a slight bit more colour in it.
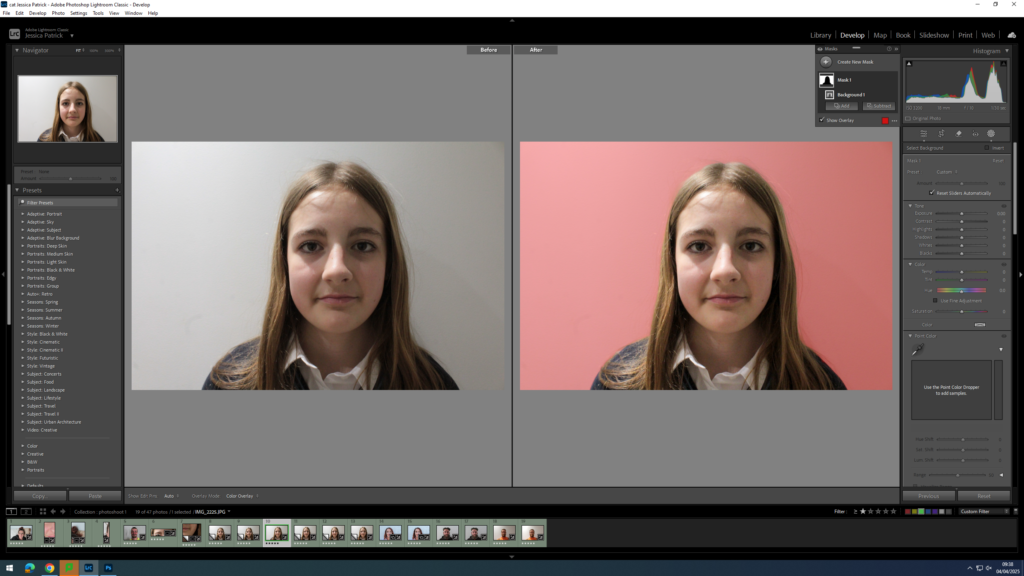
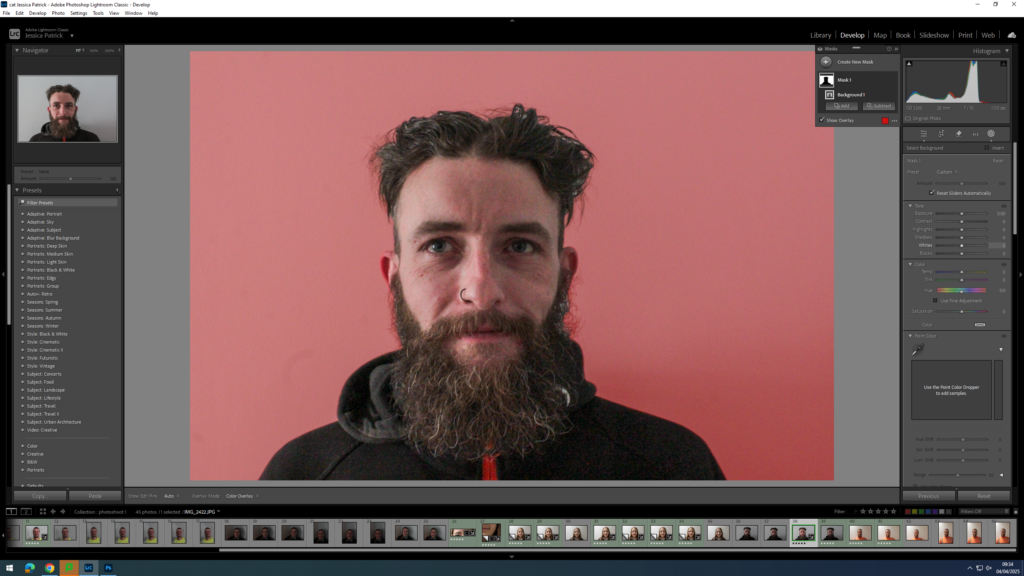
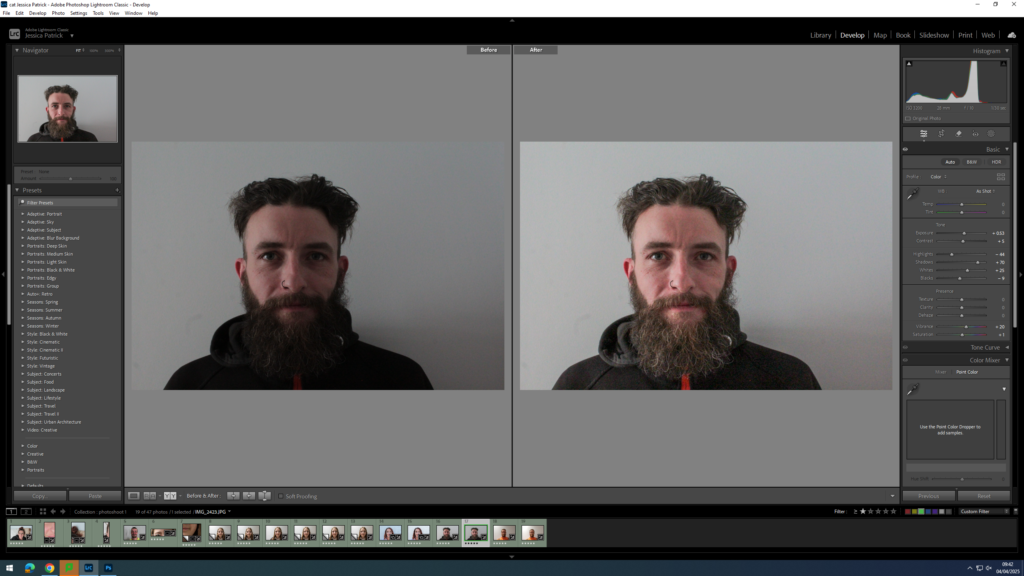
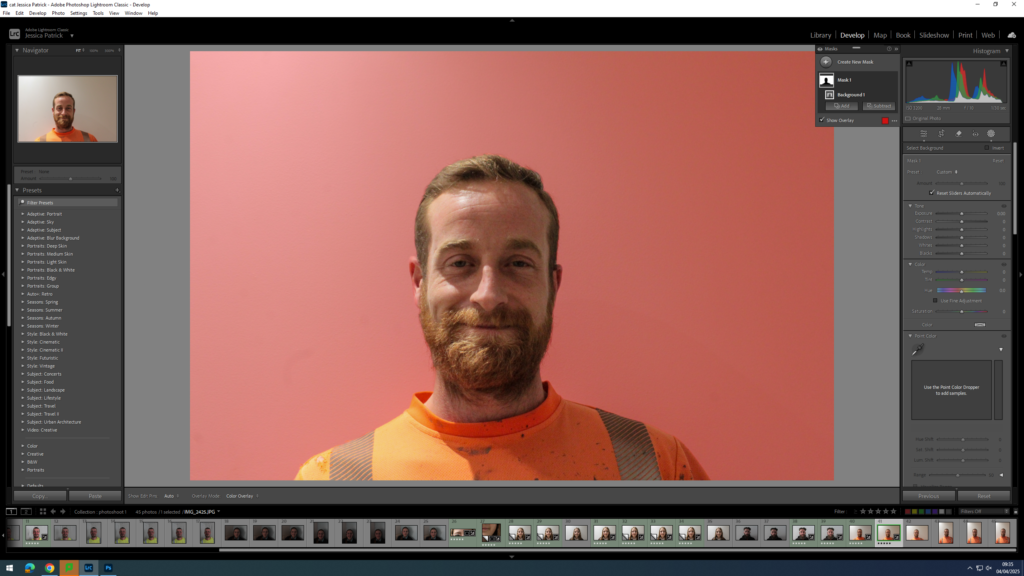
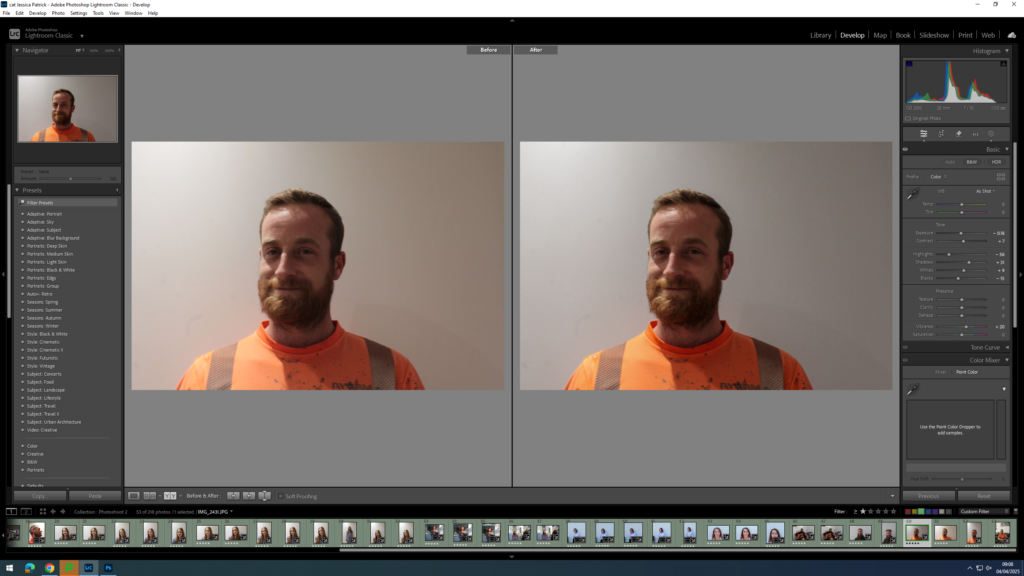
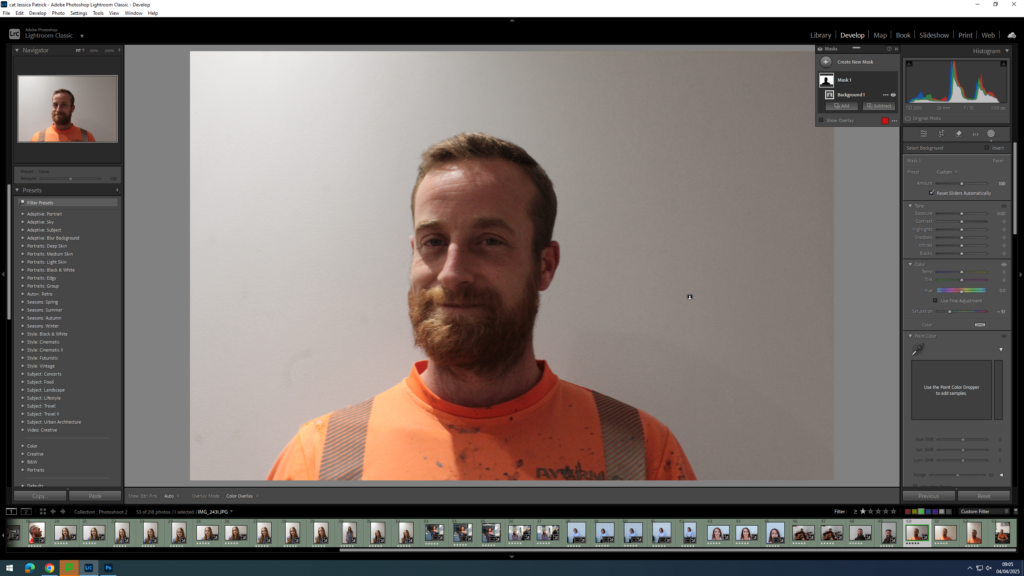
I edited this image by increasing the exposure, contrast, shadows, whites, vibrancy and saturation, while decreasing the highlights and blacks. I did this, so that the lighting was better. Then, I selected the background of the photograph and reduced the saturation and increased the whites, so that the background was less grey.
I edited this image by increasing the exposure, contrast, shadows, whites, vibrancy and saturation, while decreasing the highlights and blacks. I did this, so that the image was more exposed and therefore had better lighting. Then, I selected the background of the image and decreased the saturation and increased the whites, so that the background was less grey.
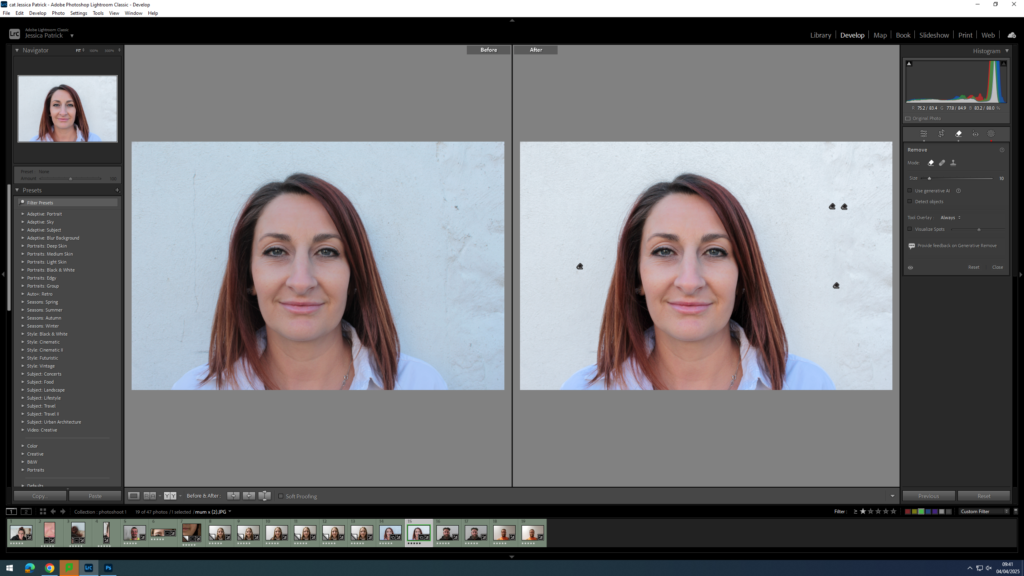
I edited this image increasing the exposure, contrast, shadows, whites, vibrancy and saturation, while decreasing the highlights and blacks. I did this, so that the lighting was slightly better.
Then, I selected the background and decreased the saturation and the whites very slightly and then increased the blacks. I did this, so that the black marks on the white wall were less obvious and so the background would be a brighter white, rather than grey.
Next, I used the remove tool to remove any dark marks left behind on the white background.
I edited this image by increasing the exposure, contrast, shadows, whites, vibrancy and saturation, while decreasing the highlights and blacks. I did this, so that the image had better lighting as it was slightly more exposed. Then, I selected the background of the image and decreased the saturation and increased the whites in order to create a more white background, rather than grey.
I edited this image by increasing the exposure, contrast, shadows, whites, vibrancy and saturation, while decreasing the highlights and blacks. I did this, so that the image had better lighting as it was slightly more exposed. Then, I selected the background of the image and increased the whites in order to create a more white background, rather than grey.
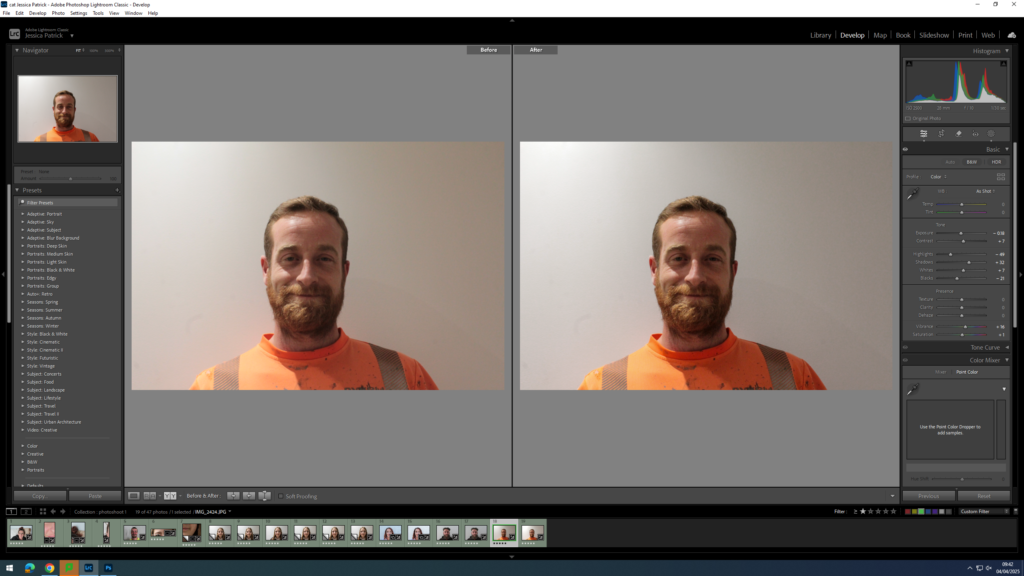
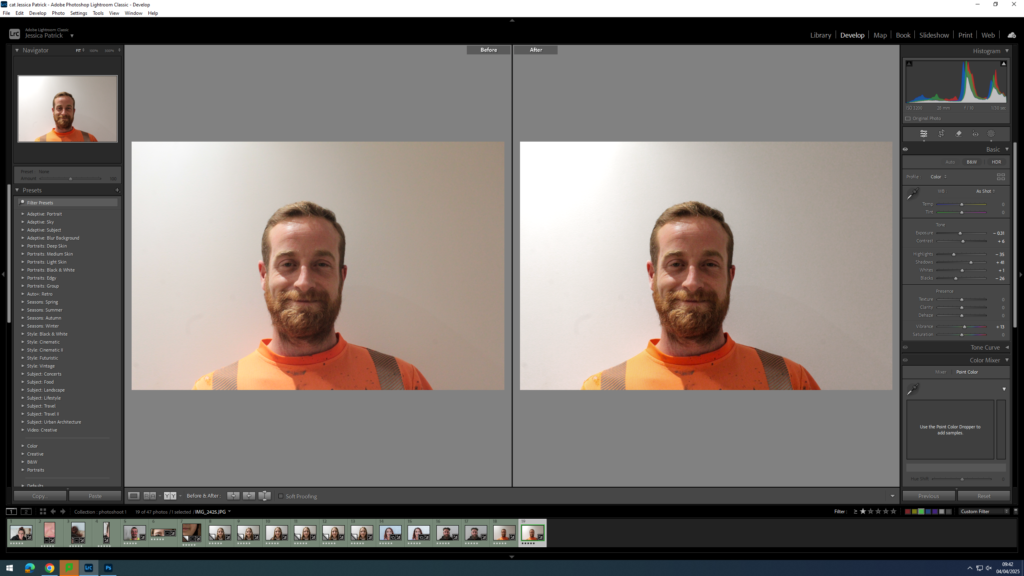
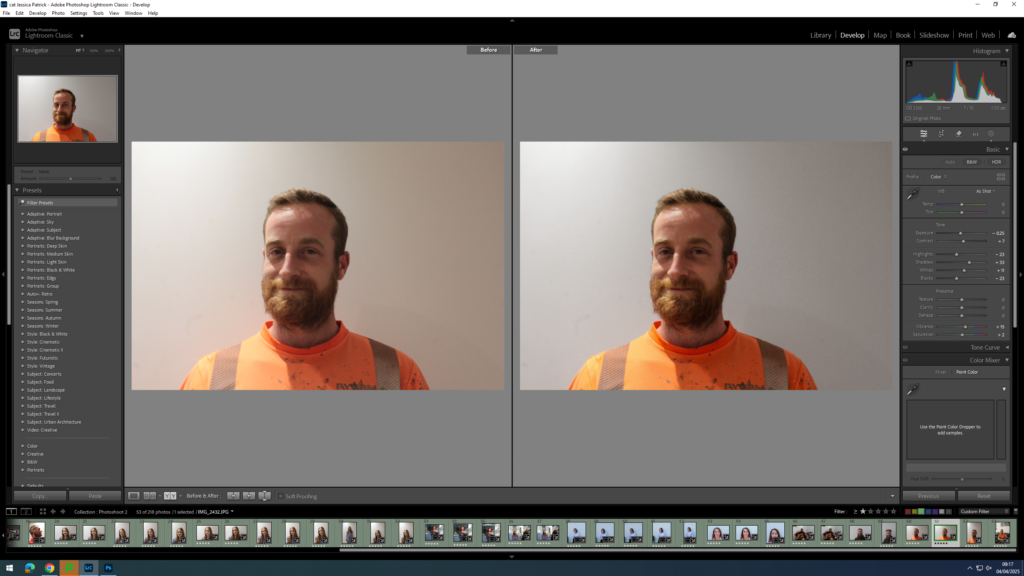
I edited this image by increasing the contrast, shadows, whites, vibrancy and saturation, while decreasing the exposure, highlights and blacks. I did this, so that the lighting would be slightly better and less warm. Then, I selected the background and decreased the saturation and increased the whites, so that the wall was slightly less orange, due to the warm lighting and the reflection of the orange shirt.
I edited this image by increasing the contrast, shadows, whites and vibrancy, while decreasing the exposure, highlights and blacks. I did this, so that the lighting would be slightly less warm. Then, I selected the background and decreased the saturation and increased the whites, so that the wall was slightly less orange, due to the warm lighting and the reflection of the orange shirt.
For this photoshoot I am using an archive image of my mum’s mum (Sarah). I then plan to recreate this image with my 2 uncles (her sons), just like I have done with my mum. I am doing this, so that I can present similar physical features between them all, so that I can really stress how everyone in a family union are linked together through blood and DNA and how that bond can never be broken.
Archive I am referring to:
To present these similar characteristics I am going to create a collage of the images I take similarly to the image below:
In order to do this I am going to use Lightroom to edit my photographs and then use photoshop to combine them all together like so. I am going to use facial features from my two uncles, my mum and their mum to create a face.
This will help me present their similar facial features. The collage also metaphors the union of the family, as all the pieces of my photographs are unified together, just how family is.
My sister in 2017My sister in 2025My sister in 2025
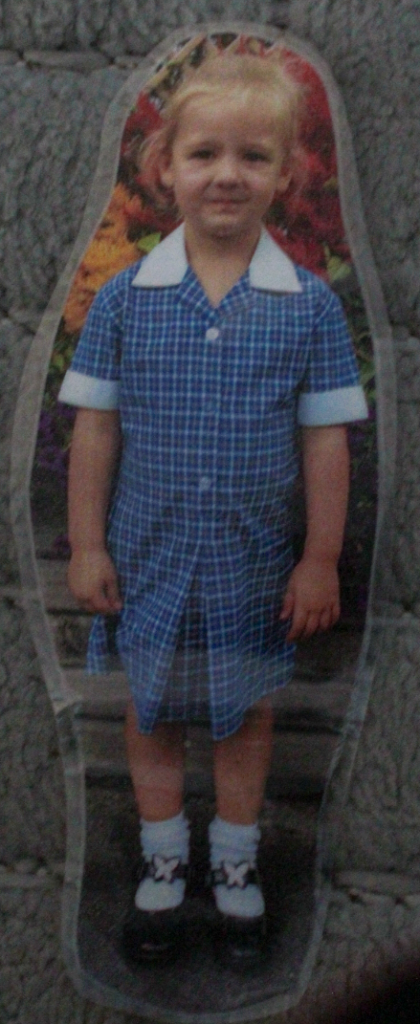
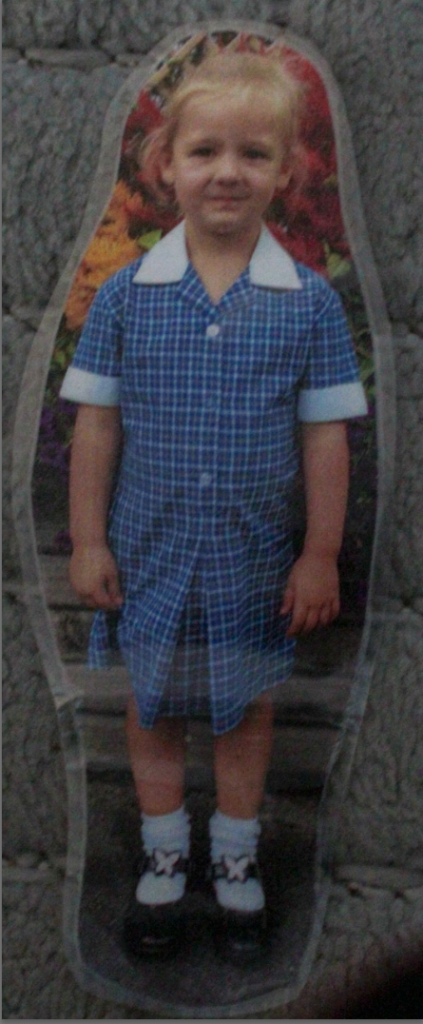
For this photo I had my sister wear her new secondary school uniform, but I also had her wear the old primary uniform as well.
My dad in 2006My dad in 2025My dad in 2006My dad in 2025My dad in 2006My dad in 2025My dad in 2007My dad in 2025My dad in 2007My dad in 2025My dad in 2006My dad in 2025Me in 2012My sister in 2025My sister in 2025My sister in 2025My sister in 2025My sister in 2025
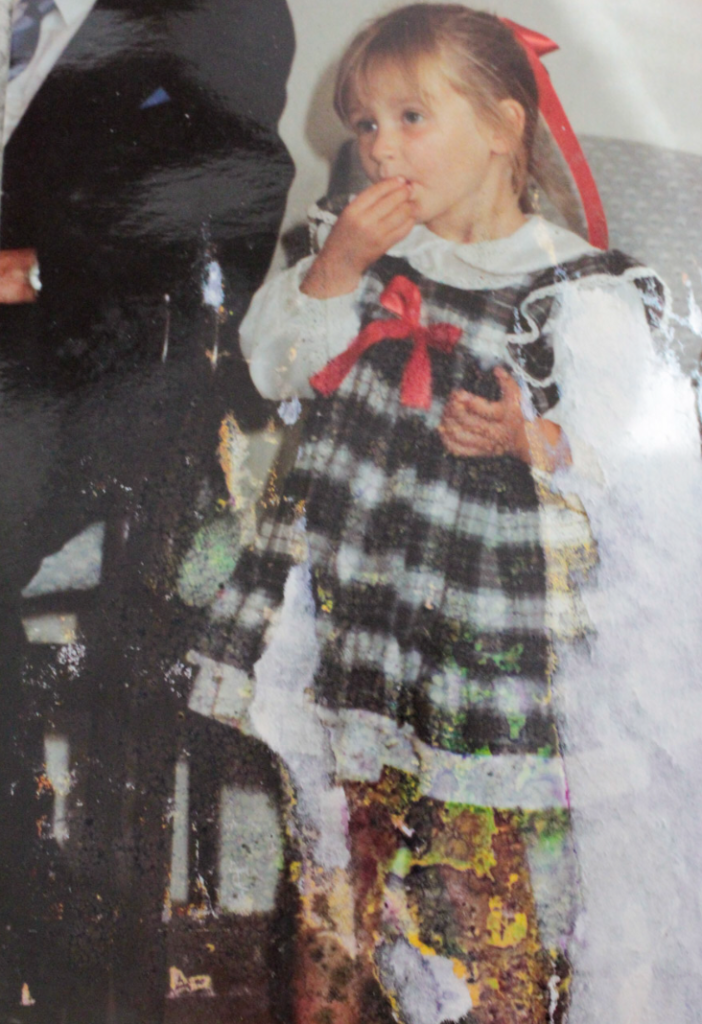
For this photograph, I had my sister wear her Summer uniform, which is similar to the primary uniform I am wearing in the archive. I also had her wear my old primary school uniform, which has signatures on from everyone I went to primary with.
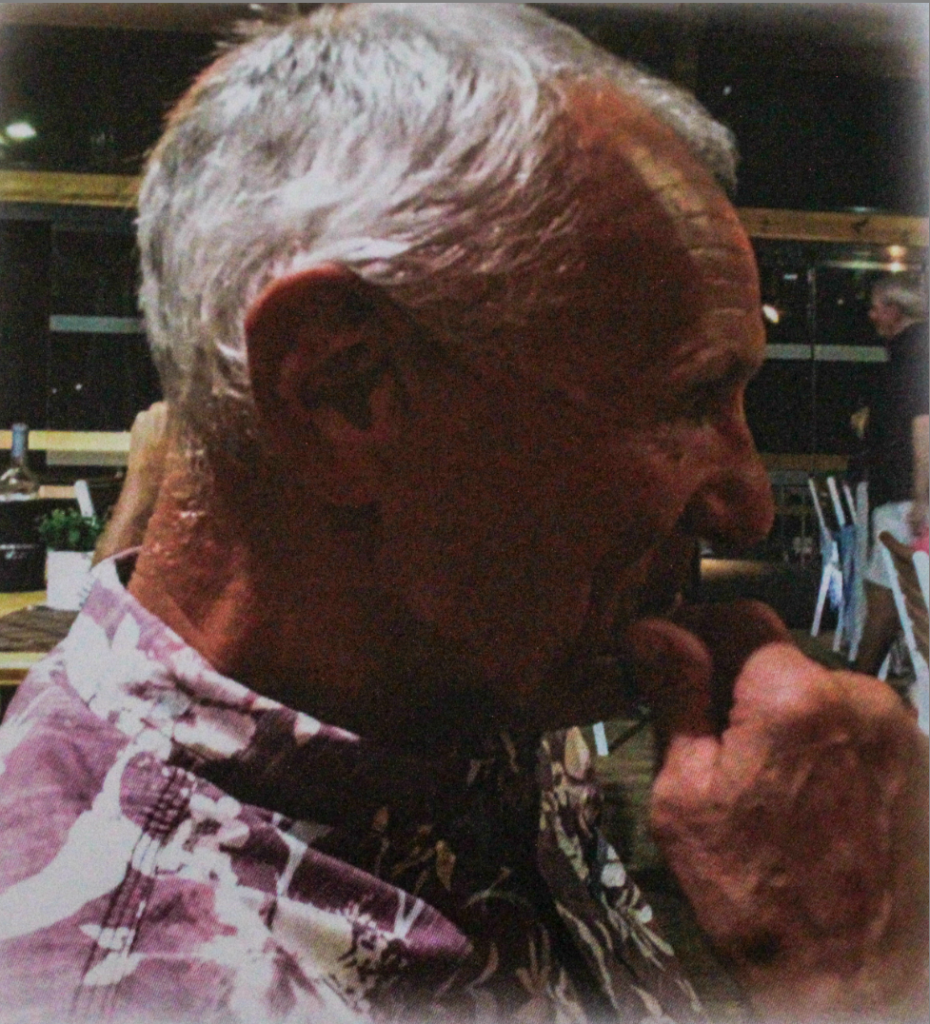
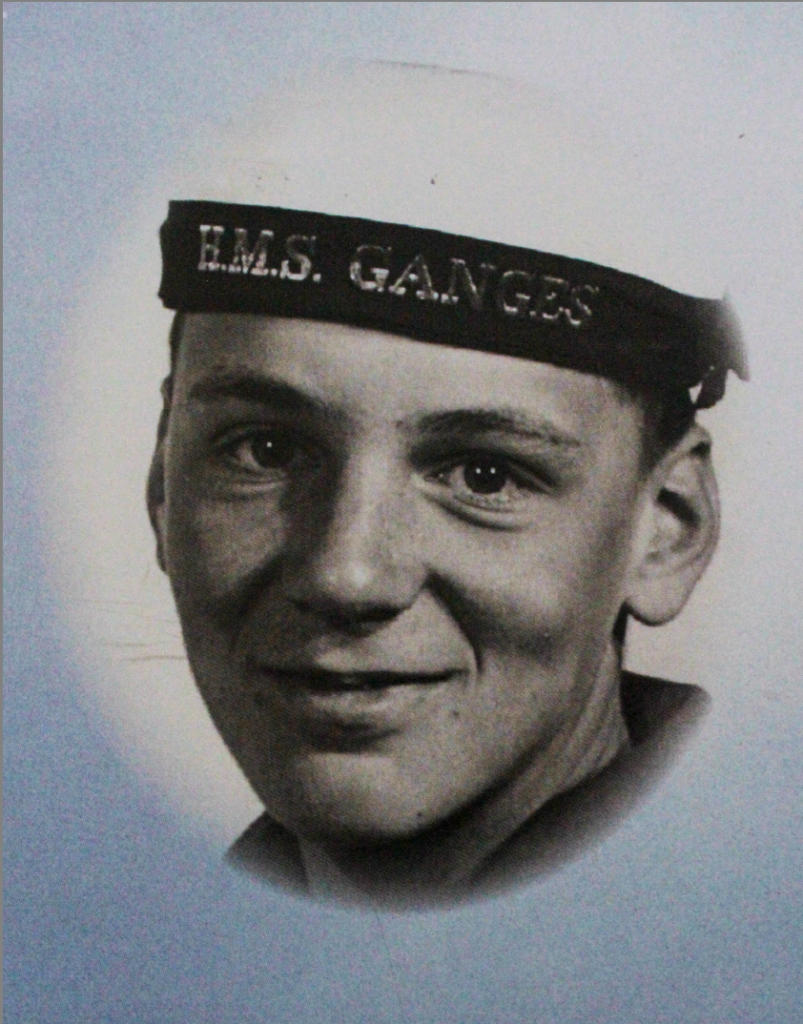
Grandad Tom in 2019My dad in 2025Grandad Tom in 1967 aged 17My mum’s mum in 2006 aged 38My mum in 2025 aged 39My mum in 1990 at 5 years oldMy mum in 2025 at 39 years oldMy mum in 1990 aged 5My mum in 2025 aged 39My mum in 1989 aged 4My mum in 2025 aged 39My uncle in year 6 aged 10My uncle in 2025 aged 36My uncle in 2025 aged 36My uncle Dan age 6My uncle in 2025 age 34My uncle in 2025 age 34My uncle aged 9My uncle aged 34My uncle Josh in 2006My uncle in 2025My uncle in 2025My mum and dad in 2006My mum and dad in 2025
Analysis of 2 Images
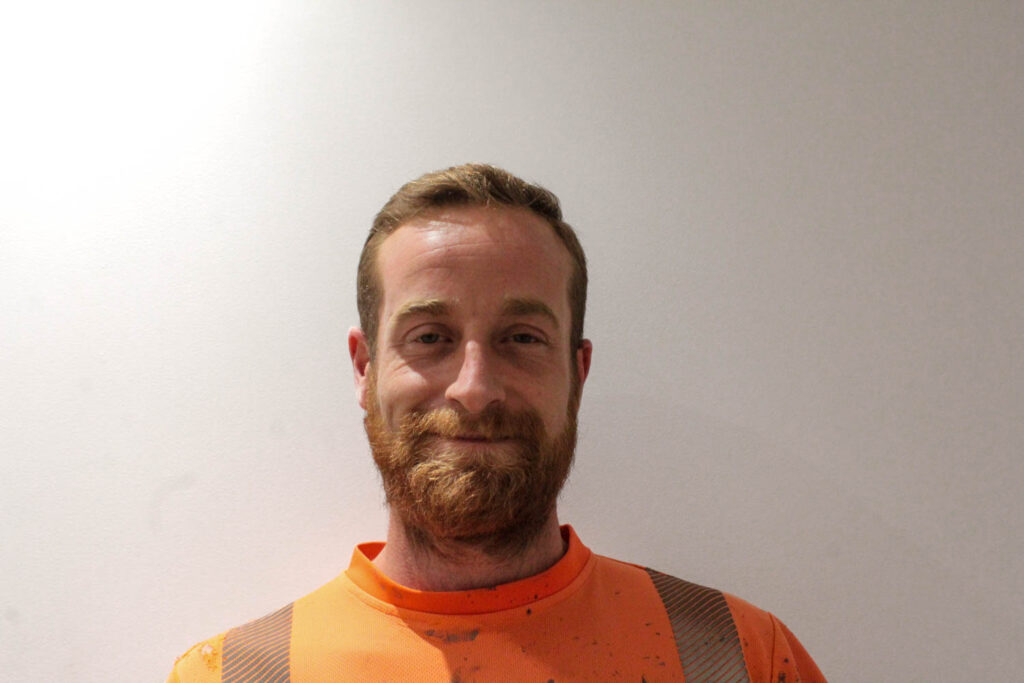
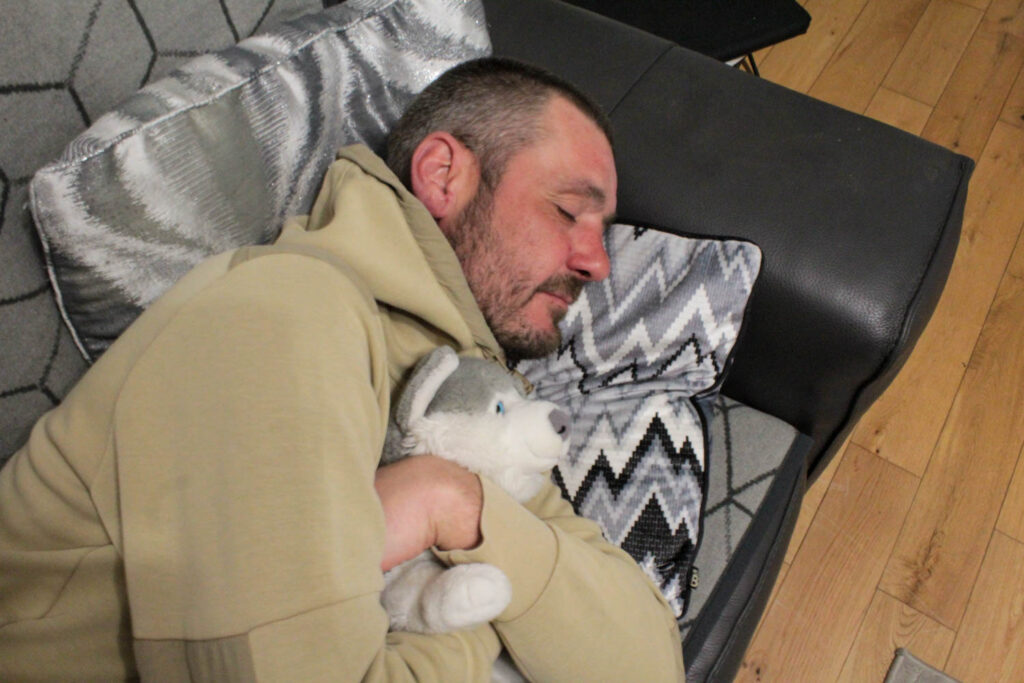
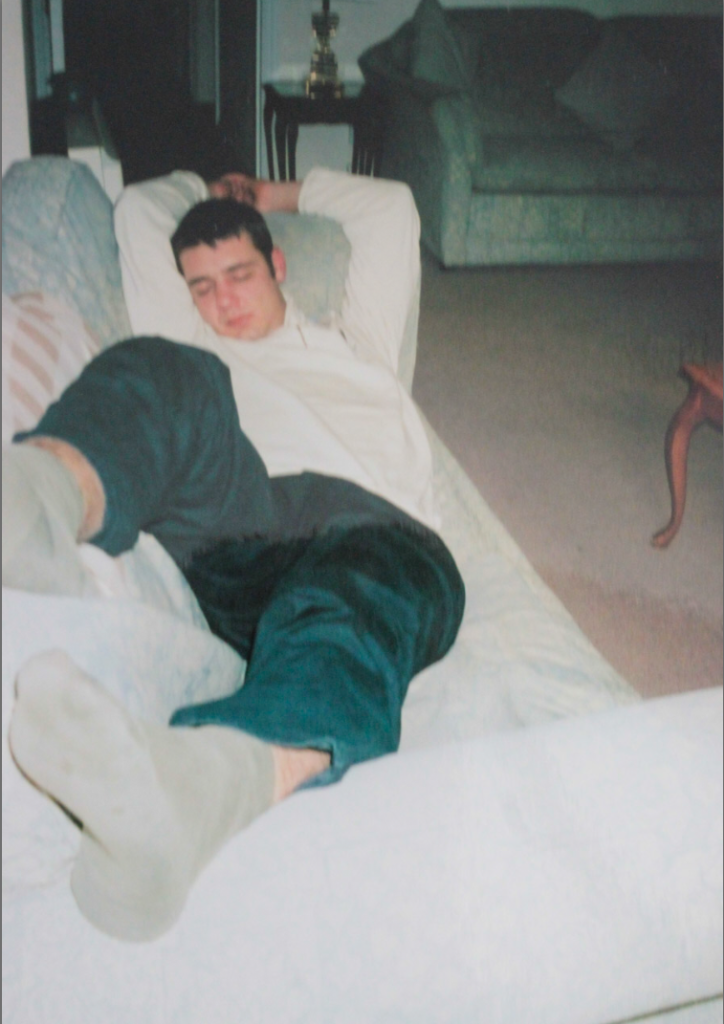
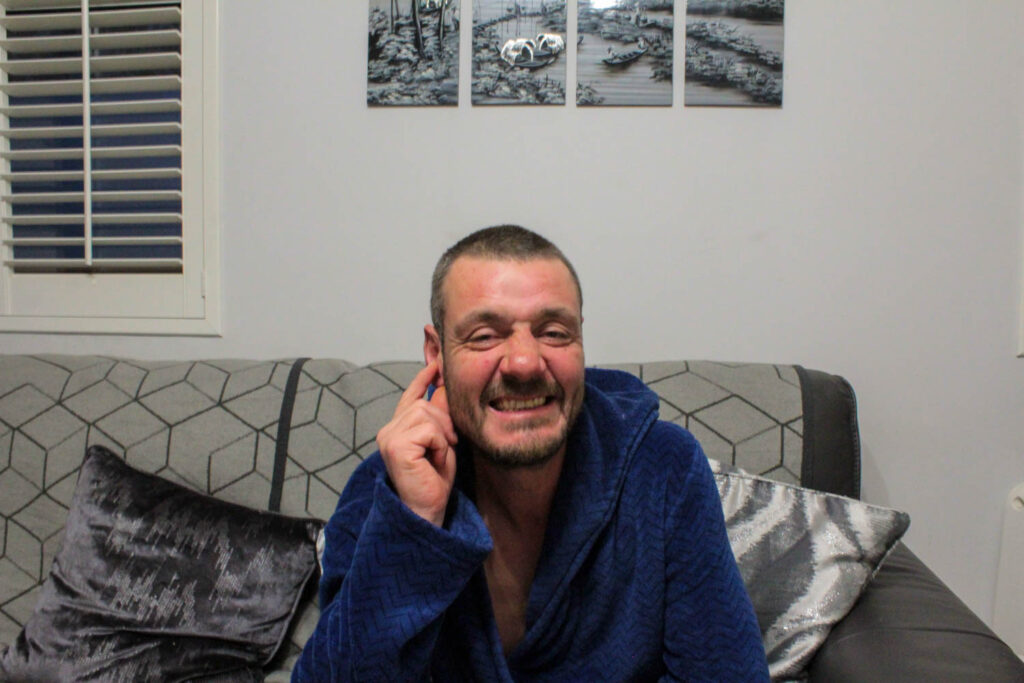
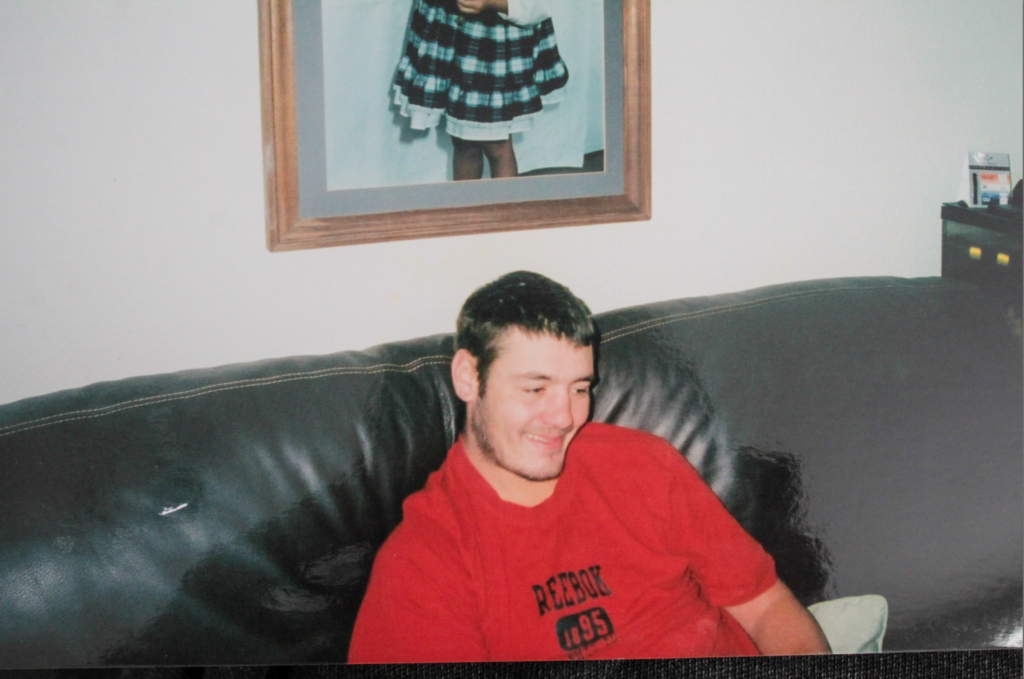
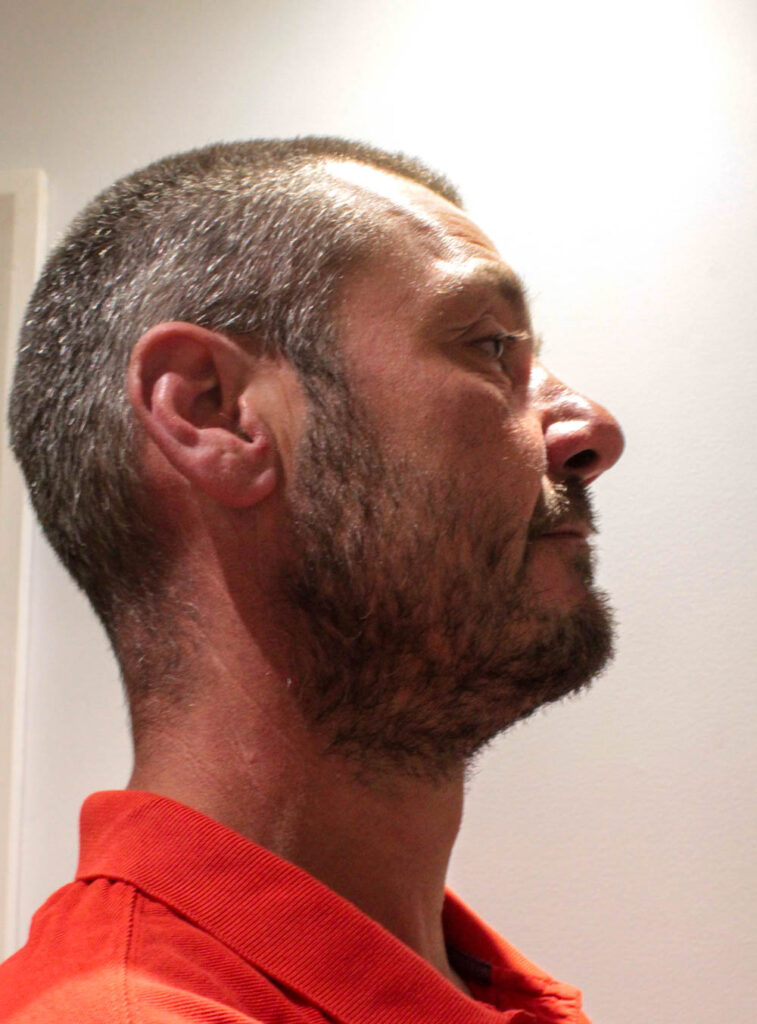
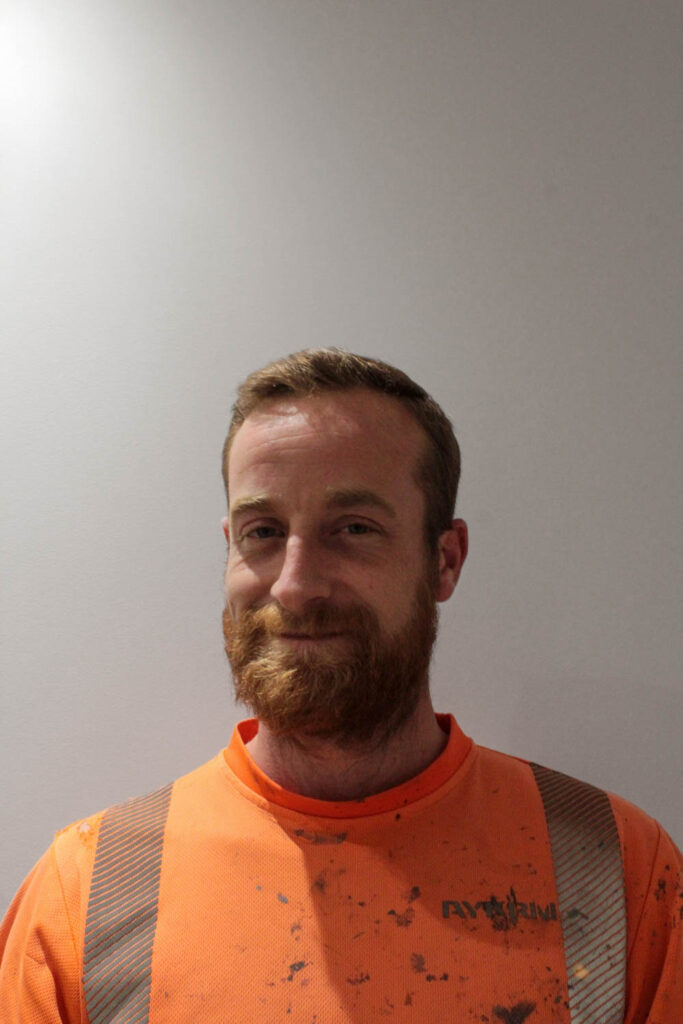
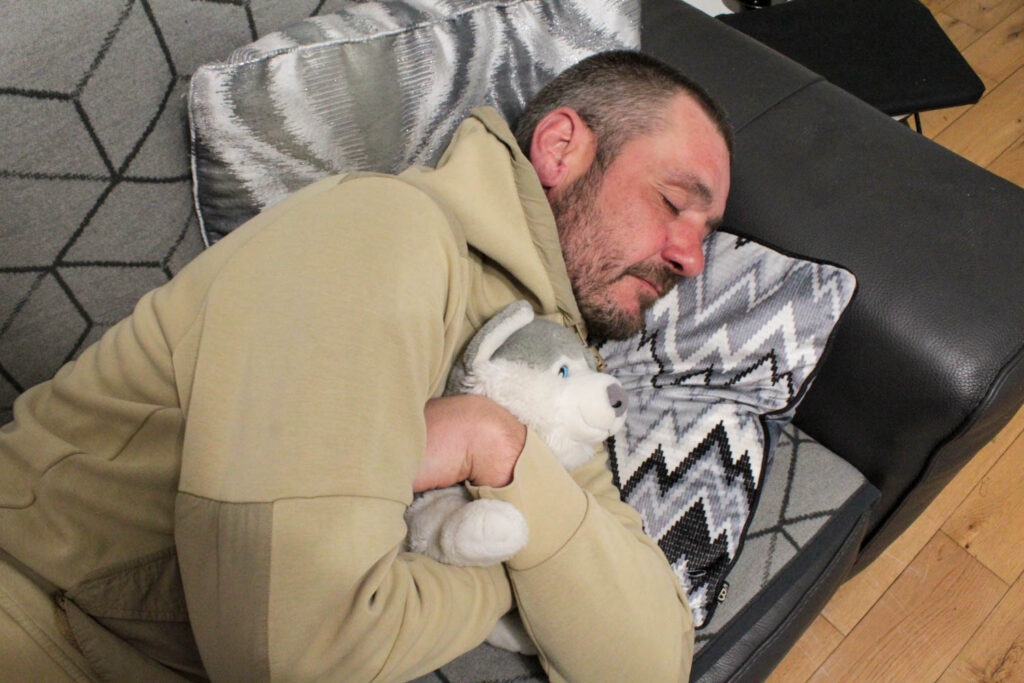
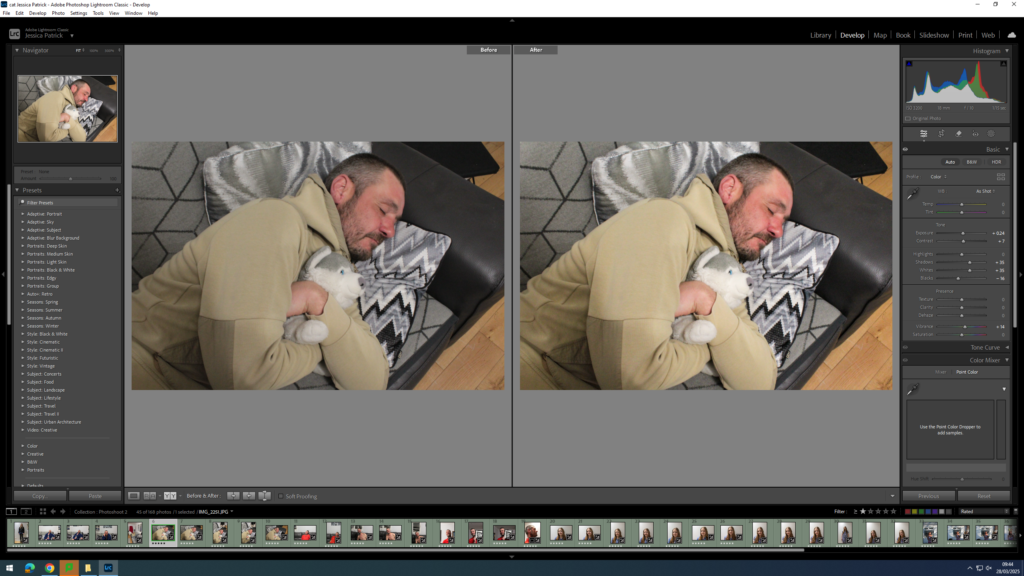
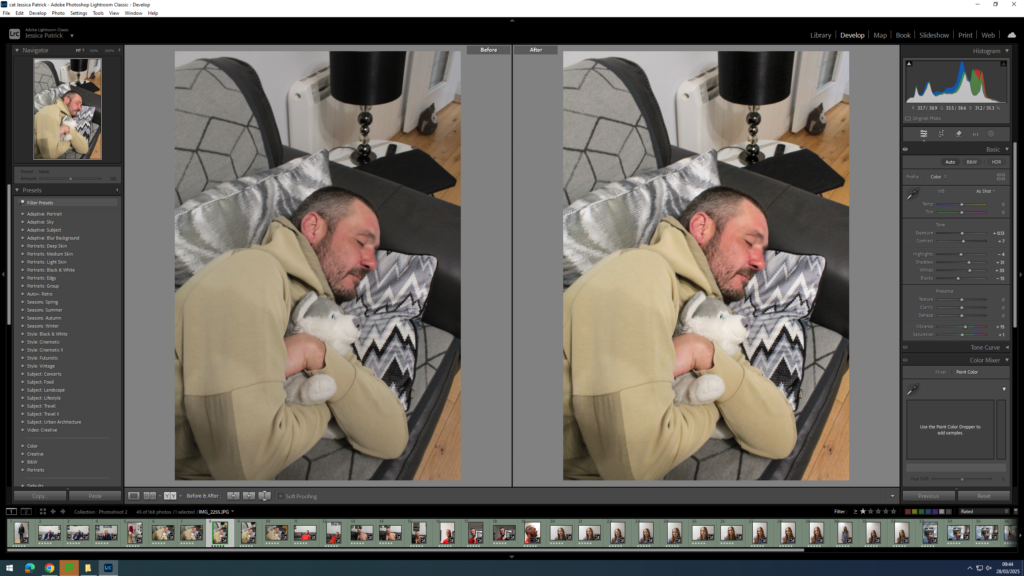
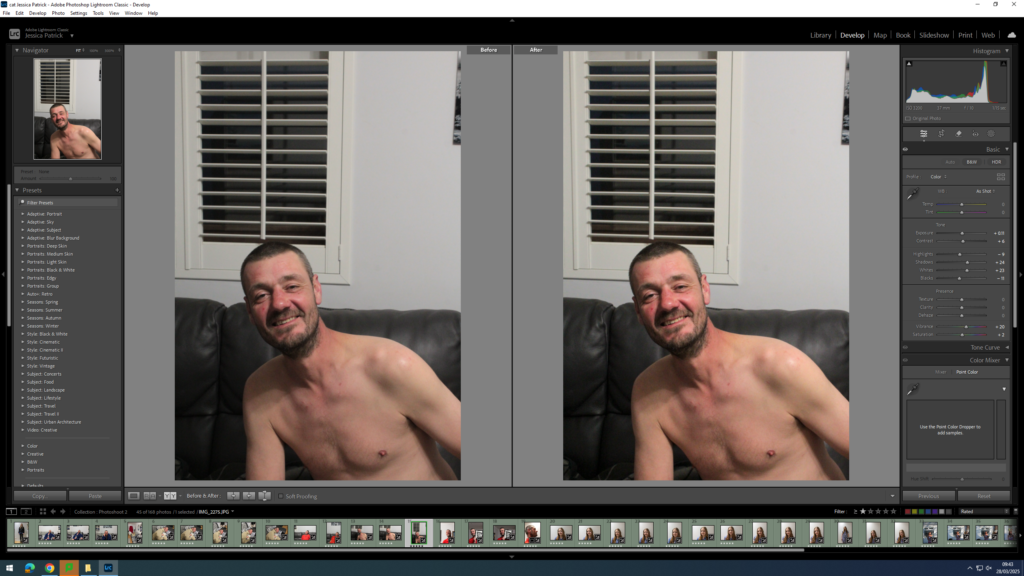
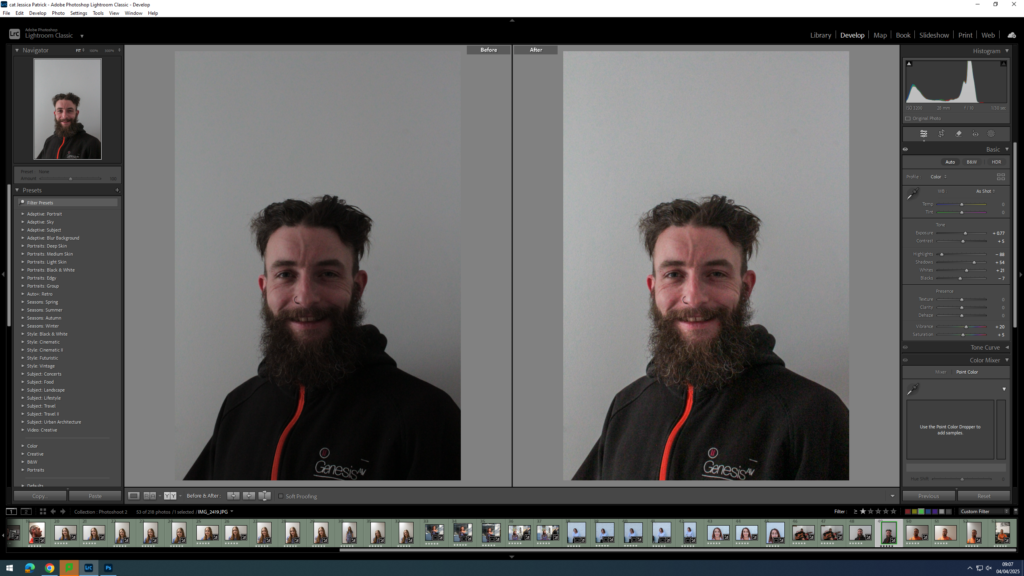
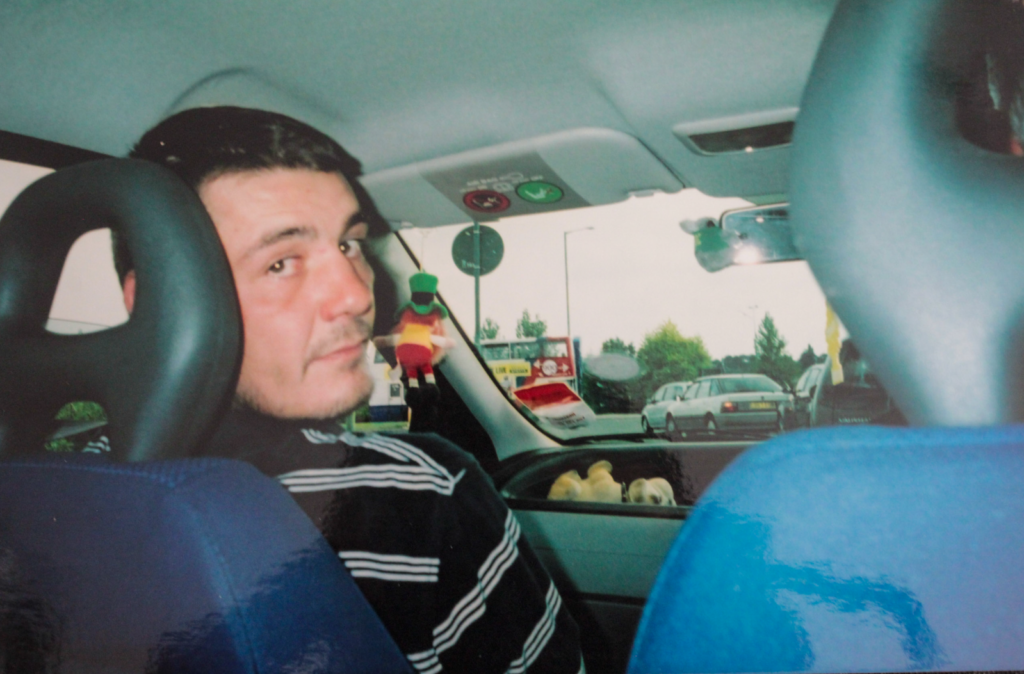
The lighting used in my image is artificial lighting. This photograph has high levels of control, because it is a staged image, where I have manipulated the position of my dad, as well as myself with the camera.
F-stop= f/10
Exposure time= 1/15 sec
ISO speed= ISO-3200
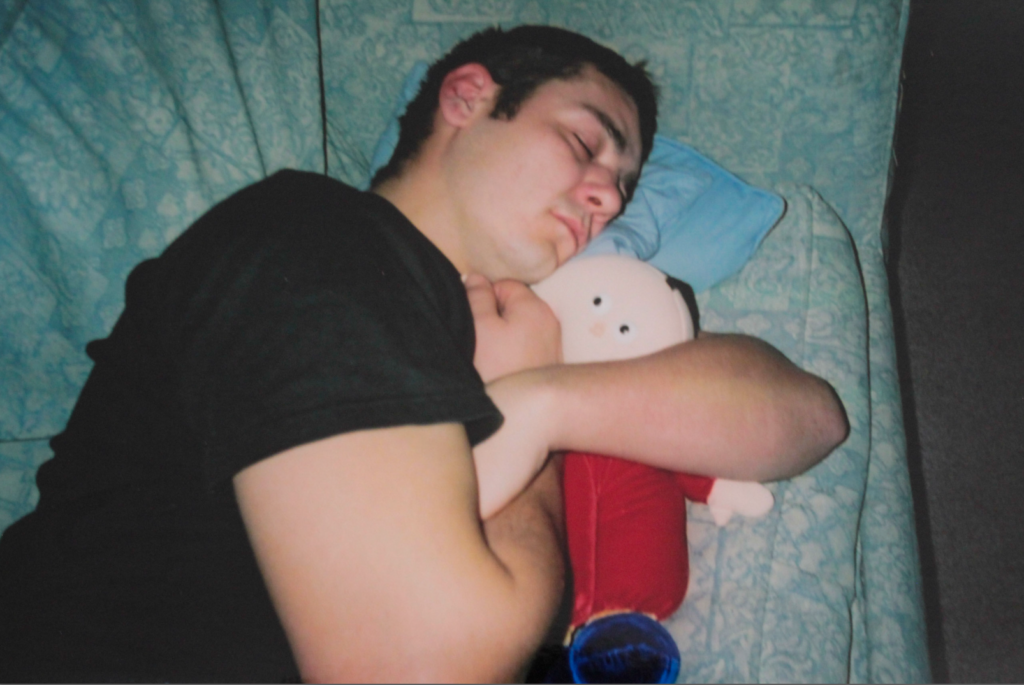
The colours in this image include more neutral tones, such as black, white, grey and beige. The colour of the couch is different to my archive photo, due to us having a new couch 18 years later. The teddy my dad is holding is also a different teddy, due to us no longer owning the original teddy and the colour top my dad is wearing is also a different colour, which I would correct if I were to do this again.
This image has lots of light and dark tones, due to all the white and black in the images. This creates contrast. There is also a lot of shapes and patterns in this image, due to the patterned pillows and blanket, which is on our couch.
The composition of this image is extremely similar to the original archive, as this was what I was aiming to achieve. The main viewpoint of this image is my dad holding a teddy and he is in the centre of the frame.
This photograph presents my father 18 years after the original archive was taken and presents how he has grown and changed since the archive was taken. It also represents things that are still similar about him from when he was younger. He was 26 years old in the first archive and he is now 44 years old today. This image also presents how our home is different, as we now have a new couch as the background.
The reason I have chose to recreate this archive of my dad is because I am exploring my family through archives and my own photographs, so that I can explore the union that is my family. I am exploring archives, so that I can present how our family union has changed and grown and how we are all linked together through blood and DNA. I have chosen to use archives from years ago, so that I can present how even though the individuals have grown and changed the family union stays strong and unbroken.
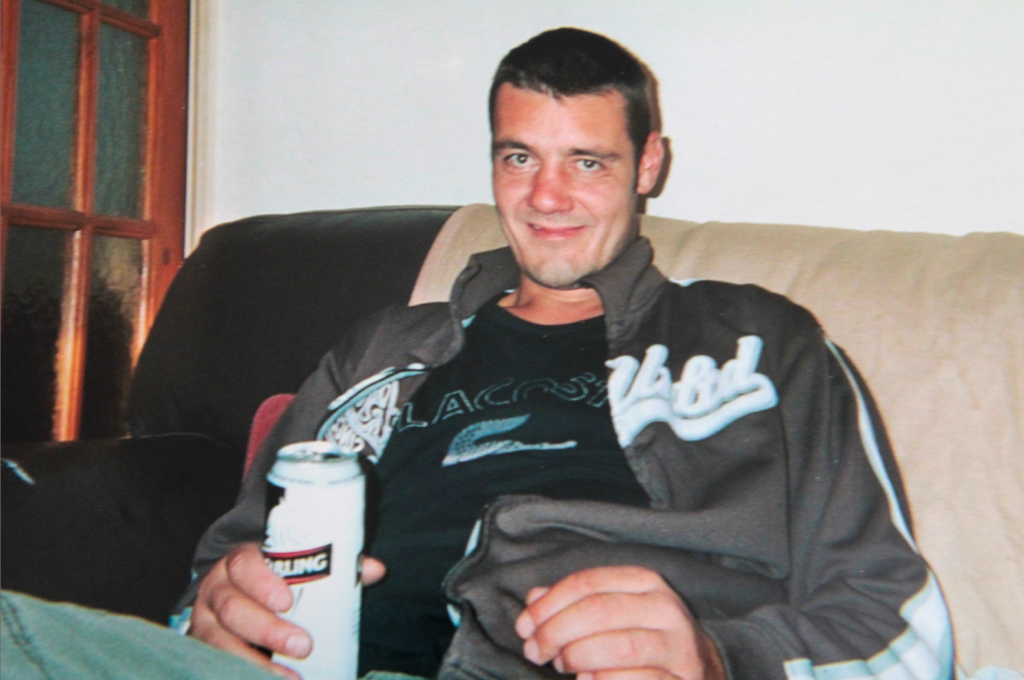
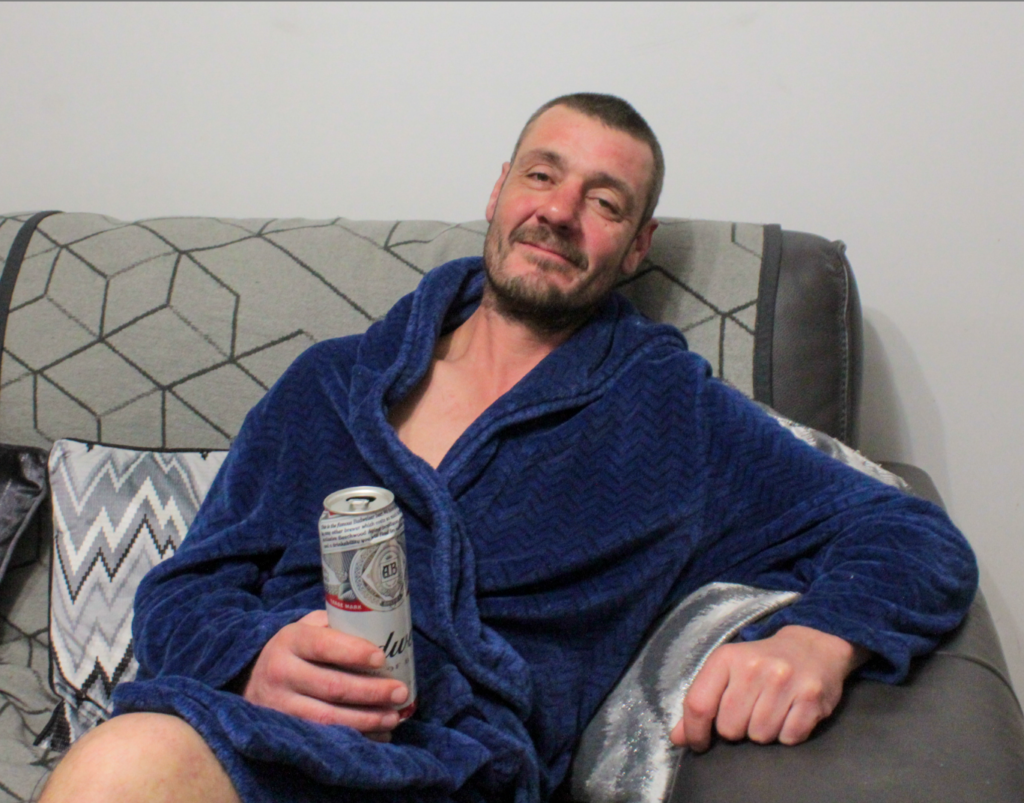
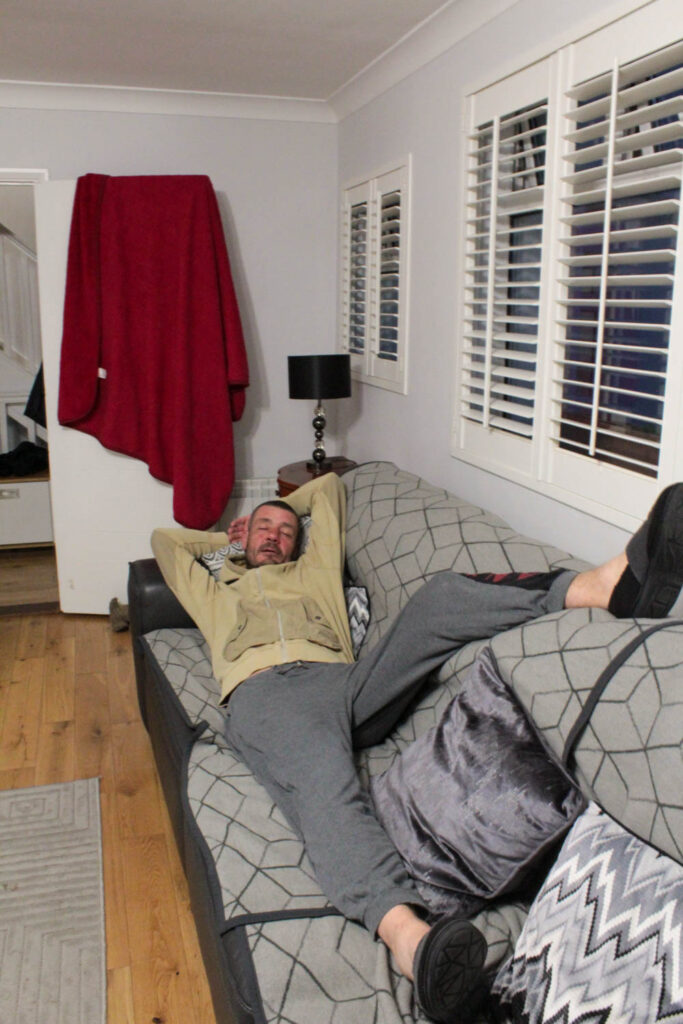
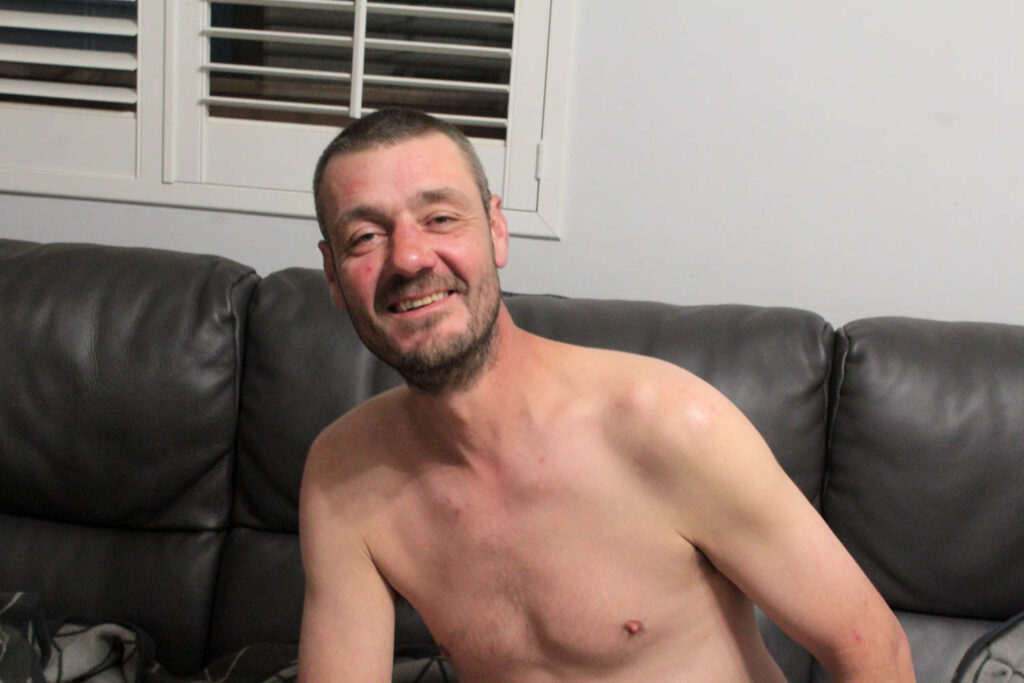
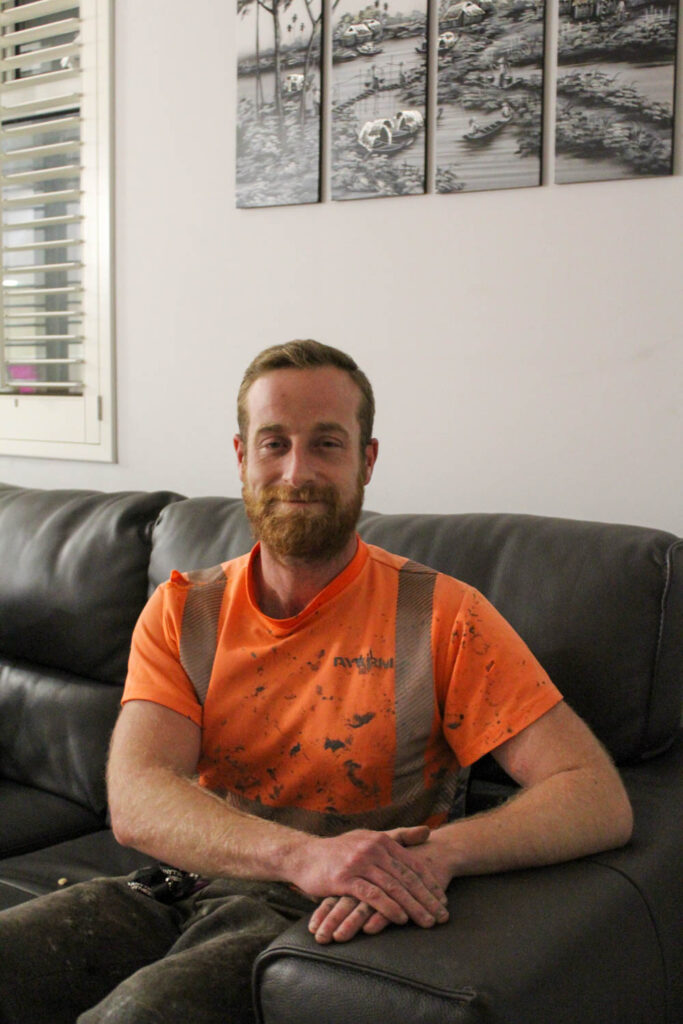
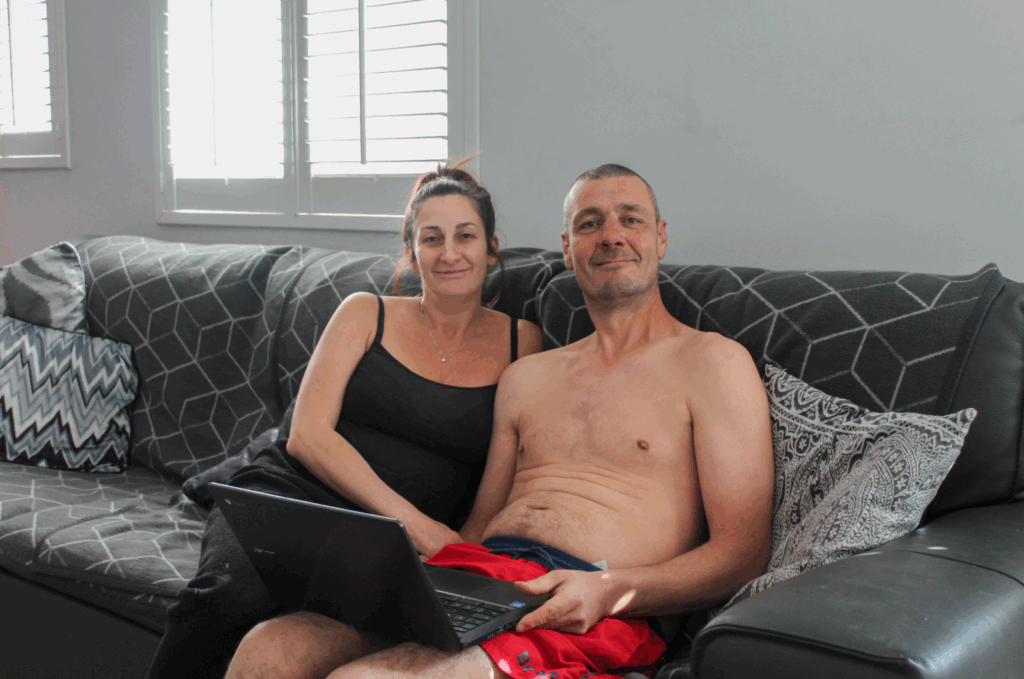
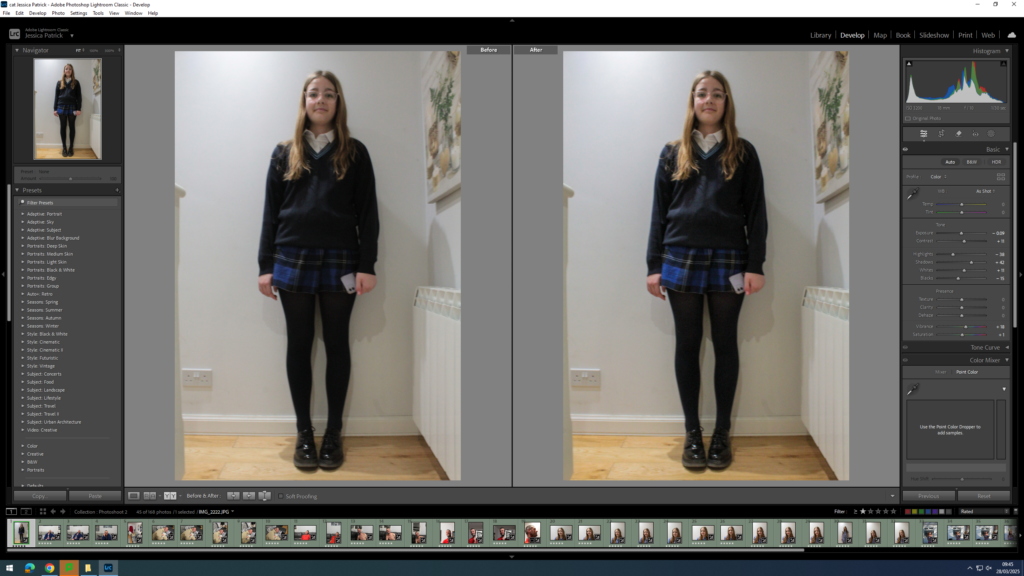
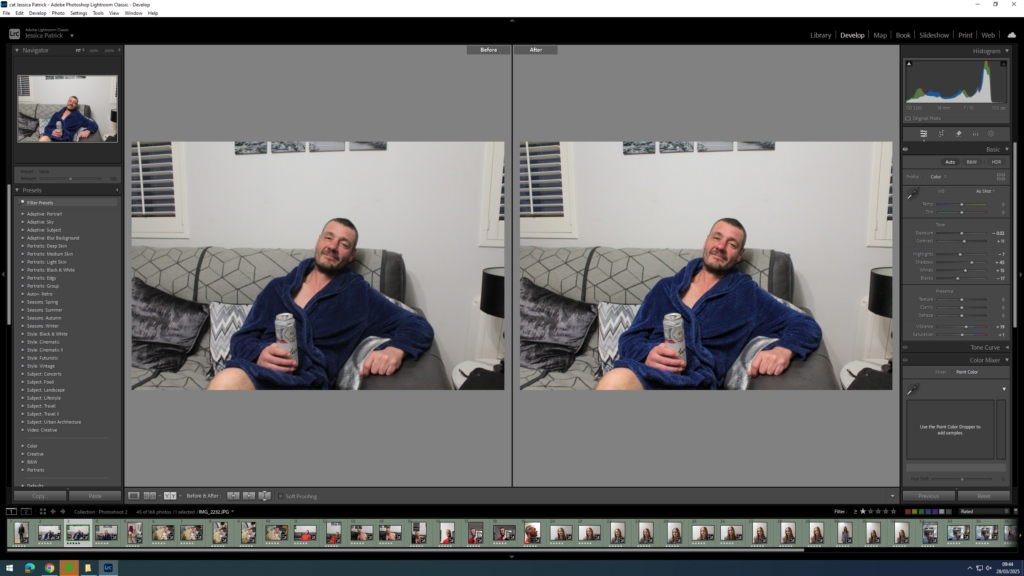
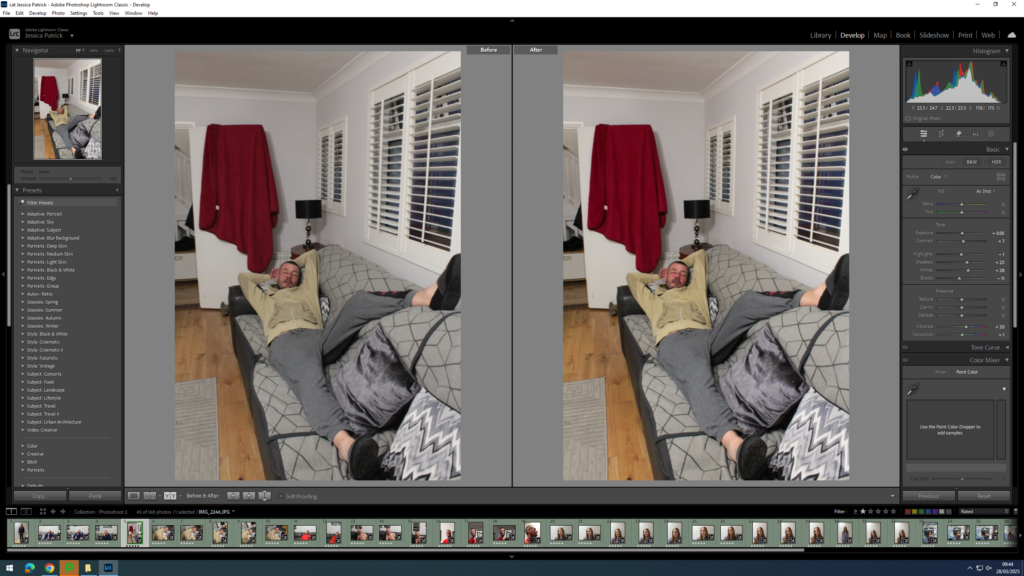
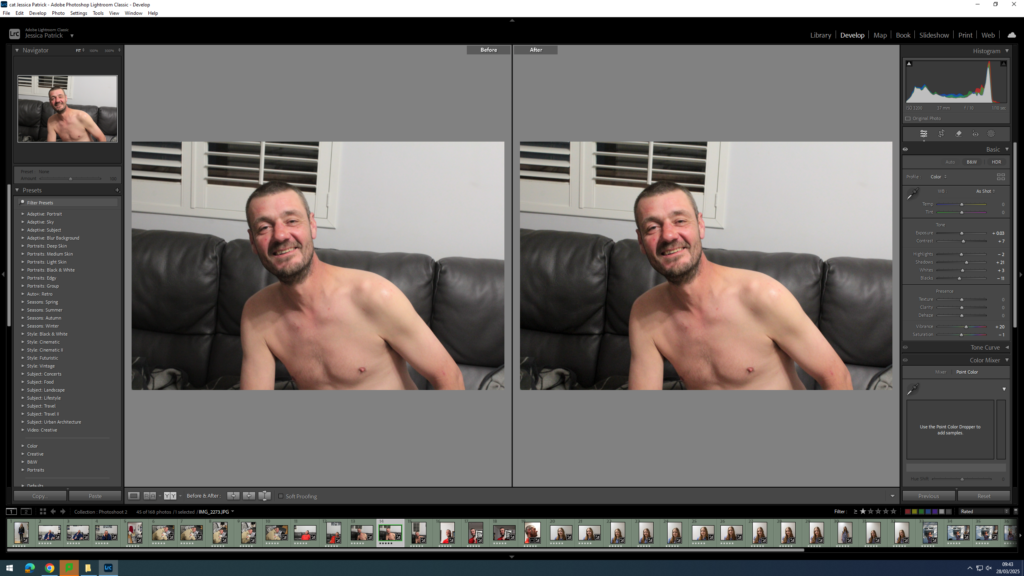
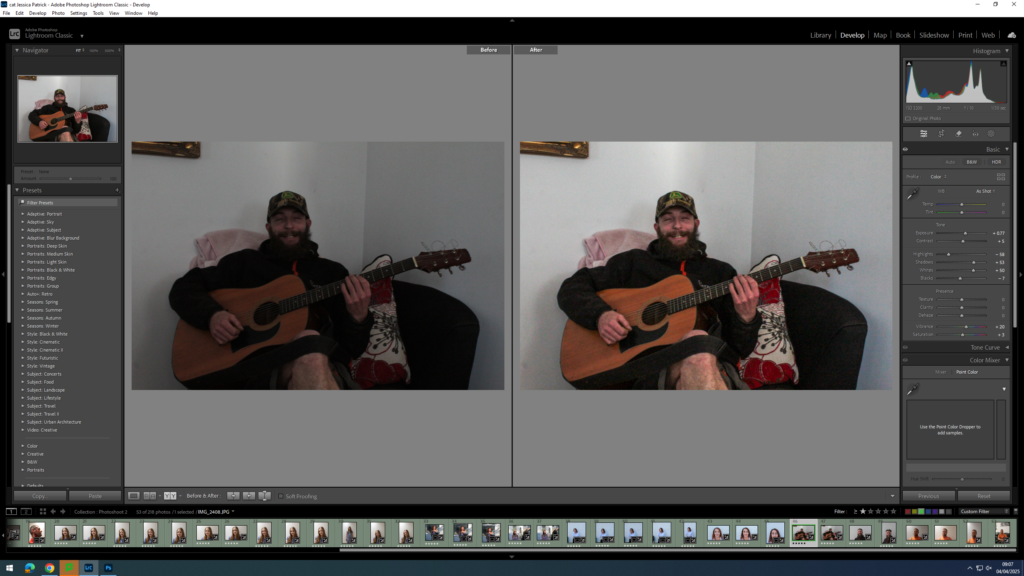
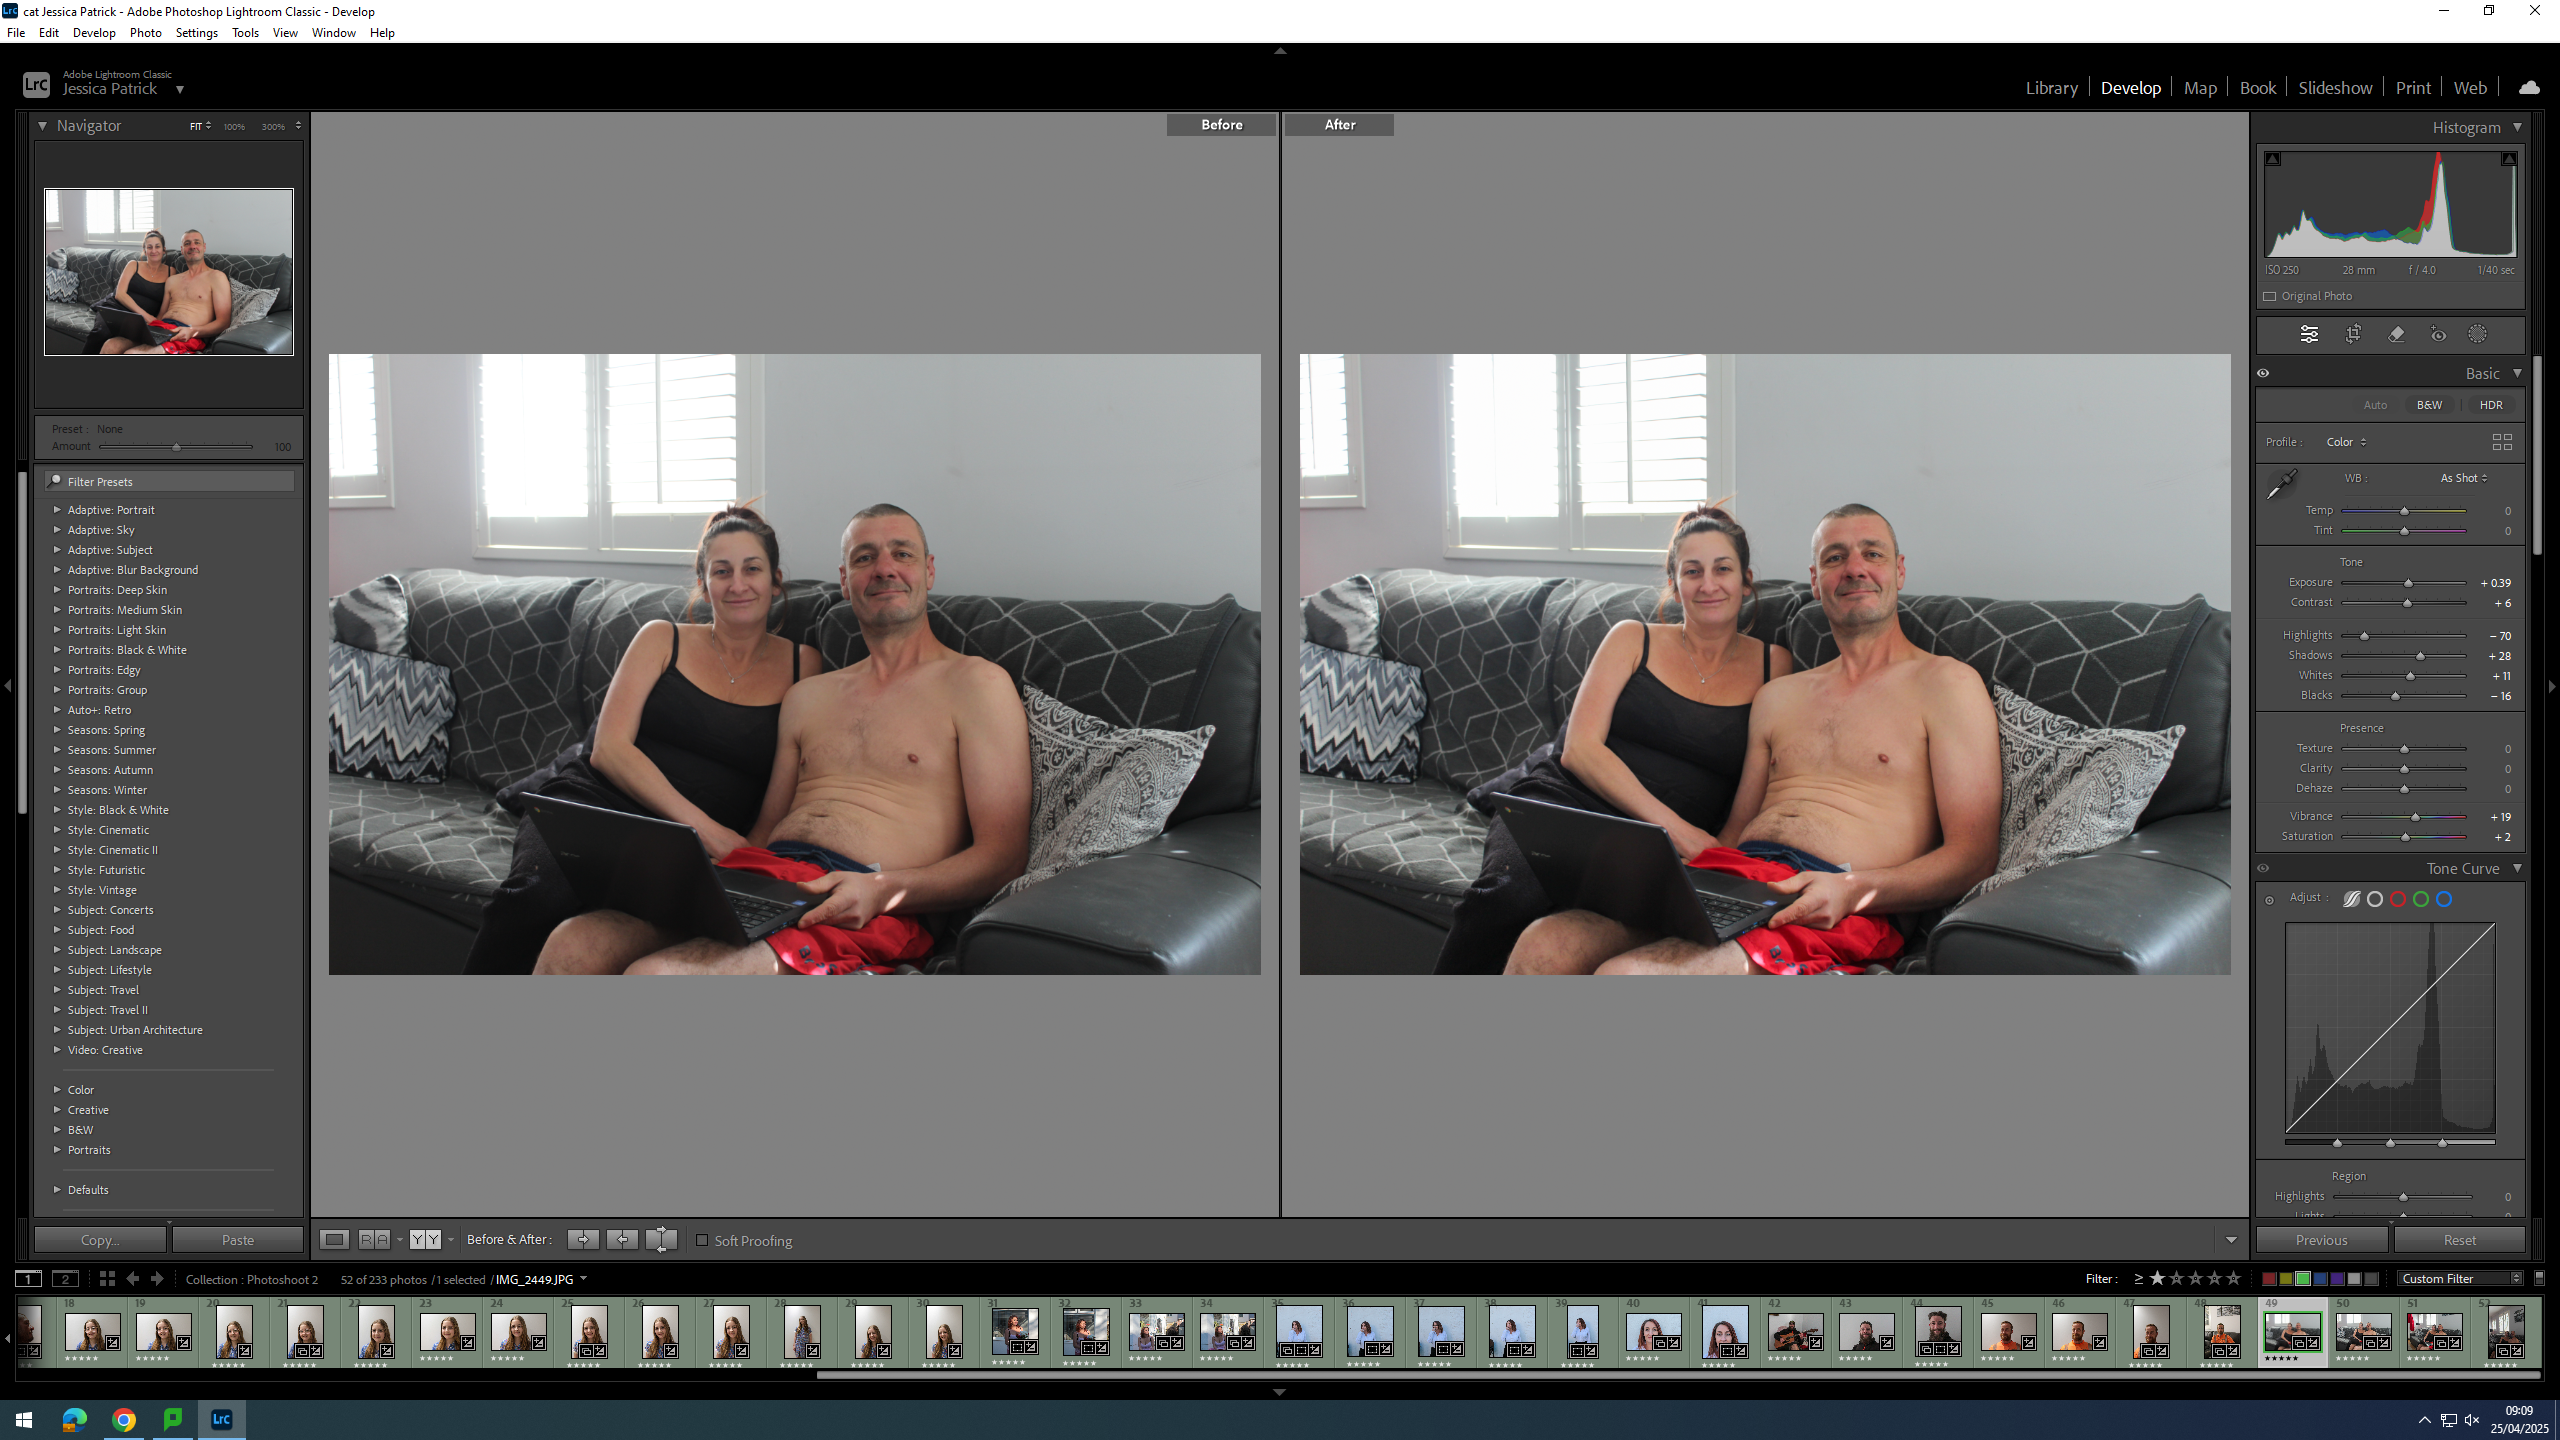
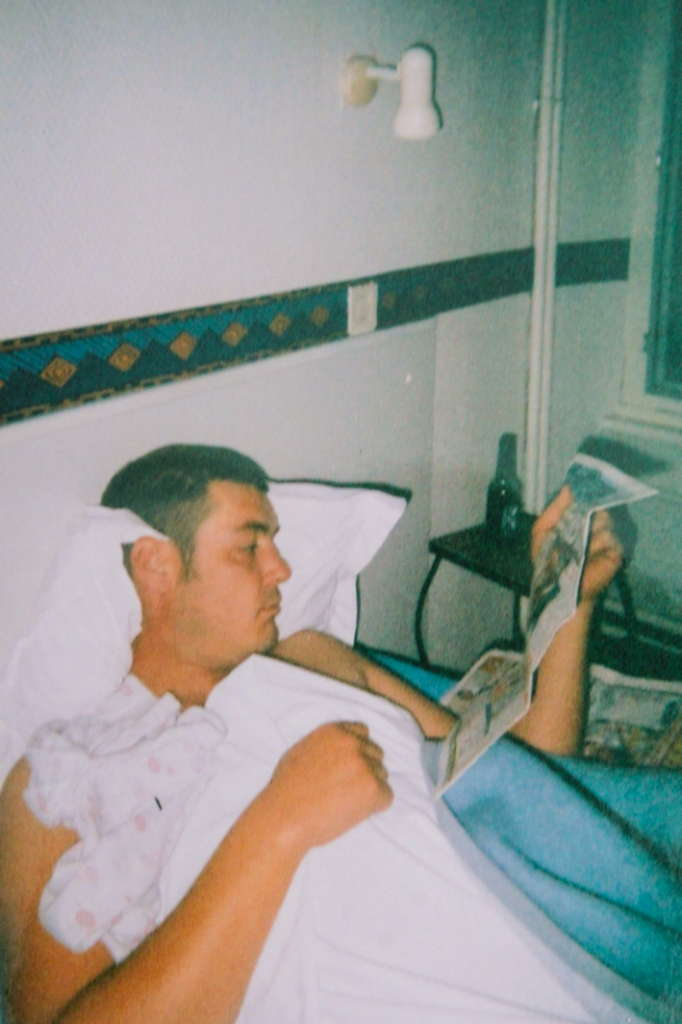
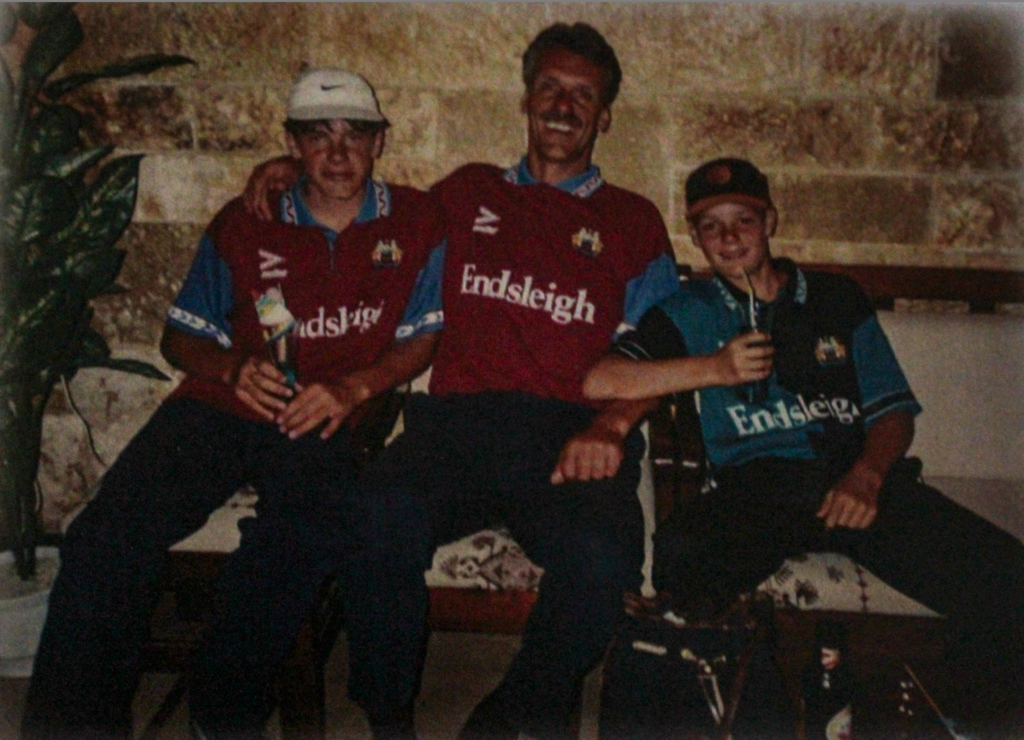
The lighting used in my image is artificial lighting. This photograph has high levels of control, because it is a staged image, where I have manipulated the position of my dad, the prop used and the distance and position of myself with the camera.
F-stop= f/10
Exposure time= 1/15 sec
ISO speed= ISO-3200
The colours in my photograph include blue, red, grey, black and white. Due to all the dark and light tones of the blacks, whites and greys this image has high contrast, especially against the brighter colours of the blue dressing gown. Due to the pillows and blankets draped on the couch there is lots of patterns and shapes in this image.
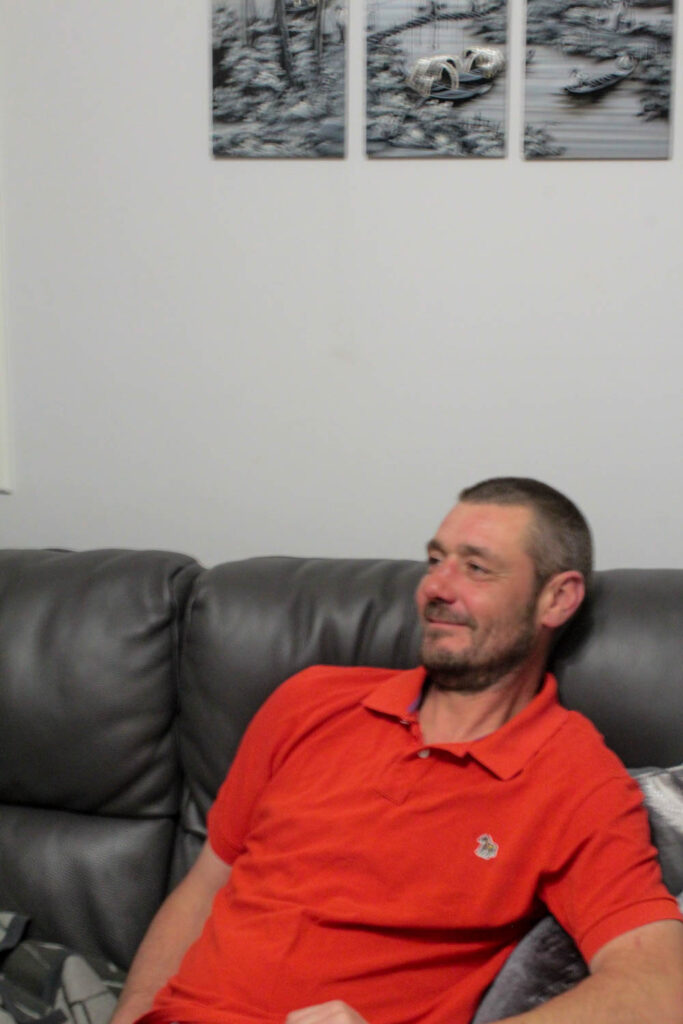
The composition of this image is very similar to the composition of the archive image, because this is what I was trying to achieve. The colour of the couch is the same and the blanket on the couch is even thrown over the back of the couch in the same way. My dad is also sat very similarly with a beer in his left hand resting on his lap and his right arm leaned up. The only difference in this image is the type of beer used and the outfit my dad is wearing, which if I was to do this in the future again I would amend this. The main viewpoint of this image is my father in the centre of the frame.
This photograph presents my father 18 years after the original archive was taken and presents how he has grown and changed since the archive was taken. It also represents things that are still similar about him from when he was younger. He was 26 years old in the first archive and he is now 44 years old today.
The reason I have chose to recreate this archive of my dad is because I am exploring my family through archives and my own photographs, so that I can explore the union that is my family. I am exploring archives, so that I can present how our family union has changed and grown and how we are all linked together through blood and DNA. I have chosen to use archives from years ago, so that I can present how even though the individuals have grown and changed the family union stays strong and unbroken.
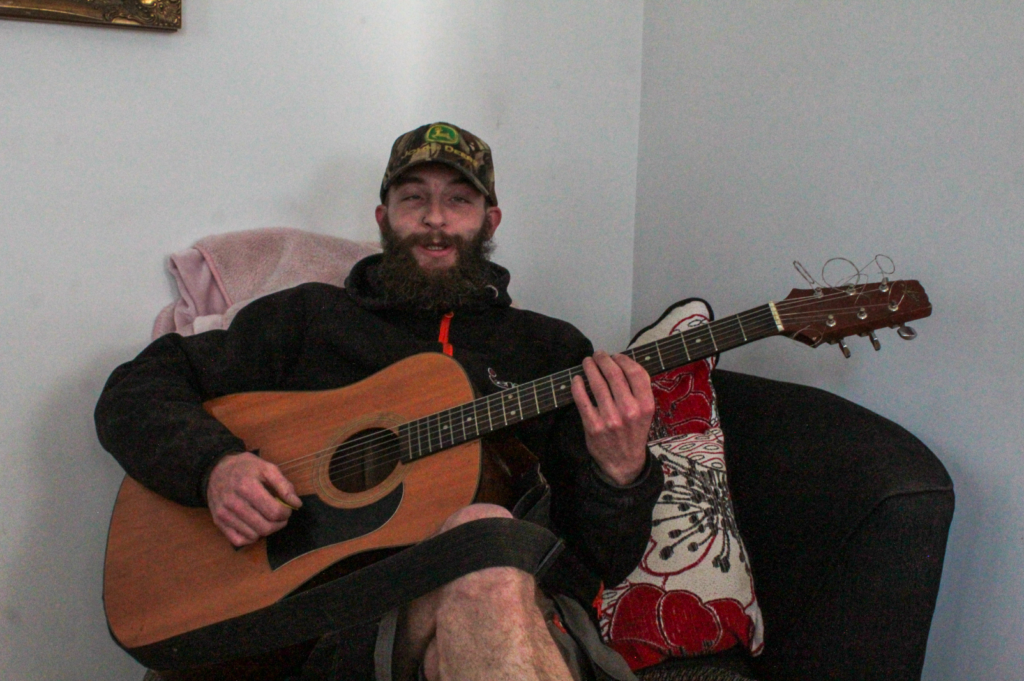
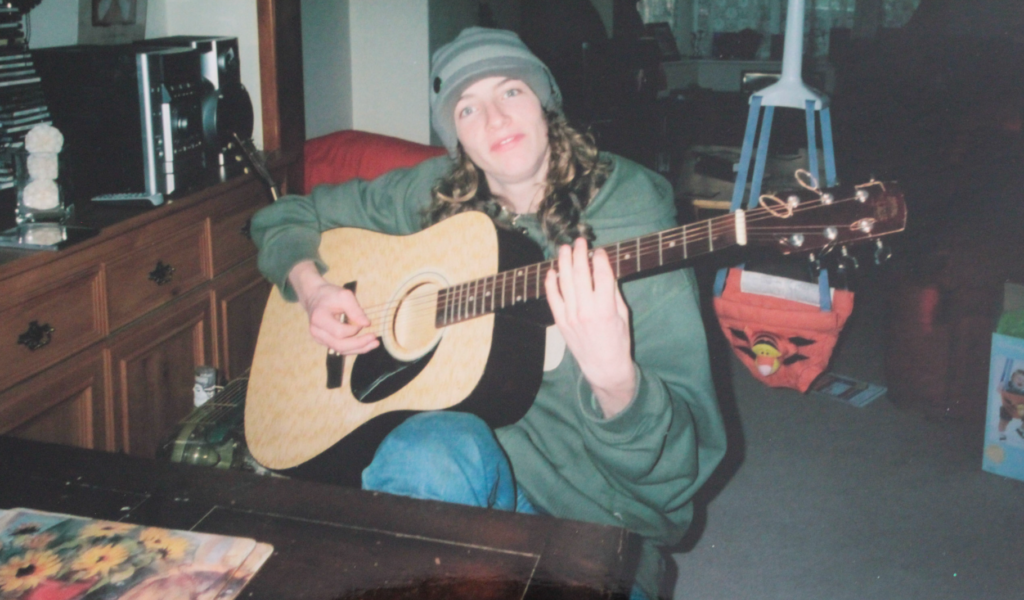
Evaluation
I think this photoshoot went well, as I was able to successfully recreate old archive images of my family members and myself. I was also able to use some of the same clothes/ props used in the original images, such as my primary school dress and my uncles guitar. However, in some of these images I did not use the same clothing/ props as I was unable to as we didn’t own them anymore. Furthermore, in some images my subjects also were not in the correct colours etc, so if were to do this again I would focus more on the fine details of the images, such as the outfits which were worn in the original archive images, so that the photographs I take would like as identical as possible to the archive. I would also focus on which way to position my model, because in some of my images my dad is facing the opposite way to the archive images. I would also like to focus on adjusting my camera settings slightly, as one or two of my images were slightly out of focus. I would also like to focus on my lighting in the next photoshoot, so that I can improve it.
I also think I have presented how the individuals in my family have changed and grown, but how the family union stays united and unbroken even after all these years that have passed from when the original photographs were taken. I think the experience of actually taking these images have unified us even more as everyone came round to support my school work and be a part of it.
For my next photoshoot I would like to focus more on taking family shots with multiple people, rather than focusing on individuals. I would also like to possibly redo some of these photographs, so I can have the subject in more similar clothing and facing the correct direction, so that the photographs I take will be more identical to the archive photographs.
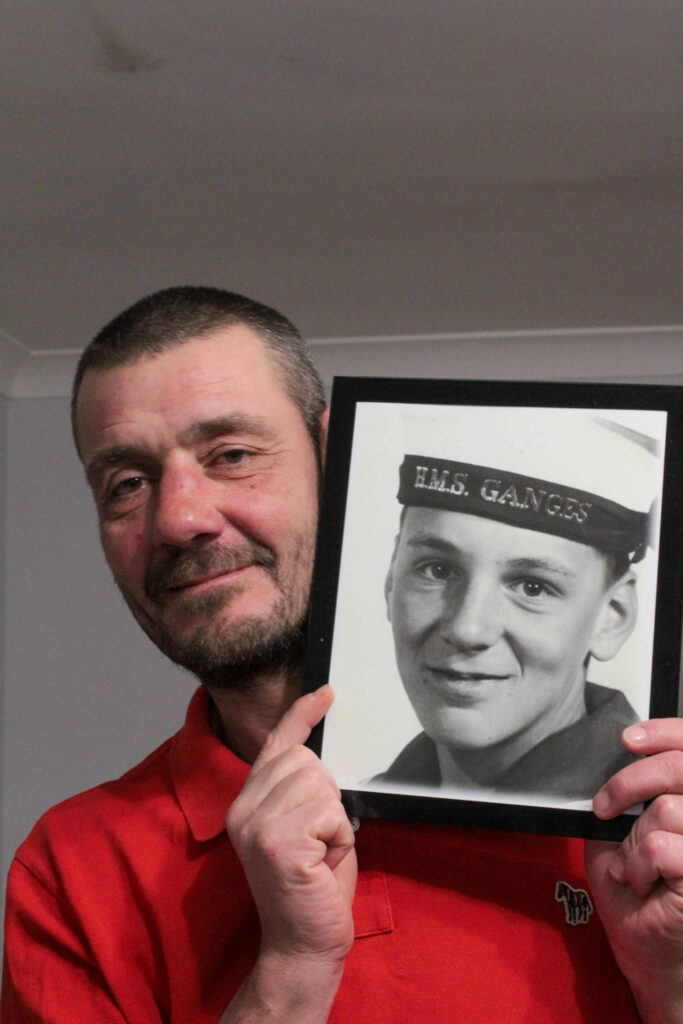
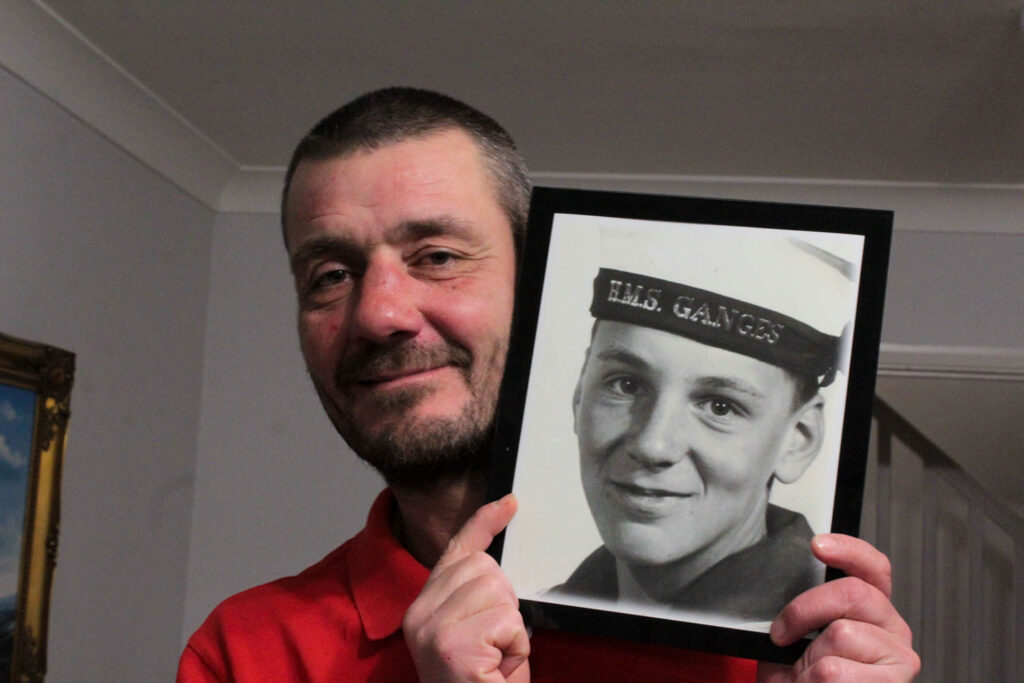
In this photoshoot, I focussed on recreating old archive images of my dad when he was younger. I also wanted to use my dad to recreate images of his dad (my grandad), who has passed away, because I could not use my grandad. My dad and my grandad also have lots of similar characteristics that I want to present as well, as they look very alike.
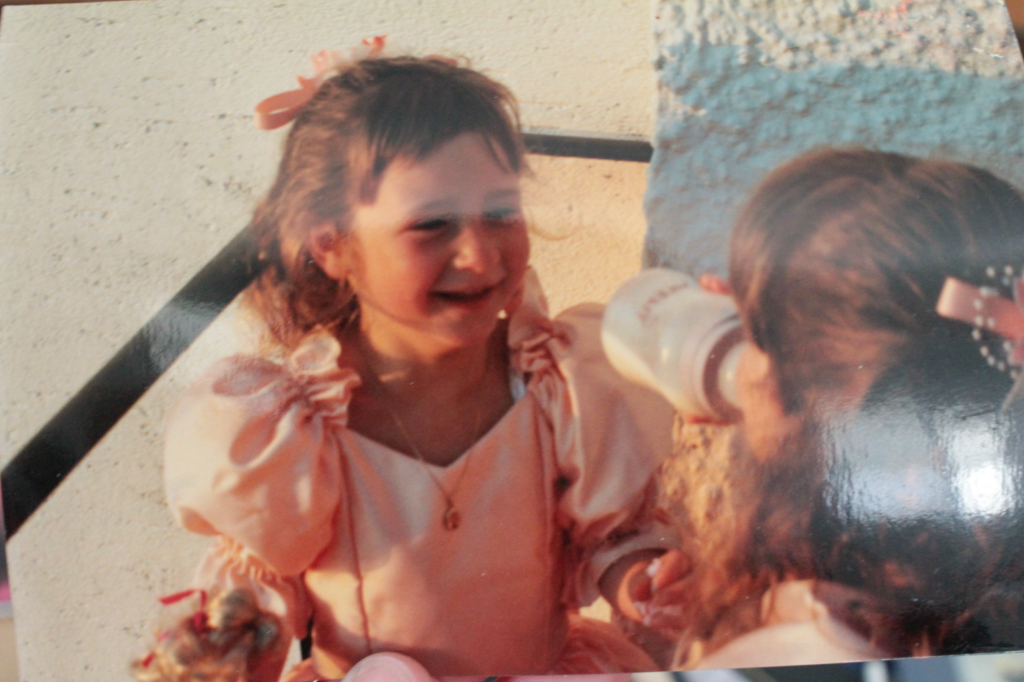
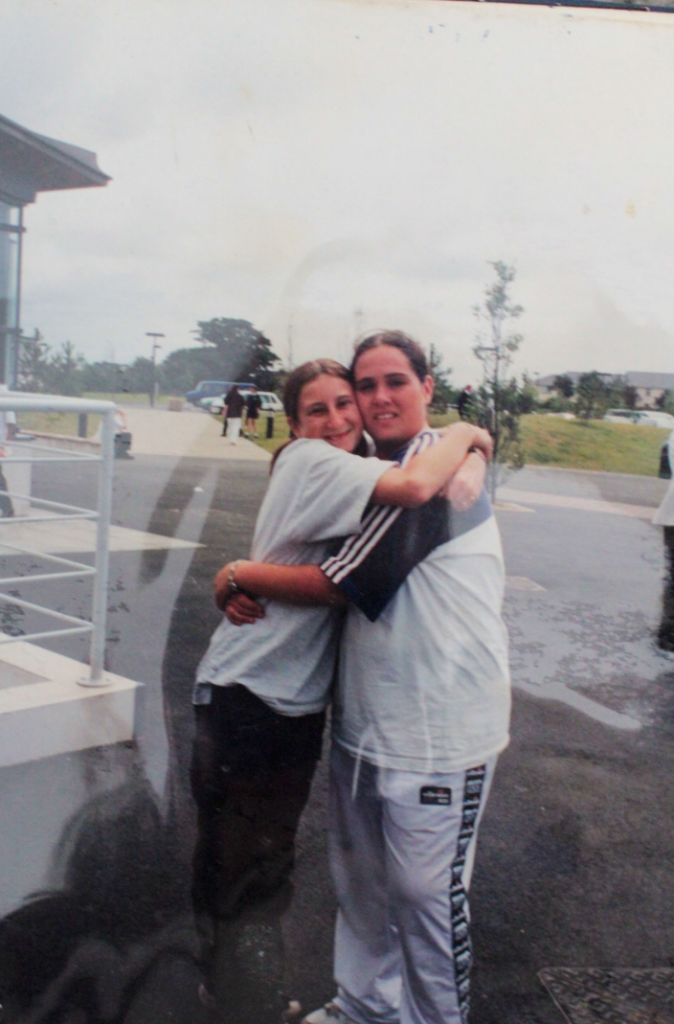
I also found archive images of myself at a similar age to my sister, so I recreated the images of myself, but with my sister. I did this, so that I could present the similarities my sister and I share due to our shared DNA.
Archive Images Used
Grandad Tom in 1967 when he was 17 years old
Grandad Tom in 2019
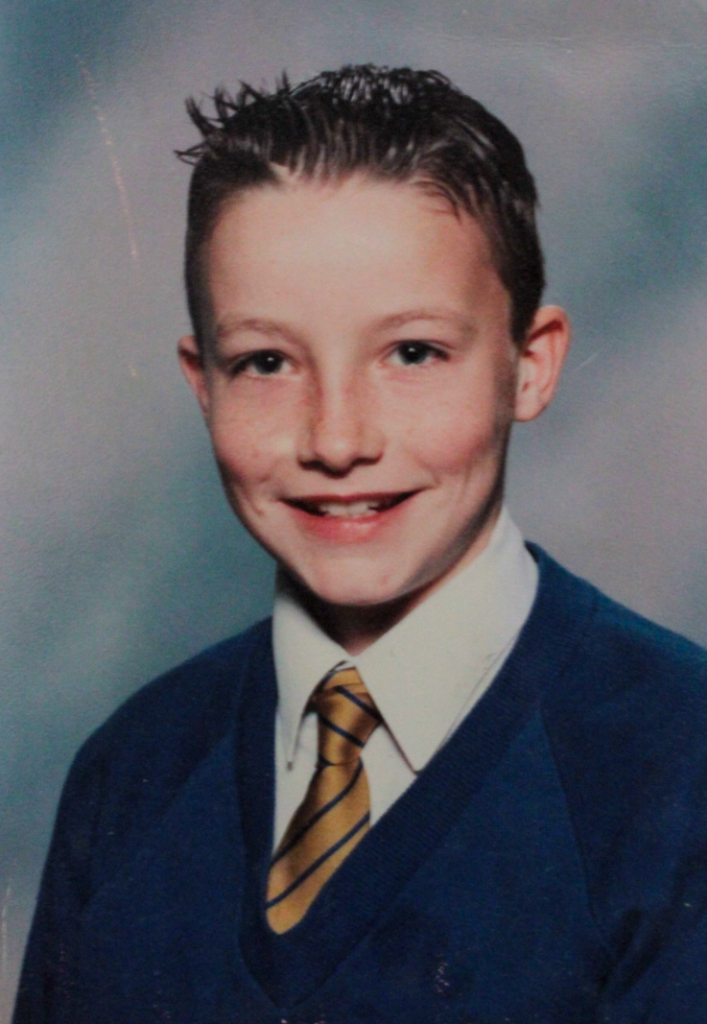
Myself in 2012
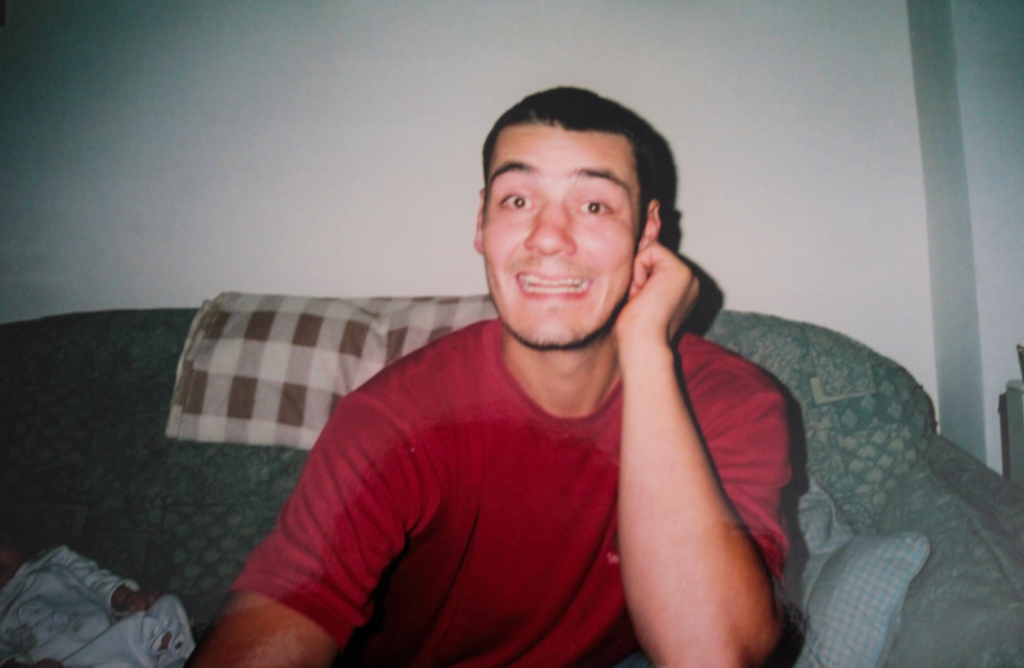
My dad in 2006
My dad in 2007
My dad in 2007
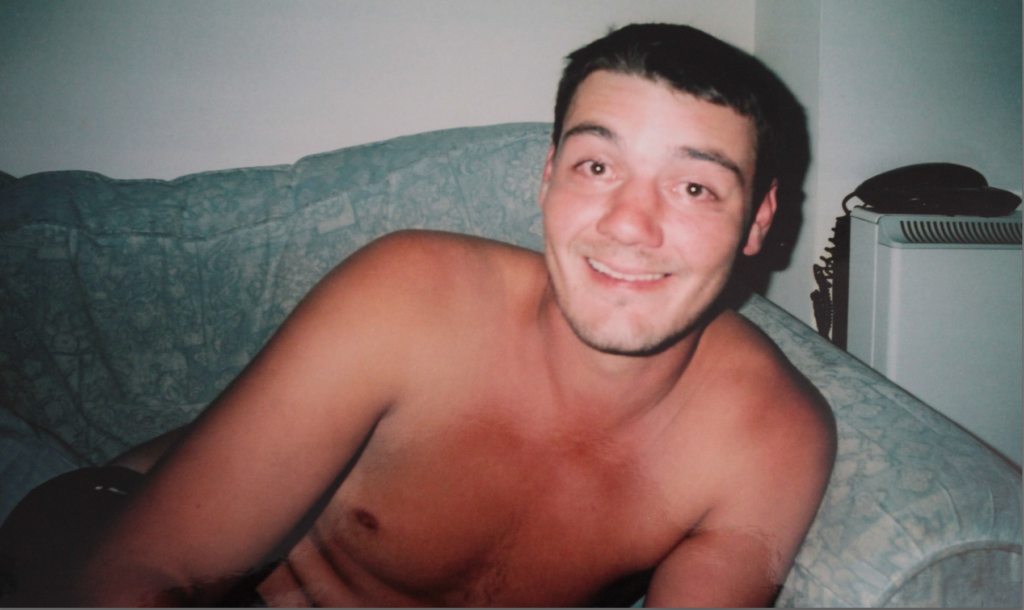
My dad in 2006
My dad in 2006
My dad in 2006
My sister in 2017
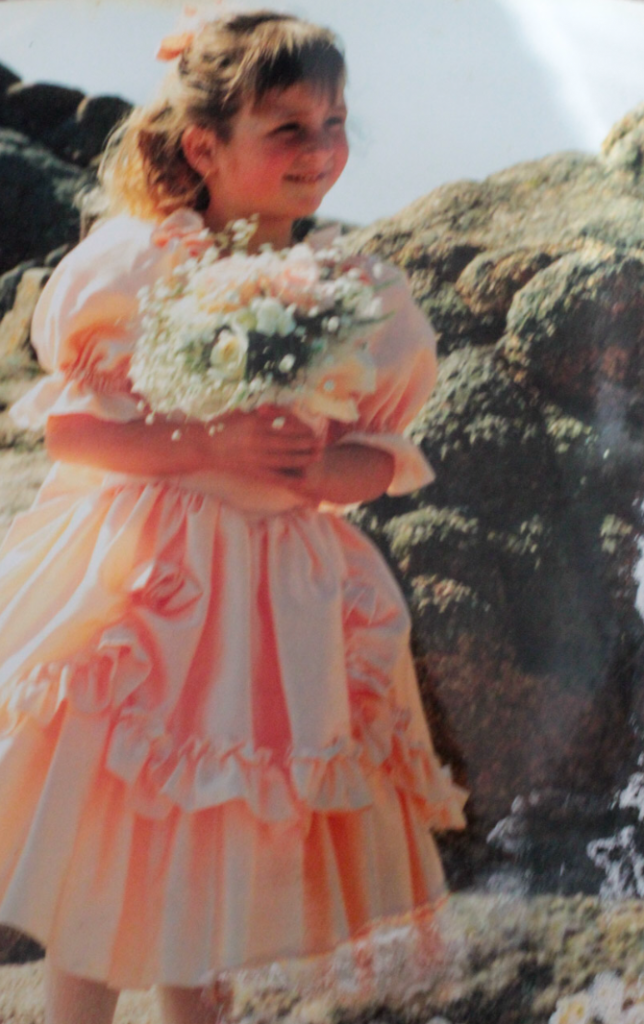
My mum in 1990 aged 5My mum in 1990 aged 5My mum in 1989 aged 4My mum’s mum in 2006 age 38
My uncle Dan aged 9
My uncle Josh in year 6 aged 10
My uncle Dan aged 6
My uncle Josh in 2006
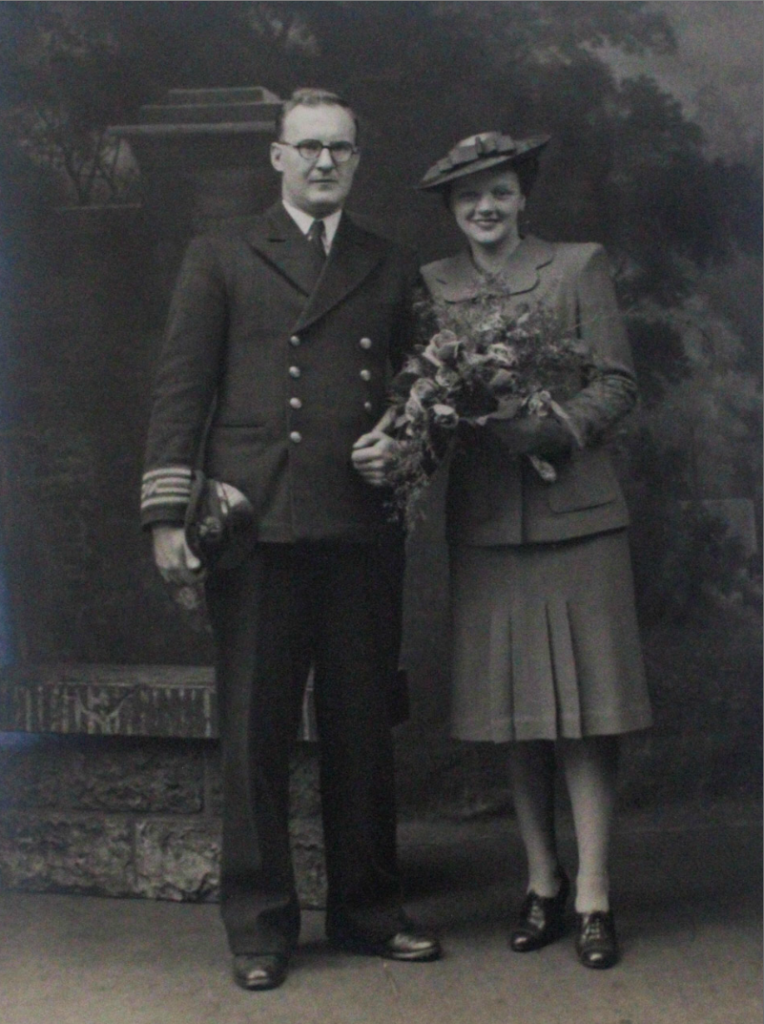
My mum and dad in 2006
Edits
I edited this image by increasing the contrast, shadows, whites, vibrancy and saturation, while decreasing the exposure, highlights and blacks. I did this, so that the image was slightly more vibrant and looked less dull and grey.
I edited this image by increasing the contrast, shadows, whites and vibrancy, while decreasing the exposure, highlights and blacks. I did this, so that the image was slightly more vibrant and had less of a grey wash.
Next, I cropped the photograph, deleting the negative space around my dad, so that the image was more similar to the archive image.
I edited this image by increasing the contrast, shadows, whites, vibrancy and saturation, while decreasing the exposure, highlights and blacks. I did this, so that the image would be slightly more vibrant and my dad would have some more colour in his face.
I edited this image by increasing the exposure, contrast, shadows, whites, vibrancy and saturation, while decreasing the highlights and blacks. I did this, so the image would be slightly more vibrant.
I edited this image by increasing the exposure, contrast, shadows, whites and vibrancy, while decreasing the blacks. I did this, so that the lighting would be slightly more exposed and the colours slightly more vibrant.
I edited this image by increasing the exposure, contrast, shadows, whites and vibrancy, while decreasing the blacks. I did this, so that the lighting would be slightly more exposed and the colours slightly more vibrant.
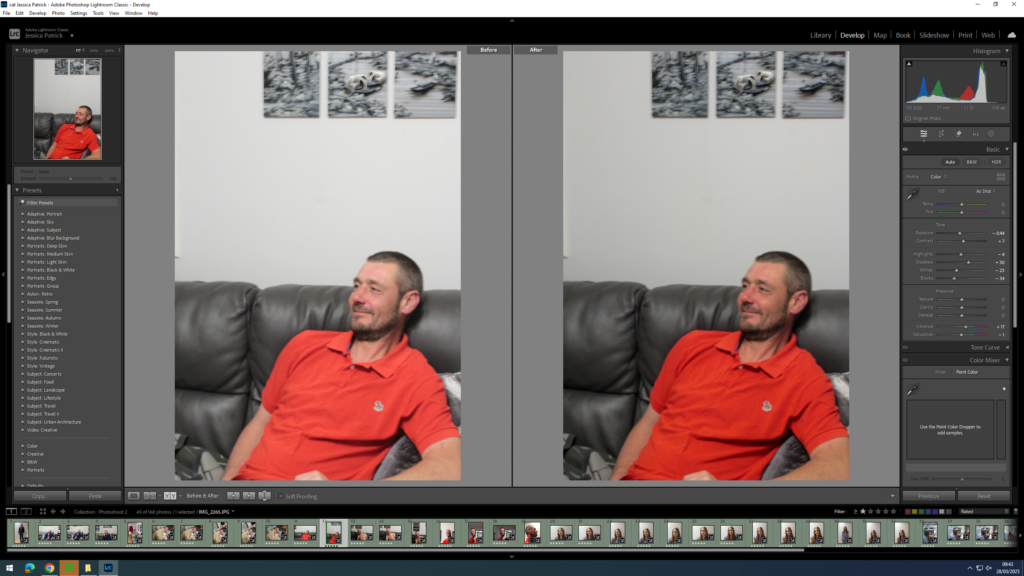
I edited this image by increasing the contrast, shadows and vibrancy, while decreasing the exposure, highlights, whites, blacks and saturation. I did this, so that the red top my dad is wearing would be slightly more vibrant and the lighting would be slightly less exposed.
I edited this image by increasing exposure, contrast, shadows, whites and vibrancy, while decreasing the highlights, blacks and saturation. I did this, so that the image is slightly warmer and less dull.
I edited this image by increasing the exposure, contrast, shadows, whites, vibrancy and saturation, while decreasing the highlights and blacks. I did this, so that the image would be slightly more vibrant.
I edited this image by increasing the exposure, contrast, shadows, vibrancy and saturation, while decreasing the whites and blacks. I did this, so that the image would be slightly more exposed, with slightly more contrast between the black and white images and my dad’s red top.
I edited this image by increasing the exposure, contrast, whites, vibrancy and saturation, while decreasing the highlights and blacks. I did this, so that the image would be slightly more exposed and vibrant, with more contrast between the black and white images and the colour around it.
I edited this image by increasing the contrast, shadows, whites, vibrancy and saturation, while decreasing the exposure, highlights and blacks. I did this, so that I could attempt to improve the lighting.
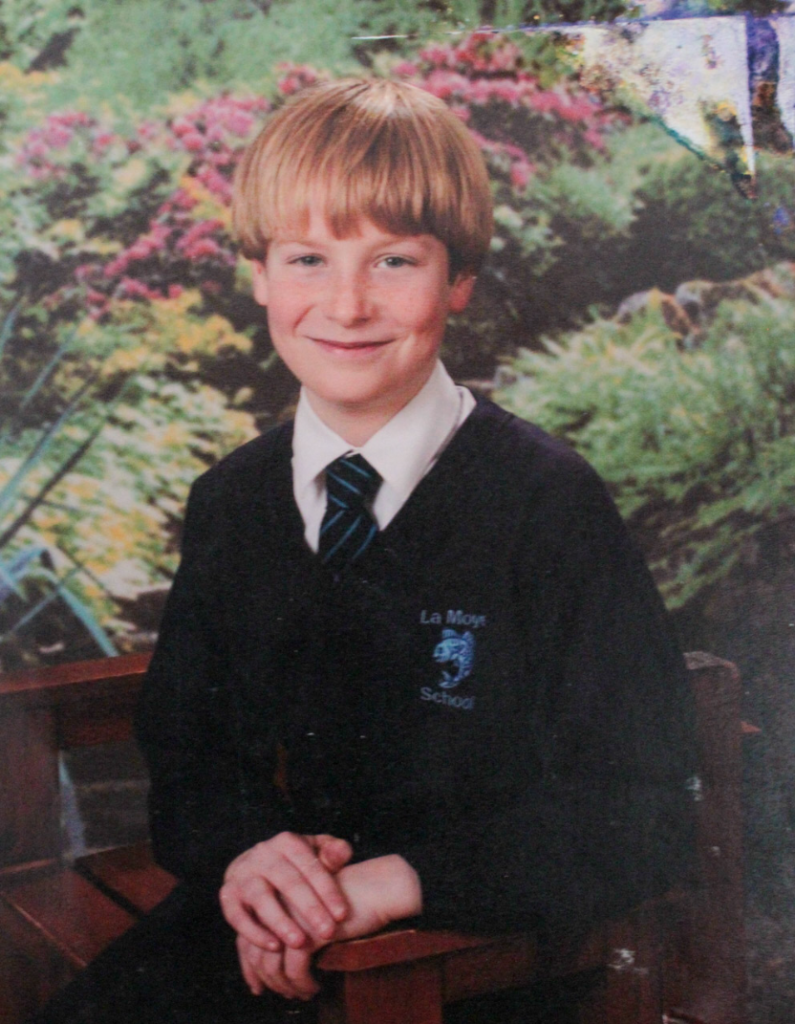
I edited this image by increasing the exposure, contrast, shadows, whites, vibrancy and saturation, while decreasing the blacks. I did this, so that the image would have more exposure and better lighting, so it looked more similar to my archive image of my school photo.
I edited this image by increasing the contrast, shadows, whites, vibrancy and saturation, while decreasing the exposure, highlights and blacks. I did this, so that the image was slightly more exposed, so that the lighting was improved. I did this, so that it would look more similar to my school photo archive.
I edited this image by increasing the exposure, contrast, shadows, whites, vibrancy and saturation, while decreasing the highlights and blacks. I did this, so that the image was slightly more exposed, so that the lighting was improved. I did this, so that it would look more similar to my school photo archive.
I edited this image by increasing the exposure, contrast, shadows, whites, vibrancy and saturation, while decreasing the blacks. I did this, so that the image is slightly more exposed with better lighting.
I edited this image by increasing the exposure, contrast, shadows, whites, vibrancy and saturation, while decreasing the highlights and blacks. I did this, so that the lighting is better as it is slightly more exposed.
I edited this image by increasing the contrast, shadows, whites and vibrancy, while decreasing the exposure, highlights and blacks. I did this, so that the image lighting is improved, because the levels of light and shade are not what I intended for this image.
I edited this image by increasing the exposure, contrast, shadows, whites, vibrancy and saturation, while decreasing the highlights and blacks. I did this, so that the lighting in this image could be improved, because the levels of light and shade are not what I intended for this photograph.
I edited this image by increasing the exposure, contrast, shadows, whites and vibrancy, while decreasing the highlights and blacks. I did this in order to improve the lighting, because the levels of light and shade from the sun are not what I intended.
I edited this image by increasing the exposure, contrast, shadows, whites, vibrancy and saturation, while decreasing the highlights and blacks. I did this in order to improve the lighting, because the levels of light and shade from the sun are not what I intended.
I edited this image by increasing the exposure, contrast, shadows, vibrancy and saturation, while decreasing the highlights, whites and blacks. I did this, so that the wall would be more white, compared to grey and so the image would have better lighting.
I edited this image by increasing the exposure, contrast, shadows, whites, vibrancy and saturation, while decreasing the highlights and blacks. I did this, so that the background would be more white compared to grey.
I edited this image by increasing the exposure, contrast, shadows, whites, vibrancy and saturation, while decreasing the highlights and blacks. I did this, so that the background wall would be more white, compared to grey and so my mum would have more colour in her face.
I edited this image by increasing the exposure, contrast, shadows, whites, vibrancy and saturation, while decreasing the highlights and blacks. I did this, so that the image would be more exposed and therefore have better lighting.
I edited this image by increasing the exposure, contrast, shadows, whites, vibrancy and saturation, while decreasing the highlights and blacks. I did this, so that the image would be more exposed and therefore have better lighting.
I edited this image by increasing the exposure, contrast, shadows, whites, vibrancy and saturation, while decreasing the highlights and blacks. I did this, so that the image would have better lighting.
I edited this image by increasing the exposure, contrast, shadows, whites, vibrancy and saturation, while decreasing the highlights and blacks. I did this, so that the image would have better lighting. I also cropped the negative space out from the top of the frame, so it was more similar to the archive photograph.
I edited this image by increasing the exposure, contrast, shadows, whites and vibrancy, while decreasing the highlights and blacks. I did this to try and correct the lighting coming from one side, rather than straight forward. I also selected the background and decreased the saturation, so that the background would be more white, compared to the orange colour it was before hand due to the warm lighting and the reflection of the orange top.
I edited this image by increasing contrast, shadows, whites, vibrancy and saturation, while decreasing the exposure, highlights and blacks. I did this to try and improve the lighting that was coming from one side, rather than straight forward. I also selected the background and decreased the saturation, so that the background would be more white, compared to the orange colour it was before hand due to the warm lighting and the reflection of the orange top.
I edited this image by increasing the exposure, contrast, shadows, whites, vibrancy and saturation, while decreasing the highlights and blacks. I did this, so that the image would look less dull and be slightly more vibrant.
Then, I selected the background of the image and decreased the highlights and whites and increased the blacks, so that the light coming through the window was less bright.
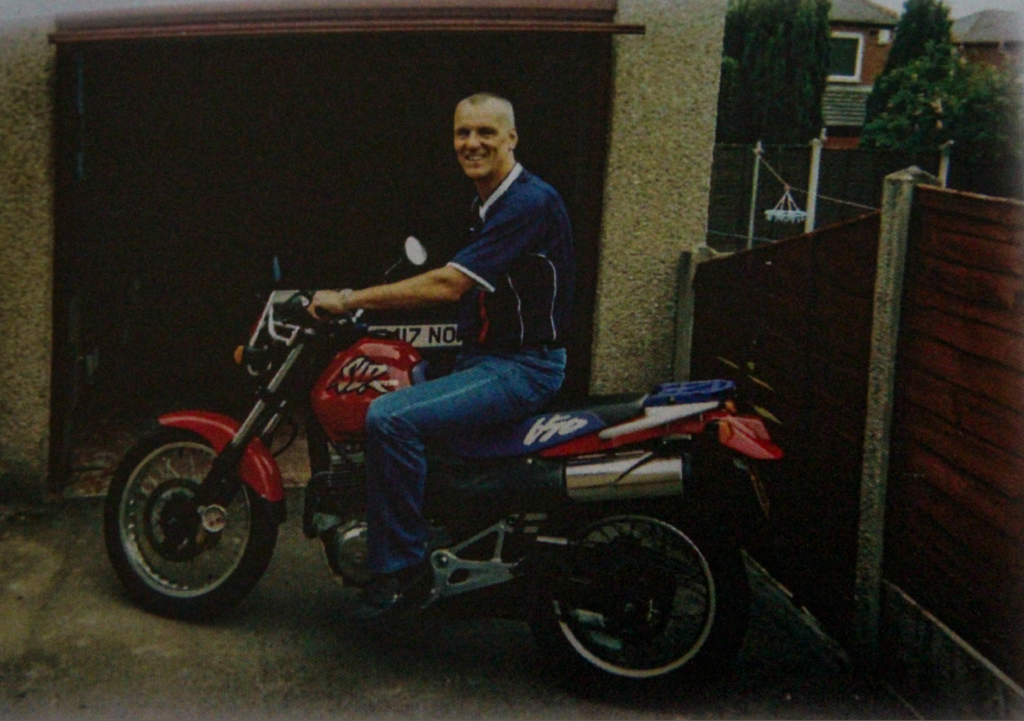
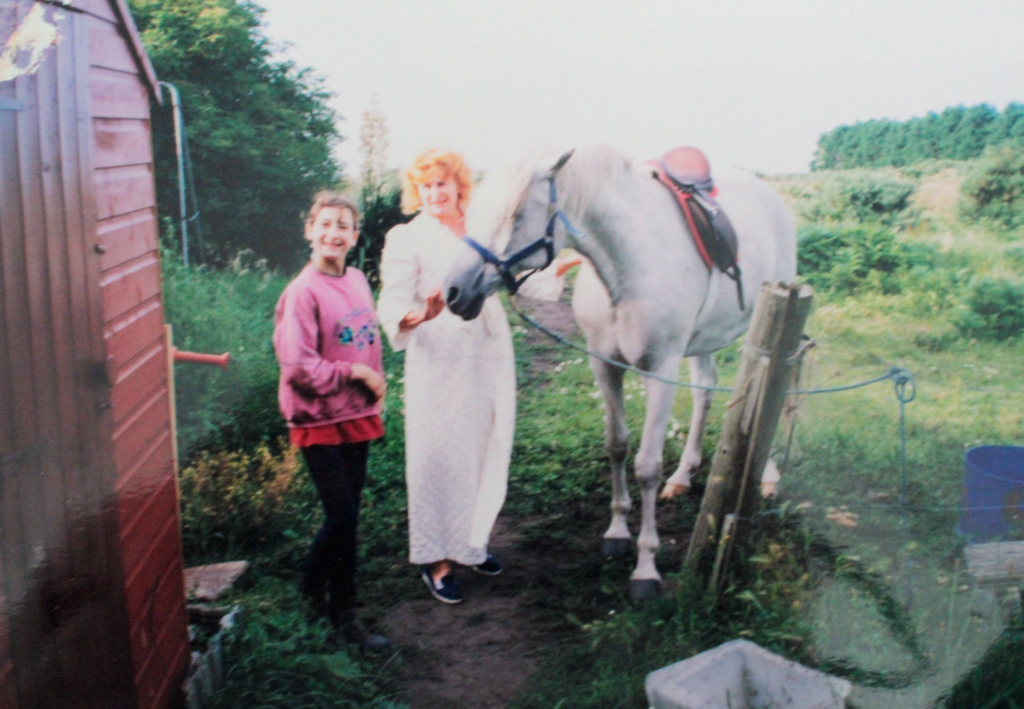
For my first photoshoot I want to focus on recreating old archived images of my family. In order to do this, I have been through my family photo albums and have taken photographs of the images I want to use in my photoshoots and recreate. I have chosen images including:
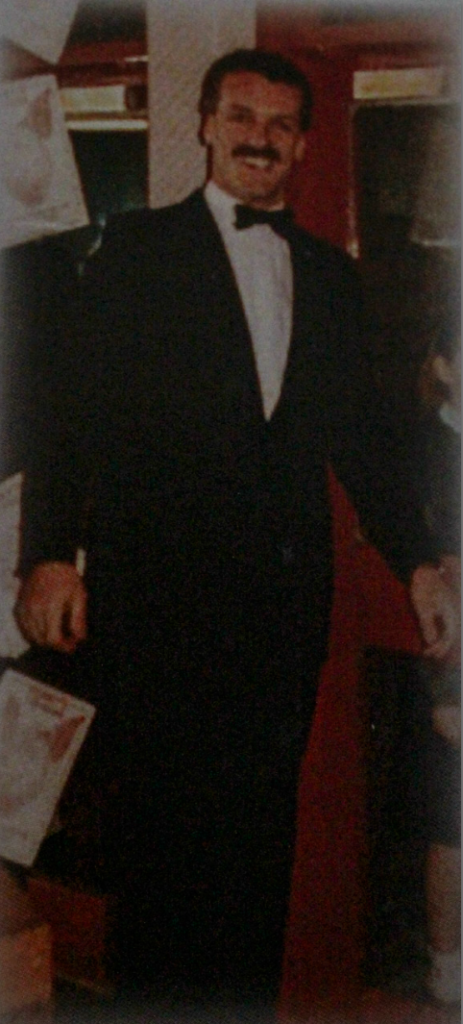
My dad when he was younger
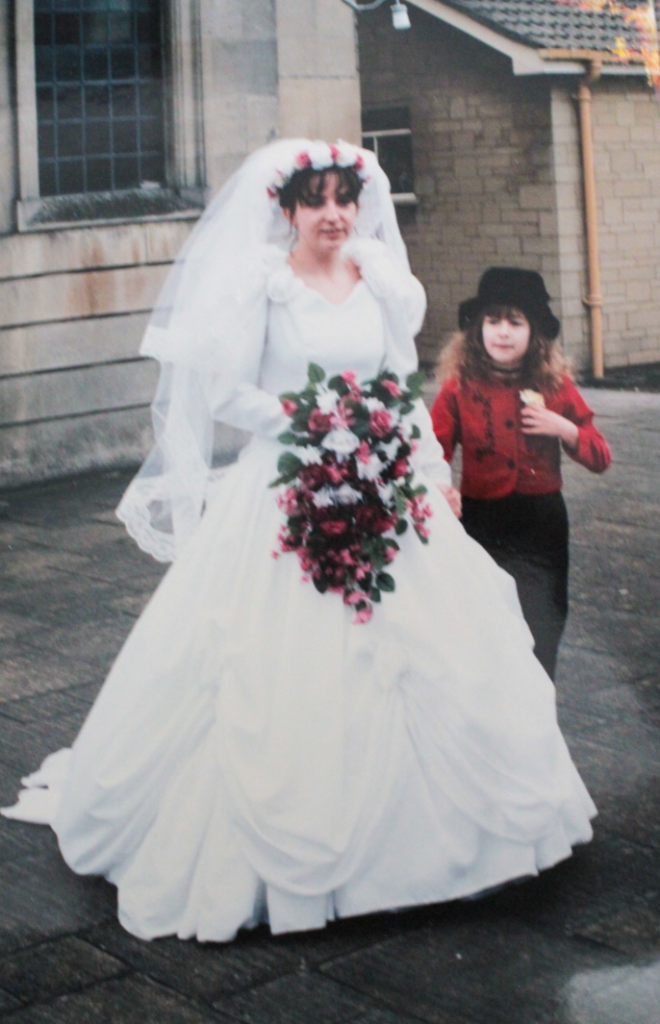
My mum when she was younger
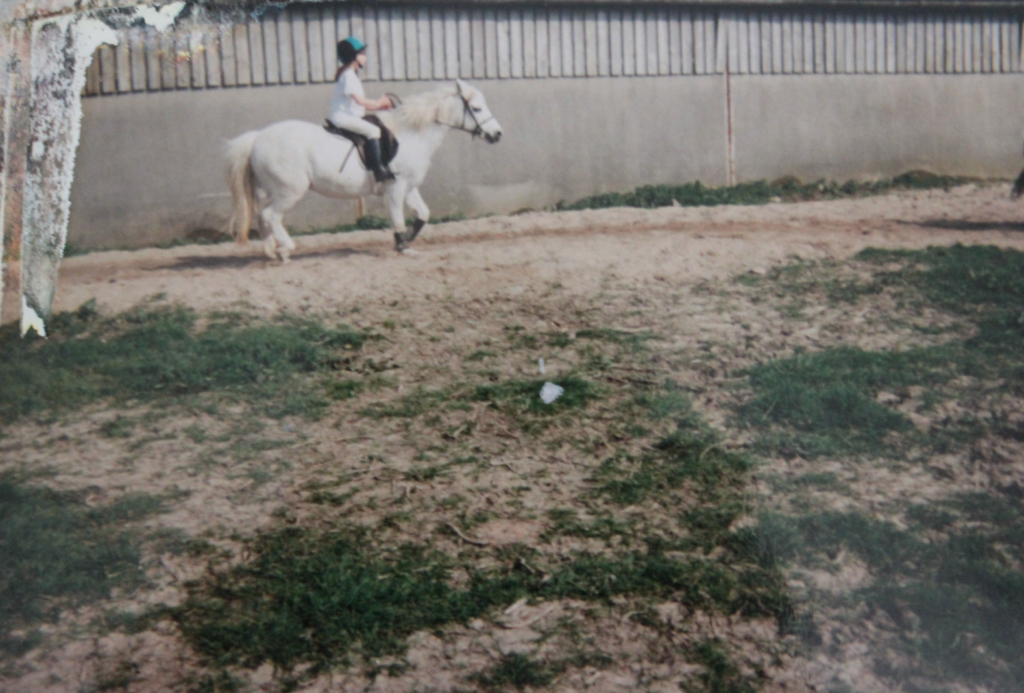
Myself when I was younger
My sister when she was younger
My two uncles when they were younger
My grandparents/ great-grandparents/ great great-grandparents
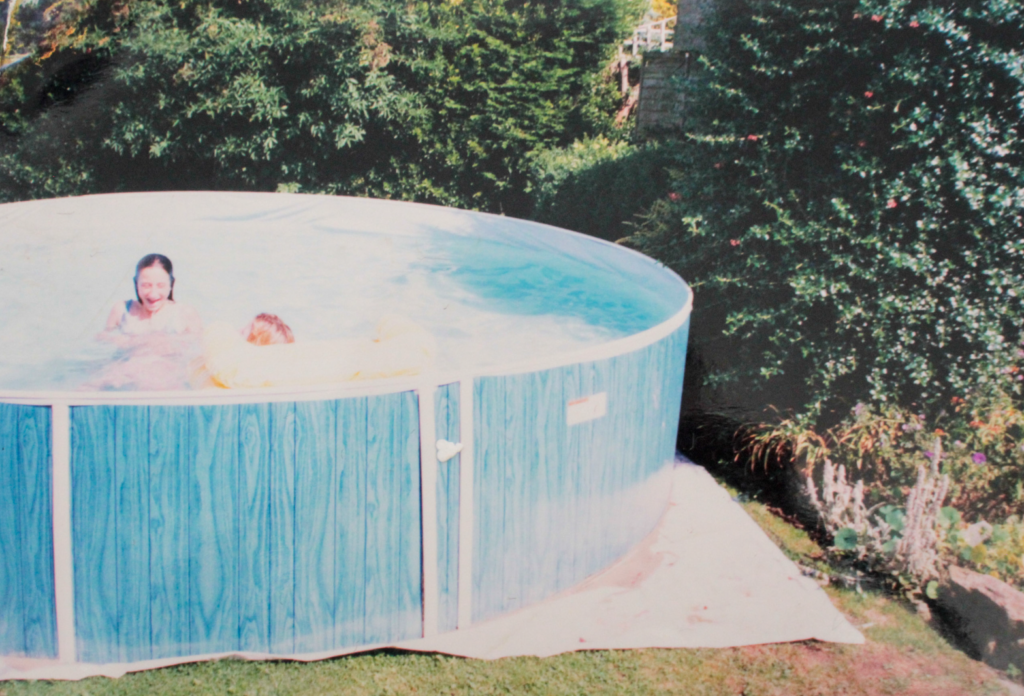
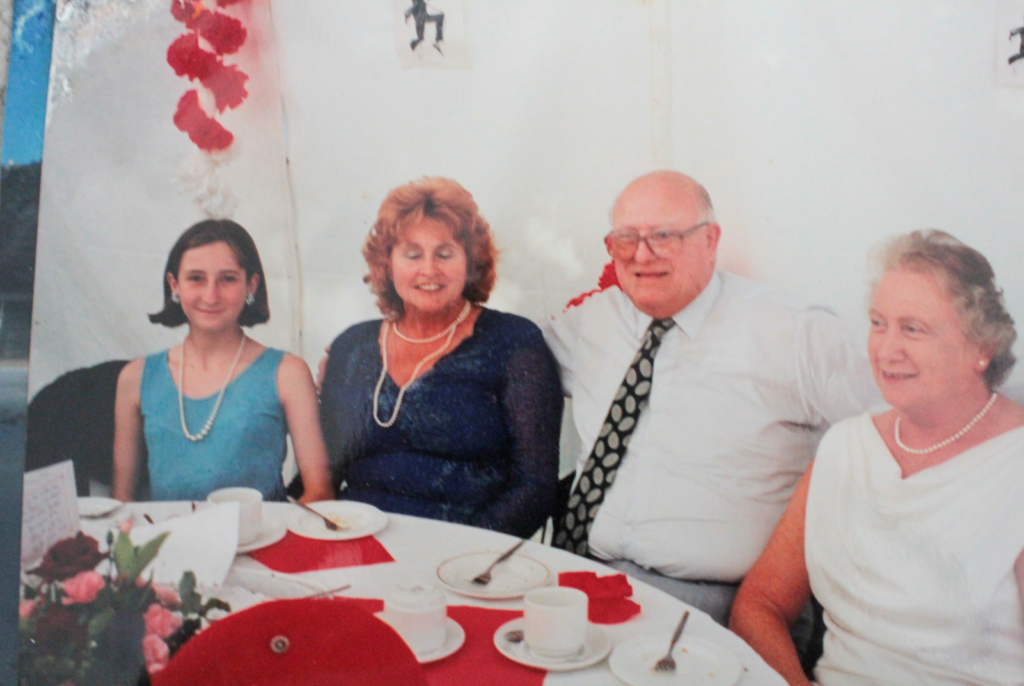
Examples of Archives
Plan
My plan for this photoshoot is to have my mum and dad recreate younger images of themselves, so I can present how they have changed and what has stayed the same/ similar during this time.
I also want to have my dad recreate photographs of his dad when he was younger and more recent images of him before he passed. I want to do this so i can present their similarities in characteristics, so I can present how family and DNA unify us together by giving us all these similarities. I also want my mum and her two brothers to recreate an image of their mum for the same reason and so I can present the similarities between my mum and her siblings as well. I also want to recreate images of my great-grandparents and great grandparents for the same reason. I also would like to recreate images of my uncles from when they were younger, myself and my sister. I also would like to recreate images of myself when I was younger, but using my sister.
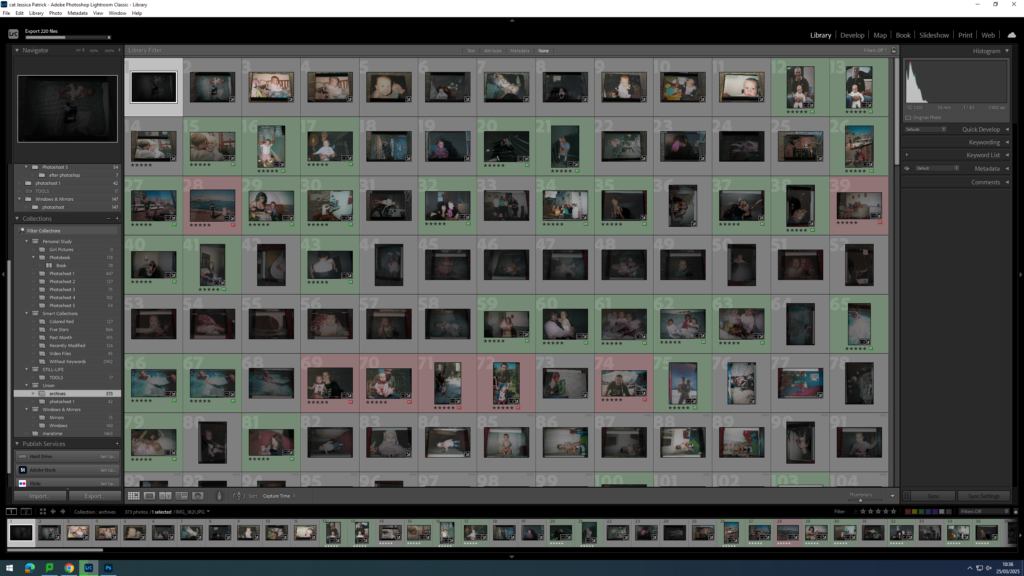
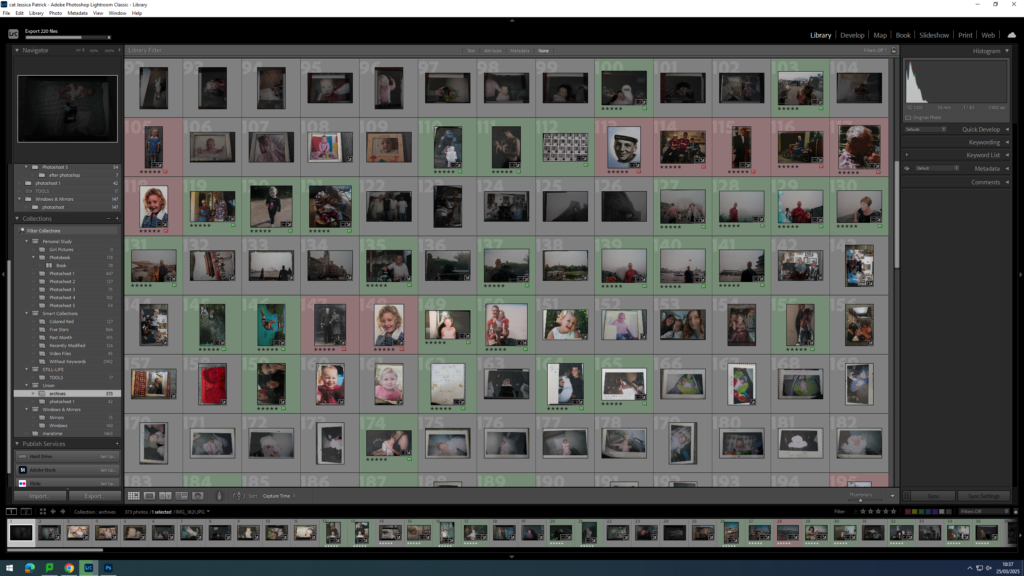
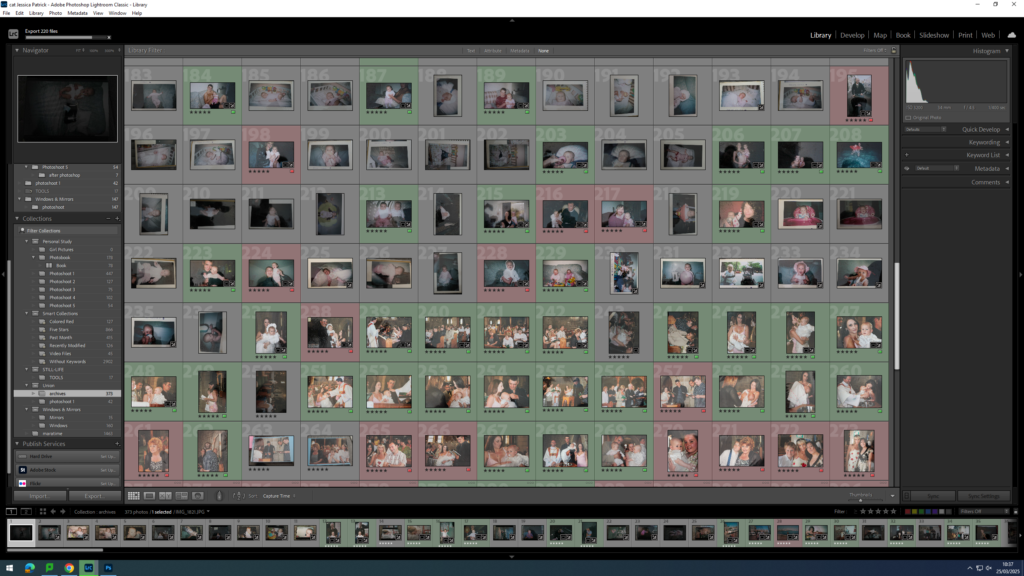
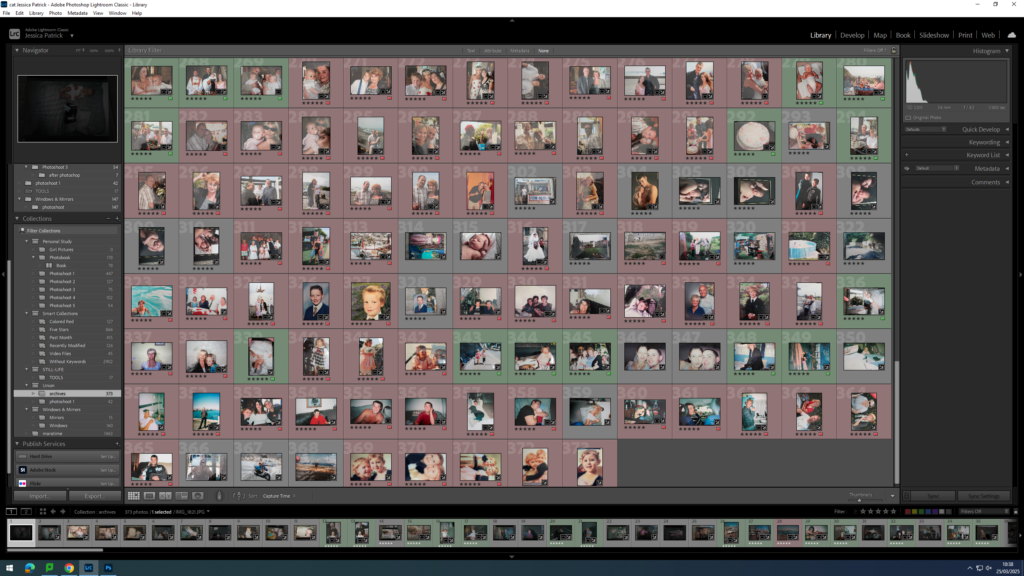
The images which are highlighted green and red are the images I have chosen to edit, because they have better quality than the other photographs. They also work better with what I am researching, which is union. The images which are highlighted red are the archives that I am going to be recreating. I have chosen these images, because I think they will be the best images to recreate to represent family and how time passes, but they are also images that I am able to recreate. Some of these images are harder to recreate, due to family members living in the UK and family members that have passed away.
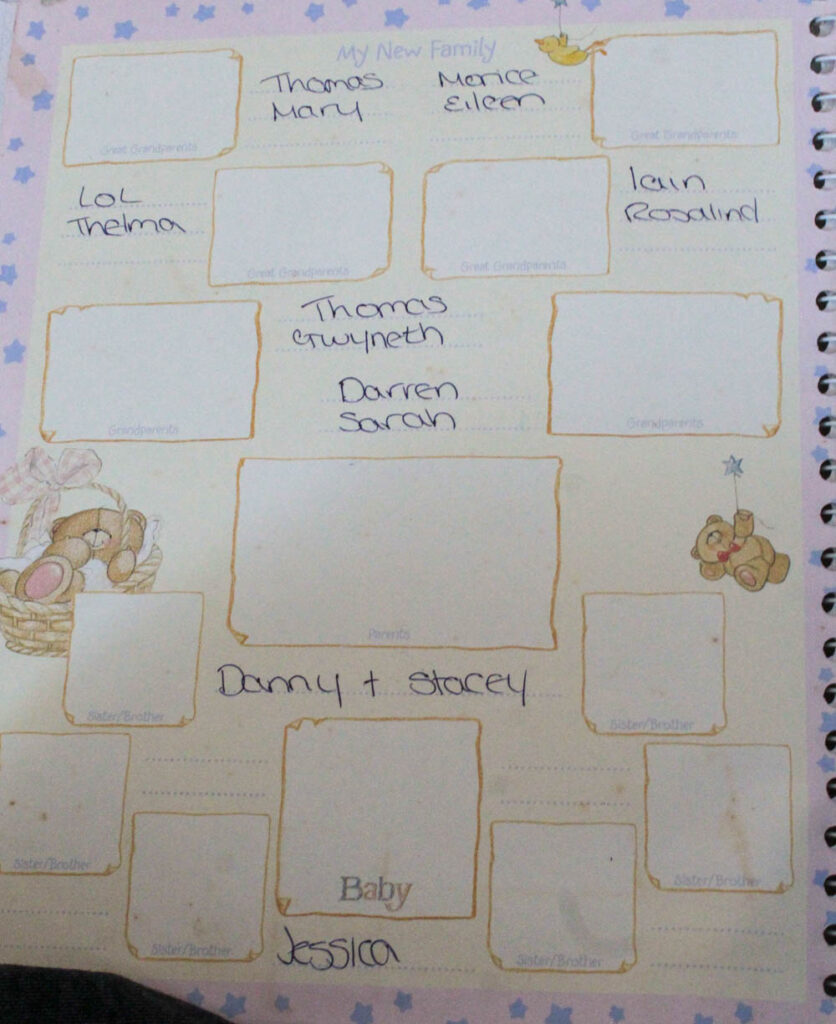
Family Tree
About the Archives
These archives are images my mum and dad have collected over the years, including images of there family, who have passed, as well as themselves when they were younger. These photos also contain documents of my sisters and my life.
Some of these images are slightly lower quality due to when they were taken, or the physical images being slightly damaged over the years, but they are a good indicator of not only my past, but my families past as well.
About My Family
Dad- My dad was born in England in Burnley and his parents are Tom and Gwyneth. He also has a brother called Adam, who is 2 years older than him. His parents got divorced, so he rotated between who he lived with weekly. He lived in Burnley until he was 23 and moved to Jersey Channel Islands for a job. He is a bricklayer. He then met my mum that same year.
Mum- My mum was born in Jersey and her parents were Darren and Sarah. She has a rough childhood, so lived with her nan Roselyn. She had two younger brothers named Josh and Daniel. There dad was Paul, who lived in England, so they both lived there for a while, until they also moved in with Roselyn. My mum then met my dad when she was 18. My dad worked with her uncle Simon and that how they got introduced.
Me- After dating for three years, I was born in 2006. In 2013 my sister Emily was born. We have both lived with our mum and dad our whole lives.