
Photoshoot plan 4

I have begun to make selections across my photoshoots to find the ones that are worth editing, as I have nearly 2,000 images and cannot possibly edit them all.

Using the ‘Flag as picked’ and ‘Flag as rejected’ tools in Lightroom, I am able to pick out the images I would like to edit, which I can then filter later on. I am choosing the best images based on their aesthetic quality and their relevance to my overall intentions.
For Amsterdam, I picked a total of 54 images for editing.
For Athens, I picked a total of 80 images for editing.
For Edinburgh, I picked a total of 21 images for editing.
For London, I picked a total of 4 images for editing.
For New York, I picked a total of 59 images for editing.
For Paris, I picked a total of 32 images for editing.
From the plane journeys, I picked a total of 24 images for editing.
For St Malo, I picked a total of 43 images for editing.
For York, I picked a total of 30 images for editing.
That makes a total of 347 images.


I didn’t like this image cropped or the blue in the background. I filled the space by selecting areas, clicking delete, then OK. This fills the space to create more of the area around it.
I also experimented with AI generative fill, and it created a more realistic look.

I still don’t know if I am going to use more black and white or colour, so I have edited some with both options

I have also experimented cropping this image because I feel like there is too much in one image, however I will see once it is laid out with all the other images.


Colour vs black and white


This is the image I attempted to create, replicating Alec Soth’s. It was difficult to make sure the reflection was in the right place, and not get myself in the frame. I can’t decide if I prefer colour, or black and white.


I have experimented with AI generative fill in photoshop again with this image because I didn’t like the background and wanted to see if it could create a better composition.


Overall, I am happy with my editing for this first shoot. I will take more photos and retake others after learning where I went wrong. Editing these has also inspired me to take photos outside the house, where my grandfather loved, as well as possibly remaking old family photos.
Overall very happy with these images, I think they capture the best perspectives of buildings and people, combined with the multiple colours and patterns in the evening sky. The edited ones are even better with exaggerated colours and vibrancy. Some of these photoshoots came out a little too dark or a little too bright, so I had to be careful in choosing and editing them to have just the right lighting, which I think I managed very well at doing. These all hit the boxes for me and most turned out just the way I wanted.


For my first photoshoot I was inspired by Andreas Varro, This is due to his use of artificial lighting and dystopian feel that his images produce

For this photoshoot I decided to do it after the sun went down, I did this to eliminate all natural lighting that could intrude into my pictures, I did this photoshoot in a bedroom at my house to create a natural setting. I used my 2 models including a male and a female and took various images of them including them together and them individually. For my first set of images I decided to take photos of them together laying in a bed while ignoring each others presence while all of there attention is on their mobile phones.


For my next set of images I took single images of the male model on his laptop working on his trading business with the artifical light from the laptop highlighting his facial features to create the feel of him being oblivious to the outside world and all of his attention in on the pixilated screen.


For my final set of images I took pictures of the Female model on her phone listening to music though a wireless Bluetooth earbud, Again only having her attention on her mobile phone while the light from her phone illuminates her face.
In conclusion I feel that this photoshoot really portrays the dystopian reality of todays consumption of technology from an outside point of view. I am very happy with how the images turned out.


I edited all of the above images on Lightroom Classic while exaggerating the exposure, contrast and whites to create the dystopian effect that I was looking for. Playing with these setting also helped me aluminate my models faces to help make their facial expressions more evident to the viewer.
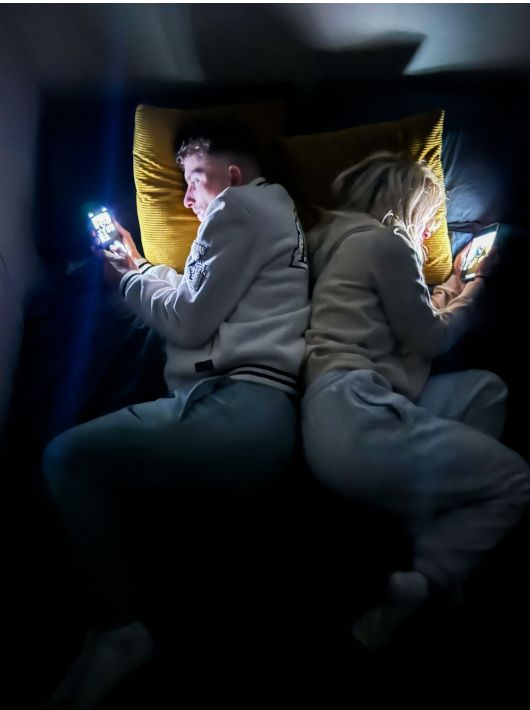
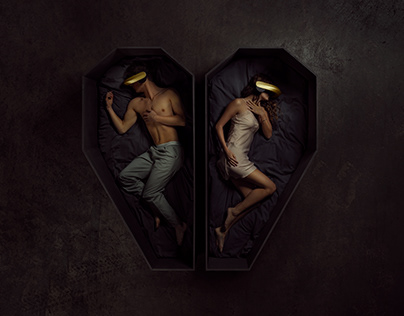
The Image that I produced on the left was made and developed to share similar relations to the image on the right made my Andreas Varro. Both images share multiple similarities such as both the male and female model laying down facing away from each other with their attention on technology. Though they are telling different stories such as Varro’s image of the models laying in a coffin comparatively to my models laying in bed I feel that overall they covey very similar messages such as how their full attention is on their electronics. It is also evident to the viewers at both models are in a relationship together but depriving each other of the physical attention that most couples use to show their love. The main difference between our images is the lighting used, Though we both used artificial lighting Varro used overhead lighting so that it was evenly displayed throughout the entirety of the image in comparison to mine where the artificial lighting is coming from their mobile phones and only making the key areas of the image visible to the viewer.


all of these where up there with my best images taken in an office mainly, some in a car park, petrol garage, and a church, which all have an essence of familiarity but isn’t noticed by many people because it is used in every day life, and mostly during the day, never commonly used in the night.