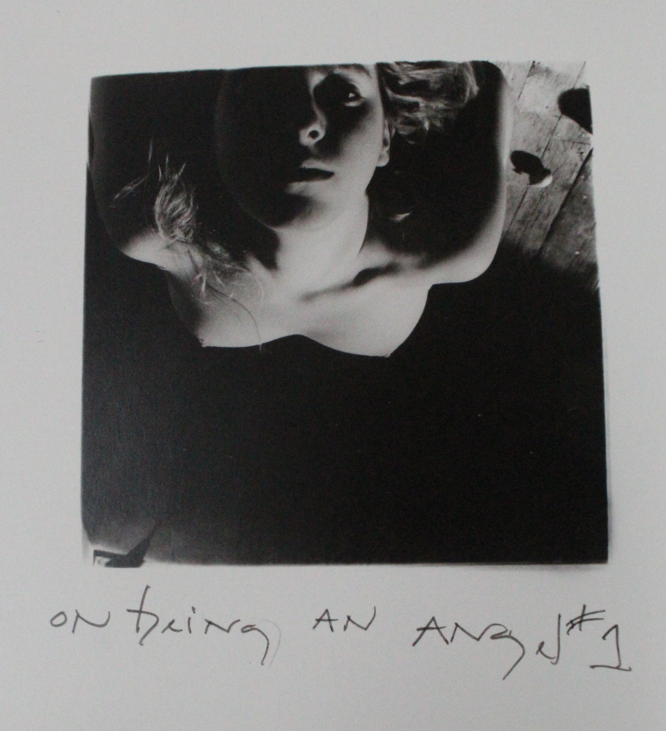
For my own interpretation of observe seek and challenge I am wanting to explore femininity and the photographic gaze, more specifically the male and female gaze. I will gaining inspiration from Nancy honey who presents her work through a documentary and portraiture style through the observation of typical female stereotypes. And also Cindy Sherman who uses her work to explore and embody the vulnerability of females and how her work could be feeding into the male gaze.
The definition of female gazes is “a feminist theory term referring to the gaze of the female spectator, character or director of an artistic work, but more than the gender it is an issue of representing women as subjects having agency. As such all genders can create films with a female gaze.” I chose this topic of the male gaze as it fits in with the exam theme of ‘Observe, Seek & Challenge’ as ‘the gaze’ is a form of seeking, and can be a very personal topic to many people.
For this final project, I would like to present my study in a photo book form. As a result of this, I intend to produce many photoshoots so that I will have a large variety of images that I can pick from. This means that, I would roughly need a minimum of 30 final images to create my book. I have plans to begin my study for this project as soon as possible to allow me the most amount of time to compete it.
Below are some mood boars from my two artist references; Nancy Honey and Cindy Sherman of whom I am gaining inspiration from:
I am planning on going to different places around the island such as abandoned buildings and bunkers left from world war 2 these places that I will be visiting will hopefully turn out good and be good enough for my project.
the places that I will be going to is st peters valley, Bouley bay, gory, north of the island and st catherines and maybe some other places but these are the main areas I will be going to take some photos
I want to take some photos that sort of look like this but put my own twist on it.
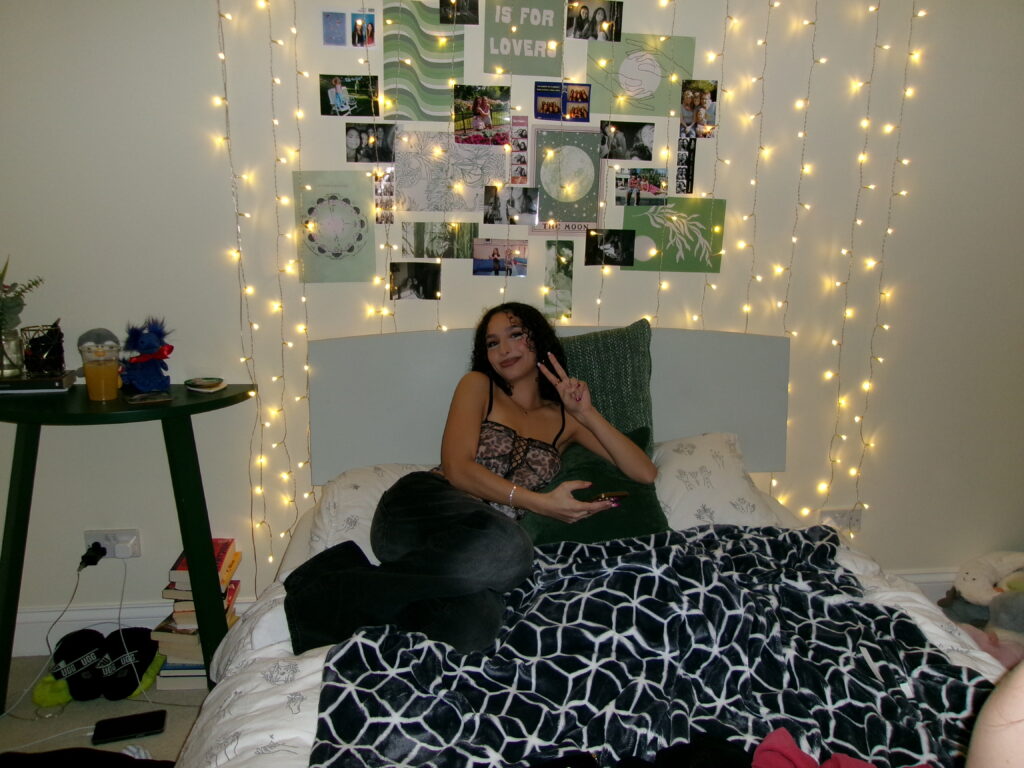
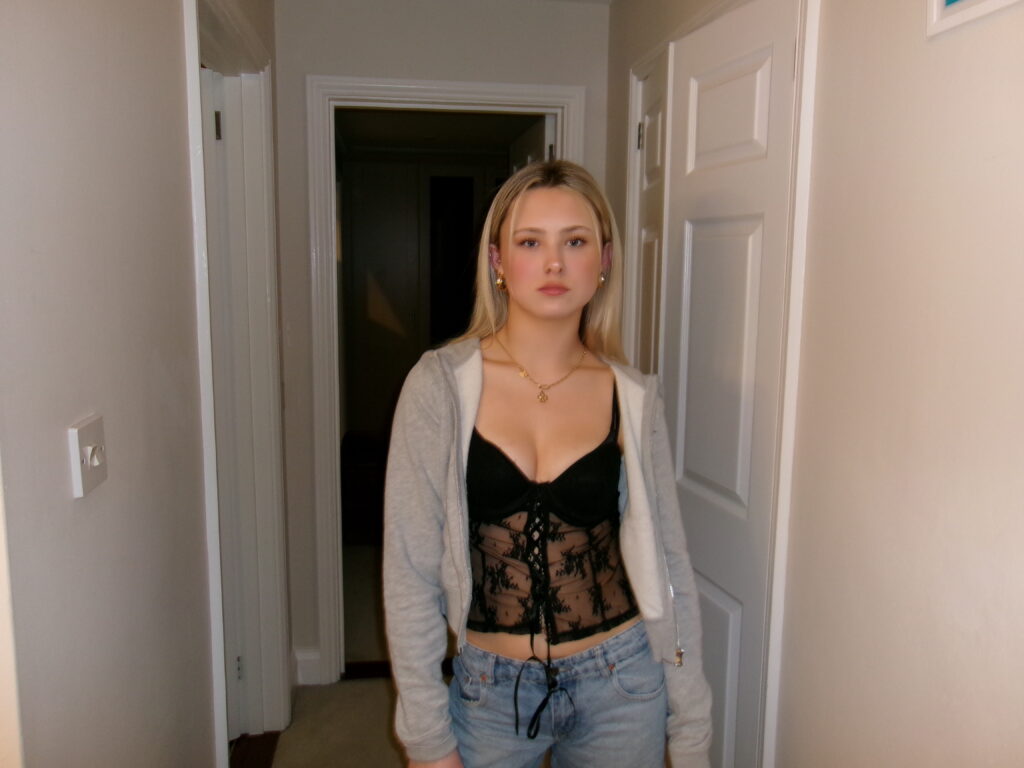
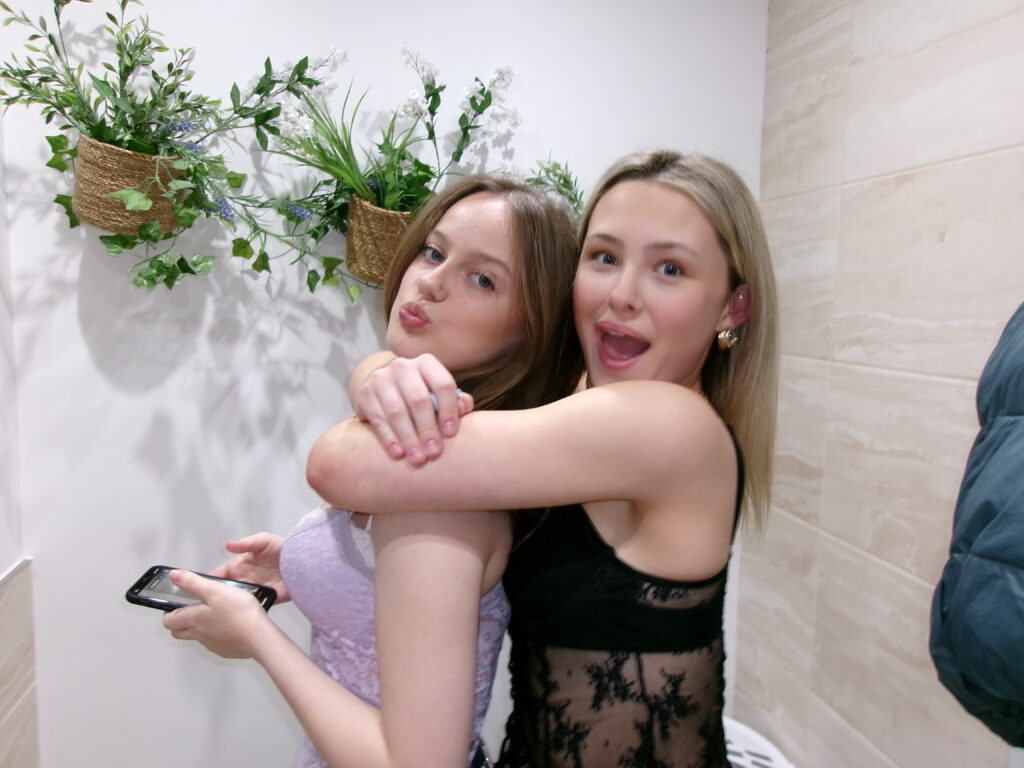
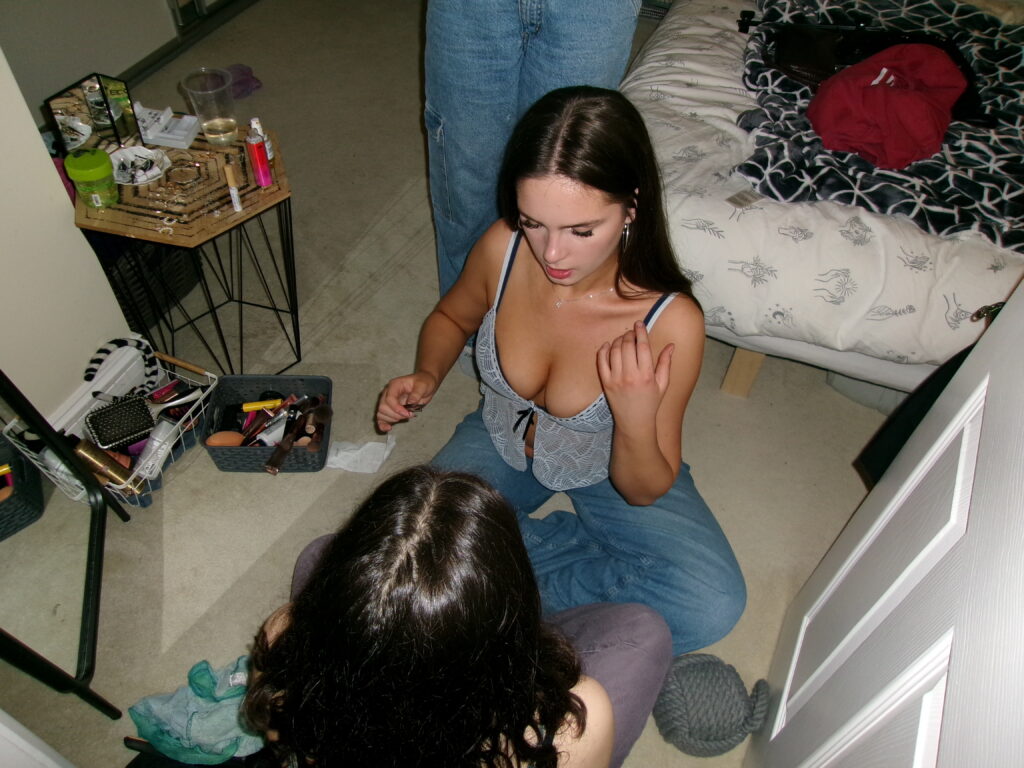
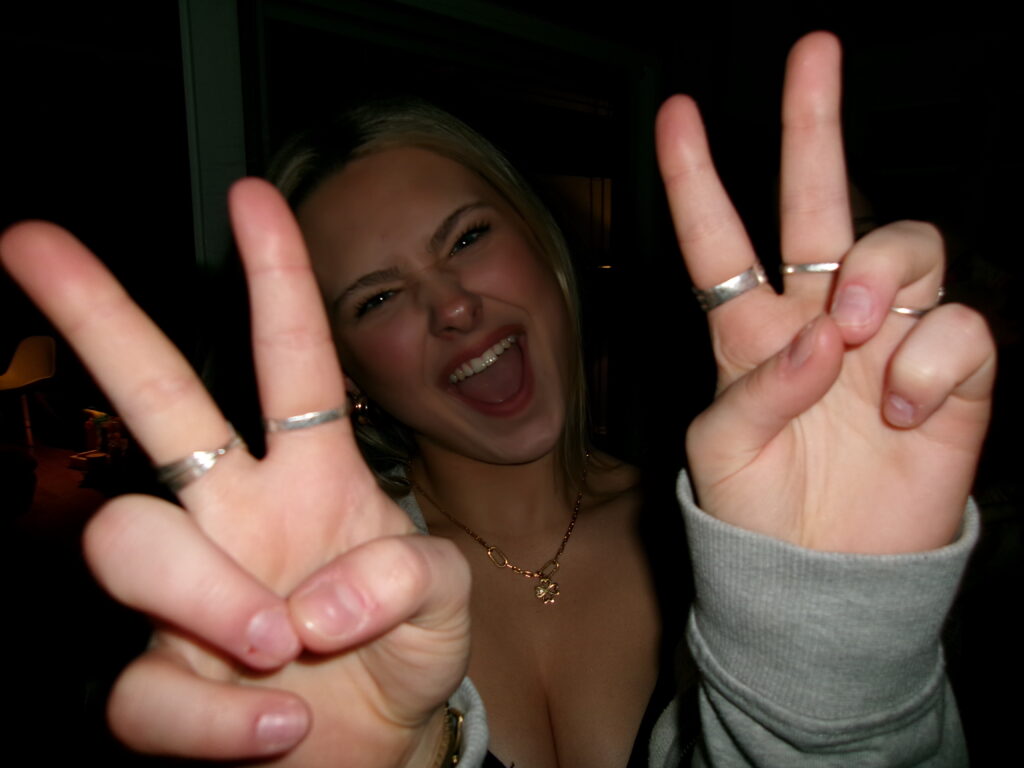
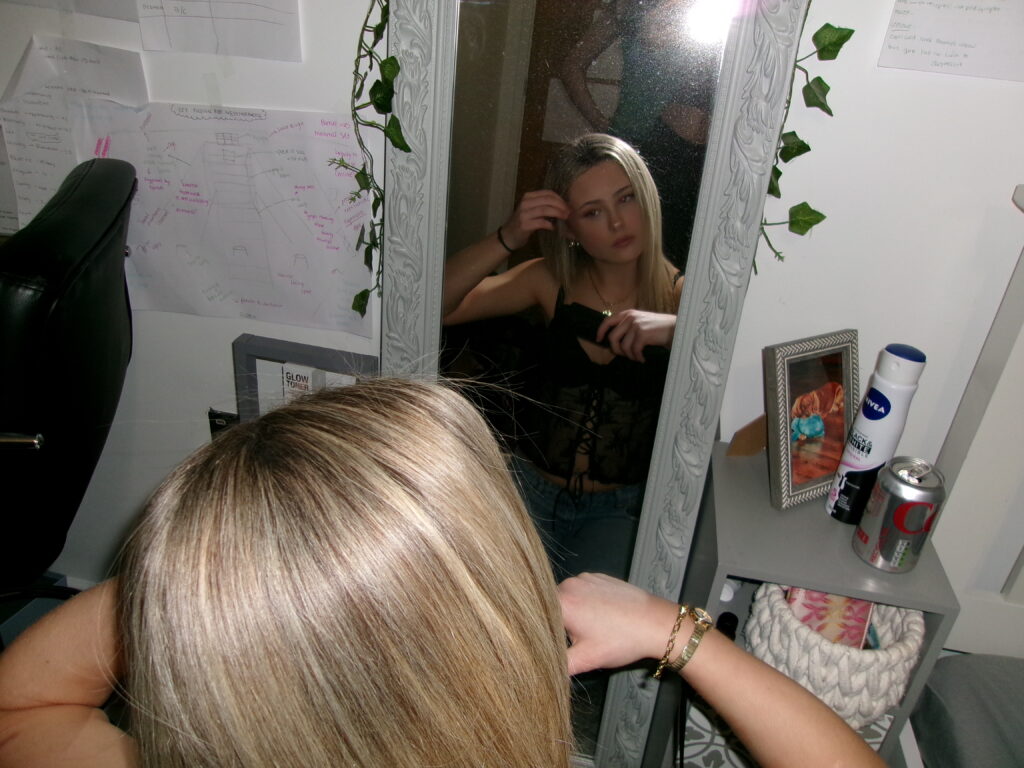
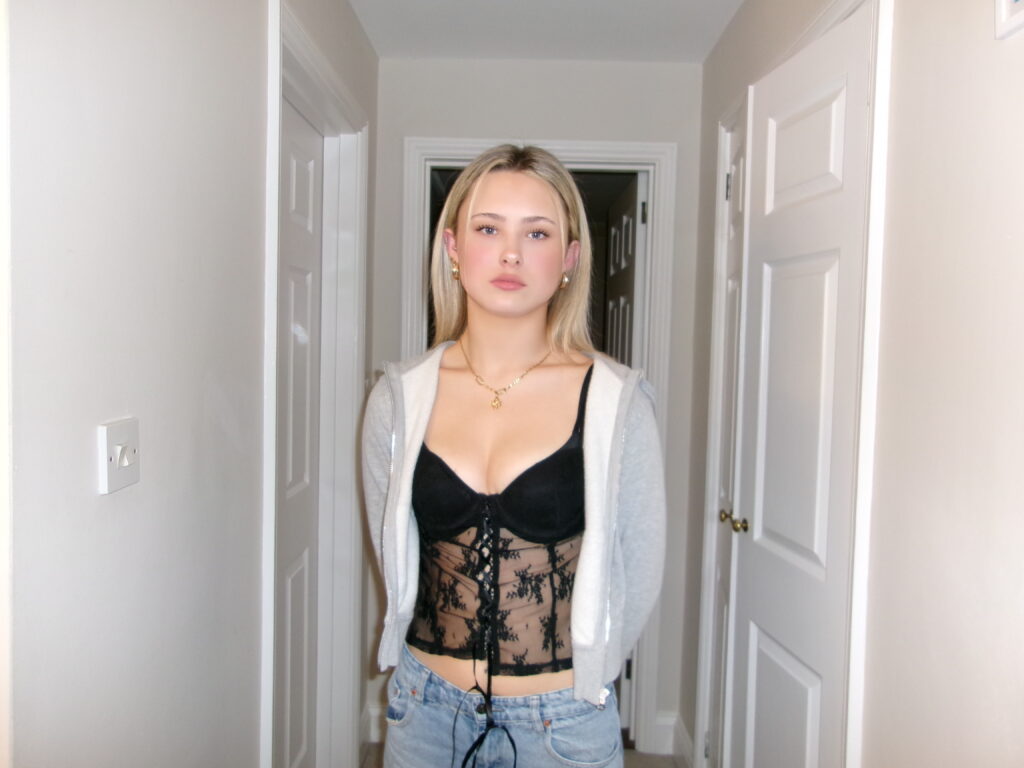
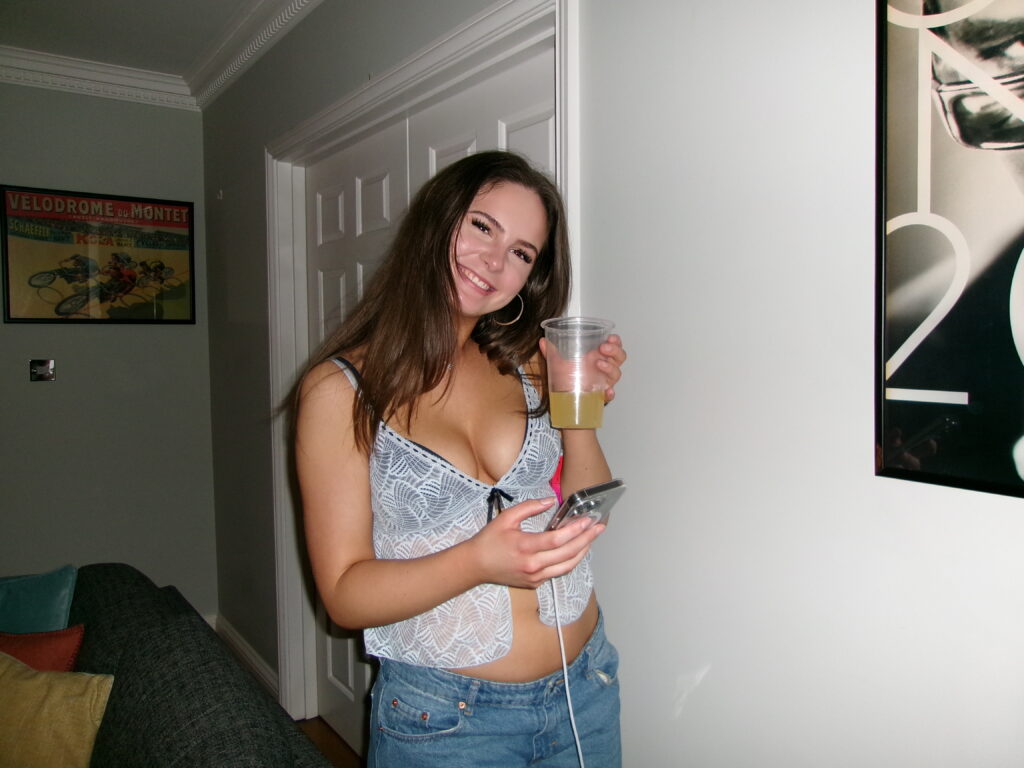
In this photoshoot I intend to portray how girls get ready for a party and how they socialize together. This photoshoot will contain elements from my artist case study; Nancy Honey as well as elements from Justine Kurland. I intend to take portraits of girl getting ready and portraits of girls together exploring this idea of friendship, as well as taking photos of close-ups.
WHERE?
This photoshoot will be taken inside, in bathrooms and in bedrooms, which is significantly where girls hang out and get ready.
LOCATIONS:
HOUSE – INCLUDING BEDROOM, BATHROOM, AND CONSERVATORY.
HOW?
I will be using a Kodak Digital camera in order to take more vintage looking images, which have a slight grain to them. Furthermore I will be using the flash setting to try and re create Honeys images as well as trying to recreate the 2000’s aesthetic.
WHY?
This photoshoot intends to present the idea of girls stereotypically getting ready together and applying makeup; overall having fun. Therefore this photoshoot should be reinforcing the dominant stereotypes in which society views woman.
For this photoshoot I wanted to focus mainly in the kitchen: looking at food, drink, etc. I wanted to try find interesting angles, colours, or shapes to capture and give ordinary things a new look. I first started off looking at different drinks/cups and food/plates before then looking around for other objects in my kitchen. I liked the idea of exploring a range of places and things that we observe each day but take for granted, the small fine details most don’t notice with interesting shapes, colours and textures. I wanted to take in the sounds, sights, and smells of the kitchen, and translate them all into the photo to make them differ from an average photo.
this mood board just shows what words I corelate to observe, challenge and seek I think my project will be more about observing and seeking rather them challenging just because the style of the photos I take they don’t really challenge any stereotypes or governments or anything really.
First I will decide what i will be doing and I will be doing a photobooks because I like the last photo book I made.
Then I will do some case study on photographers that I want to do there sort of style.
I will plan where I am going to take photographs for my photobook.
I will go out and take some photos at the locations I have decided to go to.
I will start the layout of my photo book and start editing my images in the first day of the exam
The second day of the exam I will frame my photos that have been printed and edited on the first day.
Then after that I see what needs improving and what else I need to do in the exam and I will do this by following the exams three words observe, seek and challenge.
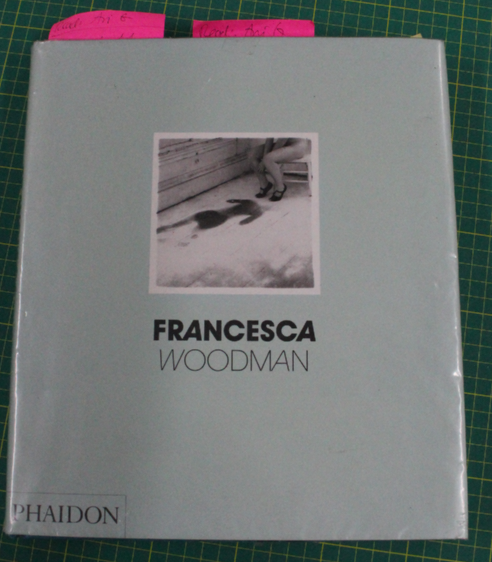
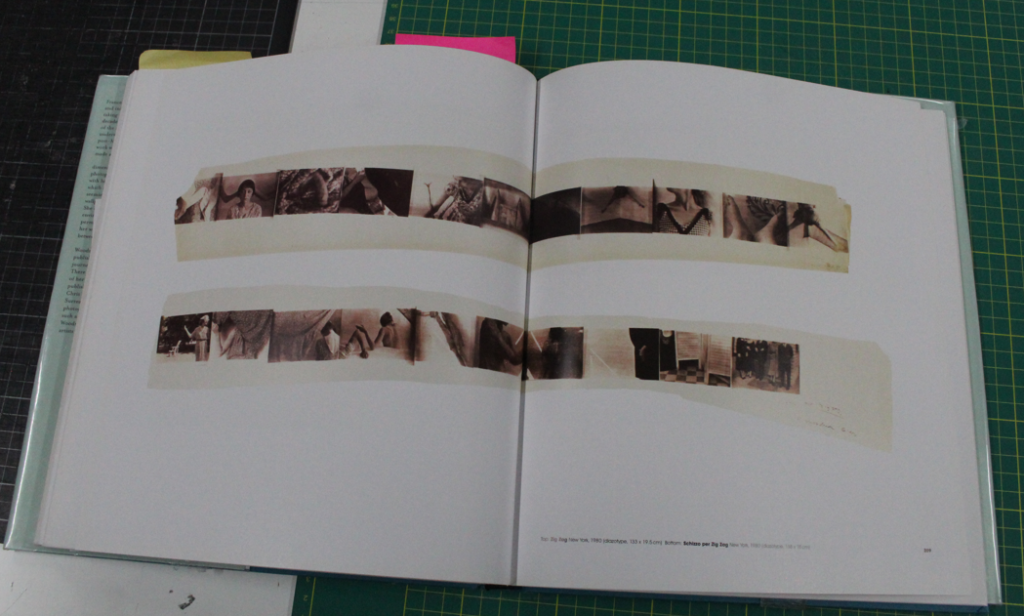
Scattered In Space And Time – Francesca Woodman – Chris Townsend
The Layout
Throughout this book the images are rarely layed out traditionally, the images are in boxes, film strips, polaroid framing etc.
I chose to look at this book as I want to do a similar style for my layout as I think it makes the book more interesting and even offers a vintage feel to the images.
By using boxes and frames around the images you can compile similar/associated images alongside each other making them more powerful and creating a sense of narrative to the pictures.
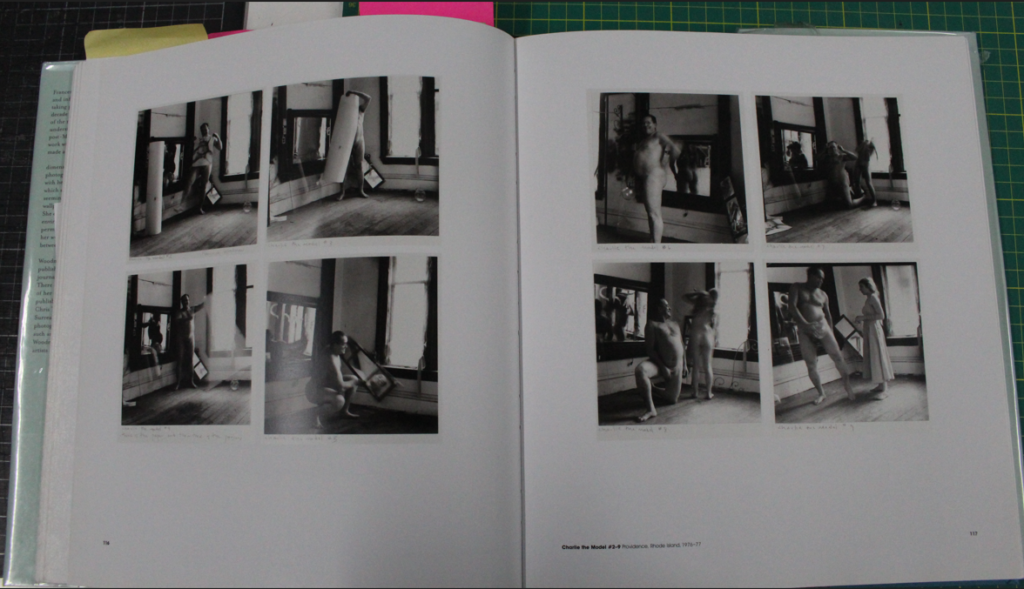
The Images
The images themselves relate to my ideas for my project as the book examines the influences of feminism and surrealism and focuses on the female experience.
My interpretation of the images is that they do in some ways represent female rage, especially internalised, which I found inspiring.
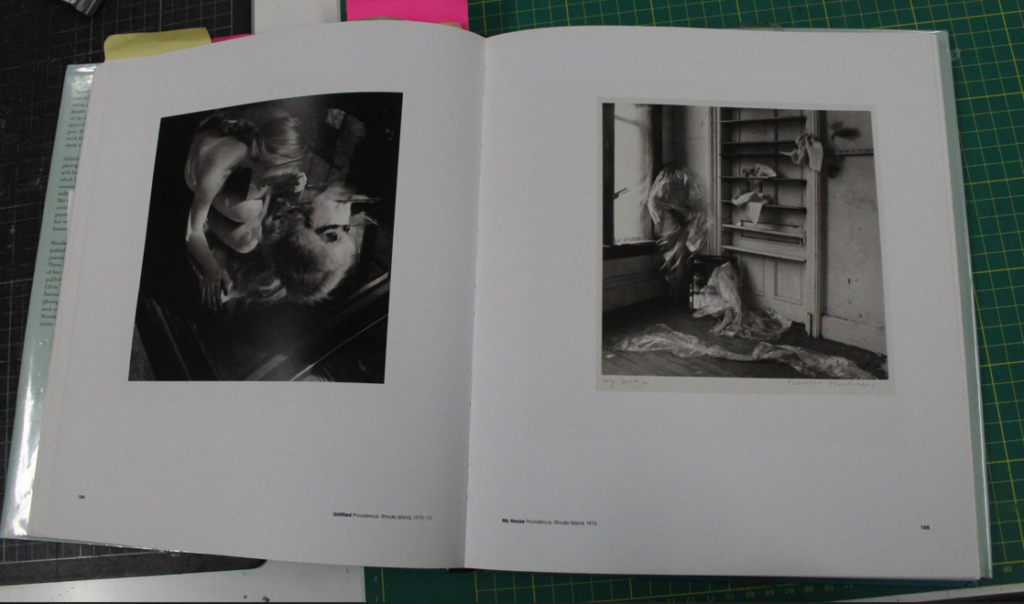
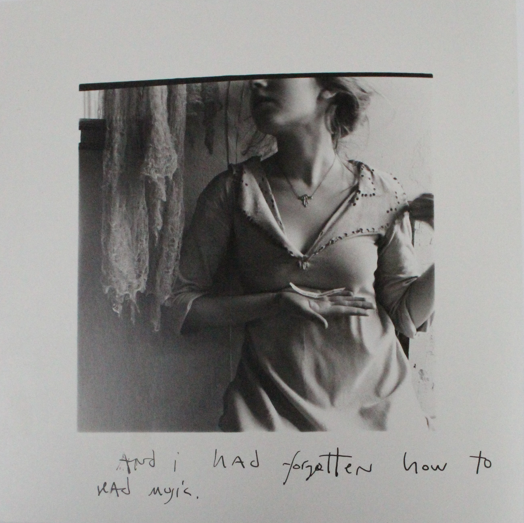
Some of his images also contain writing making the subjects of his images feel more real and giving the viewer a more personal relationship with the photographs. The writing poses to tell their story and give a glimpse of their personalities.
Some of her images are more creative with added elements to create representations. For example, the image above ‘Self portrait, talking to Vince Providence, Rhode Island, 1975-78’ shows a woman trying to speak or possibly shout and there’s something stopping her/covering her mouth. To me this represents her inability to be able to express her opinions and emotions potentially due to discrimination such as sexism or other struggles that hold women back. This image inspired me as it represents similar struggles to what I want my images to illustrate, portraying the ways in which women are scrutinised and put under pressure to be seen as delicate and unproblematic in order to appeal to societies expectations.
Female rage has been expressed as an ancestral and inherited response to the struggles, oppressions, and wrongdoings that women have been subjected to. It has also been referred to as being a compilation of the anger that our ancestors were unable to express, that is passed down through generations. It is a very abstract idea and a concept of a specific generational trauma. It is unknown as to whether women are born with this rage or it is developed due to exposure however, feminine rage appears to be prevalent for the majority of women.
Historically, female anger is pathologized as hysteria or madness and can be portrayed as silent and unnerving as well as loud and chaotic. I am planning to explore the many different portrayals of female rage and how it can be portrayed as other emotions such as sadness or even a smile, and how it can be expressed through unhealthy habits.
Women are psychologically conditioned to internalize anger, put on a smile and pretend everything is always okay in order to live up to the stereotype that we are quiet and delicate beings. Studies published in Psychological Science and Science Daily, as well as many other organizations, show that male anger is appreciated and respected. In contrast, female anger reduces a woman’s status and puts her capabilities into question. Angry women are often seen or portrayed as overdramatic or irrational with their anger boiled down to two-dimensional stereotypes like the crazy ex-girlfriend, feminazi or the angry Black woman, just to name a few.
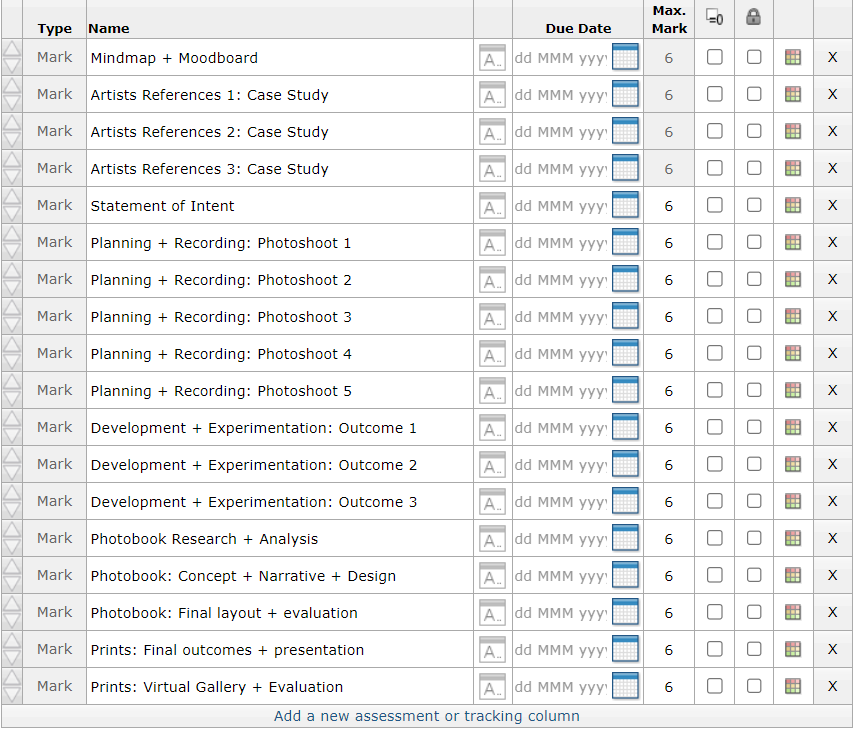
Use this simplified list to check that you are on task. Every item on the list represents one piece of work = one blog post. It is your responsibility as an A-level student to make sure that you complete and publish appropriate blog posts each week.
Examination dates: 15 hrs controlled test over 3 days Group 13A: 22. 25 & 26 April Group 13B: 23, 29 & 30 April
The Theme: ‘OBSERVE, SEEK, CHALLENGE’
Each week you are required to make a photographic response (still-images and/or moving image) that relates to the research and work that you explored in that week. Sustained investigations means taking a lot of time and effort to produce the best you can possibly do – reviewing, modifying and refining your idea and taking more pictures to build up a strong body of work with a clear sense of purpose and direction
SPRING TERM
WEEK 1: 19-25 Feb 1. RESEARCH 1: Mind-map and mood-board
WEEK 2: 26 Feb-3 March 1. RESEARCH 2: Case studies > Artists References (at least two) < overview > context > analysis > meaning
WEEK 3: 4-10 March 1. Statement of Intent 2. PLANNING: 3 photo-shoots > ideas > intentions > response to artists studies
Week 4+5: 11-24 March – Study Leave 1. EDITING: Photoshoot 1 2. EXPERIMENTING: Develop images in postproduction using creative processes > techniques > manipulation relevant to your intention 3. EVALUATING: Photoshoot 1 and experimentation > reflect > review responses > compare with artists references 4.HOMEWORK: RECORDING > Photo-shoot 1+2 > camera handling > composition > lighting Deadline: Mon 25 March – first day back in school
MOCK EXAM: Mon 25 March 5 hours controlled test Rules: You will have access to the blog to produce blog posts, BUT no access to the internet. No use of mobile phones. No talking to each other or ask teachers for help.
Work to be done: EDIT IMAGES: Using either Lightroom/ Photoshop produce blog posts with clear evidence of image selection, adjustments and experimentation. PRESENTATION OF IMAGES: Imagine working towards a final outcome and also produce mock-ups in Photoshop showing how you wish to present your images, ie. singles/ diptych/ triptychs/ grids in window mounts or on foamboard with or without borders. VIRTUAL GALLERY: Select images from our folder below of empty gallery walls/ spaces and create a virtual display of your images using Photoshop to resize images to fit using templates here: M:\Radio\Departments\Photography\Students\Image Transfer\EXAM 2024\Gallery mock-ups MOUNTING FINAL PRINTS: Present final prints from your Personal Study project on foamboard/ window mounts and put in your coursework folder. Make sure it has a label and velcro on the back. You may want to take make sure that you produced evidence on the blog of how you planned to present your final prints.
Week 6-8: 25 March – 14 April – Easter Break 1. EDITING: Photoshoot 1+2 2. EXPERIMENTING: Develop images in postproduction using creative processes > techniques > manipulation relevant to your intention 3. EVALUATING: Photoshoot 1+2 and experimentation < reflect > review responses > compare with artists references
Week 9: 15-21 April 1. EDITING: Photoshoots 3-5 from Easter 2. EXPERIMENTING: Develop images in postproduction using creative processes > techniques > manipulation relevant to your intention 3. EVALUATING: Photoshoots and experimentation > reflect > review responses > compare with artists references 4. PHOTOBOOK: Begin design and layout of photobook in LR 5. FILM: Begin editing process in Premiere/ Audition 6. PRINTS: Select images and save in print folder here (ready for Day 1: 22 & 23 April of the exam)
Week 8: 22-30 April – EXAM Group 13A: 22, 25 & 26 April Group 13B: 23, 29 & 30 April
Rules: No use of mobile phones. No talking to each other or ask teachers for help.
You will have access to the blog to produce blog posts, BUT no access to the internet.
The blog will only be available for you to access during exam times each day between 09:00 – 15:20. In other words, you will not be able to make any changes/ improve work outside of exam times.
It essential therefore, that you have done must of the preparatory work – research/ artist case studies/ photo-shoots/ evidence of creativity, development and experimentation of images – before the exam period begins on day 1.
Work to be done 1. PRINTS: Final selection of images in print folder above (ready by end of Day 1 22 & 23 April of the Exam) 2. PRESENTATION: Complete mounting all final prints 3. VIRTUAL GALLERY: Present final images using templates here: M:\Radio\Departments\Photography\Students\Image Transfer\EXAM 2024\Gallery mock-ups 3. PHOTOBOOK: Complete design and evaluate 4. BLOG: Review and complete all supporting blogposts 5. FOLDER: Label all final outcomes and put in Exam folder 6. SIGN: Student authentication form
Follow the 10 Step Process and create multiple blog posts for each unit to ensure you tackle all Assessment Objectives thoroughly :
Mood-board, definition and introduction (AO1)
Mind-map of ideas (AO1)
Artist References / Case Studies (must include image analysis) (AO1)
Photo-shoot Action Plan (AO3)
Multiple Photoshoots + contact sheets (AO3)
Image Selection, sub selection, review and refine ideas (AO2)
Compare and contrast your work to your artist reference(AO1)
Evaluation and Critique (AO1+AO4)
PREPARE AND SAVE IMAGES FOR PRINTING:
Add your images to the print folder here…
File Handling and printing...
Remember when EXPORTING from Lightroom you must adjust the file size to 1000 pixels on the Short edge for “blog-friendly” images (JPEGS)
BUT…for editing and printing when EXPORTING from Lightroom you must adjust the file size to Short edge for “high resolution” images (JPEGS) like this…
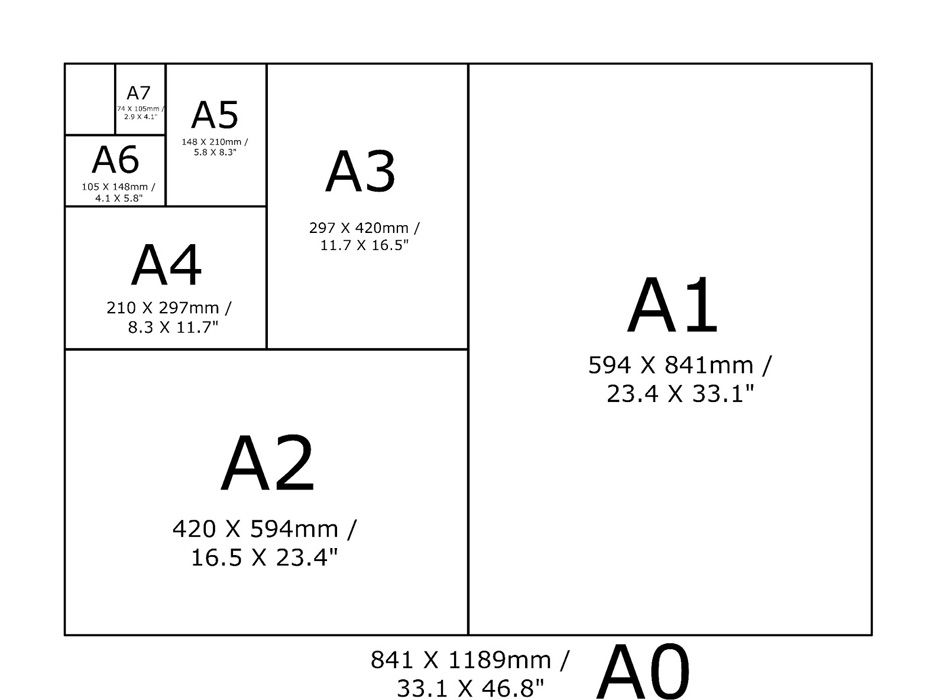
A5 Short Edge = 14.8 cm
A4 Short Edge = 21.0 cm
A3 Short Edge =29.7 cm
This will ensure you have the correct ASPECT RATIO
Ensure you label and save your file in you M :Drive and then copy across to the PRINT FOLDER / IMAGE TRANSFER
For a combination of images, or square format images you use the ADOBE PHOTOSHOP > NEW DOCUMENT + PRINT PRESETS on to help arrange images on the correct size page (A3, A4, A5)
You can do this using Photoshop, Set up the page sizes as templates and import images into each template, then you can see for themselves how well they fit… but remember to add an extra 6mm for bleed (3mm on each side of the page) to the original templates. i.e. A4 = 297mm x 210 but the template size for this would be 303mm x 216mm.
Oliver Chanarin photographed his partner Fionna bargess during the lockdown period during the outbreak of Covid-19. The aim of these photographs was to express the uneasy tranquillity of this period.
However, there were many critics of his work that described his images as a basic. They see his images as invasive in his way of showing a young woman’s body being inspected and scrutinized from a range of close-up and intimate angles.
In these images her body is being inspected by the cameras , which unforgivingly presents every detail. Pores, wrinkles, dimples, hairs, every aspect of her body became visible. Critics describe how this very descriptiveness portrays the project as very male, and how it was created to appeal to the male gaze by showing a sexualised and excessive portrayal of the female body.
One viewer said the images ‘speak of the power the man with the camera has, a power the model appears to be willing to submit to.’
Other work:
He also photographed Helen Abelen in the image titled ‘painter’s wife’:
The title, ‘Painter’s Wife’, presents Abelen not as her own person but rather as the property and an accessory to her husband. However, many believed this to be problematic and offensive as the feminist movements didn’t appreciate the way women were being identified through their husbands.